This was a Friday, often an odd day, sometimes a long day because
I don't like to leave things half-done over the weekend. But the
power usage constraints that we've been asked to comply with
forced me to close up early -- intending to get back to finish up
after supper. But Marie had other plans for our evening, so I
didn't get the drawer box lumber planed all the way to finished
thickness. I'll need that lumber first thing Monday morning, we
were away all day on Saturday, so I took a couple of hours Sunday
afternoon to finish that step. Normally this is forbidden, but
under these circumstances...
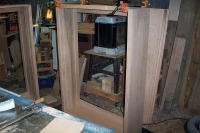
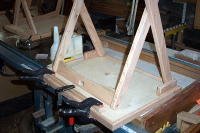
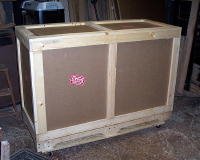
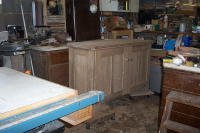
So, "today" I installed the large drawer guides and permanently
assembled the larger pedestal.
Then I took a little time to put away the tools and clean up the
shop before roughing out the poplar lumber for drawer boxes and
planning it to 1/2" thickness.
Two of the drawers are almost 10" deep, requiring w-i-d-e boards,
so surface planning them was a slow process; take too much off in
a pass and the wide shavings choke the planer's dust collection
hood. But, I got it done.
Now we're ready for Monday.
We are coming up on a step that is difficult to do by remote...
fitting the opening in the cabinet top to the machine to be used
in it. In the past, the lift used in these cabinets had two
positions: 'up' and 'down'. In the UP position, the shelf the
machine rides on comes up to seal the opening in the cabinet top,
regardless of it's size. Then we found a professional version
that offers a mid-way position -- they call it the "free-arm"
position, but I believe that to be a misnomer. This would be the
typical working height when using the sewing machine in normal
mode. To use the free arm (if your machine has one) you'd want
to raise it to the full height.
When Marie was a professional seamstress, they had commercial
sewing cabinets that were designed to accommodate most any
standard sewing machine. The biggest aggravation she had with
them was that the large gap left around the machine (being a
generic cabinet) allowed her rulers, scissors, and what have you
to fall through. It would have been nice to have the opening
more precisely fitted to each machine to reduce the time spent
retrieving her tools.
So that's what I've been discussing with Paula. She has measured
the case on her machine as 14.5" by 6.125". I would like to keep
the opening as snug as possible; maybe 1/4" gap all around, but
worry that if the machine should shift at all, it may get clunked
by the cabinet top as it rises into working position.
With a narrow gap, there is no room for cleats around the base of
the machine, so perhaps I could route out a pocket in the lift
shelf -- 1/4" deep or so -- that would serve to hold the machine
in position. But then a non-skid pad may be all that is
required, and would be less laborious.
Still pondering that one. I have a little time to do so because
I must first get the drawers built and the doors mounted. And
make and mount the feet. But I like to know where I'm going
before I get there.
Thanks for looking in. See you again Monday.
Doug
_____
avast! Antivirus <http://www.avast.com> : Outbound message clean.
Virus Database (VPS): 0631-3, 08/04/2006
Tested on: 8/7/2006 6:21:42 AM
avast! - copyright (c) 1988-2006 ALWIL Software.
 So, I spent the day removing all the hardware, shooting lacquer, and reassembling the entire desk. There were a couple of tense moments, but nothing I couldn’t (with God’s help) figure out a way to get it to work out.


