Today I'll cut the backer panels for Jeffrey's tables and finish gluing up Shelly's half-panels.
I start by cutting a half-sheet of birch, cabinet grade plywood to rough size on the table saw. First I rip the panel into two pieces 1/4" wider than the finished pieces will be. The cut-off strip from the remaining edge goes in my scrap plywood cart: I use small pieces in making jigs and fixtures.
Then I mount the big sled on the saw and cut the two strips to rough length. Now I go back and trim all the panels to finished width, but leave them at rough length. We'll cut them to length later.
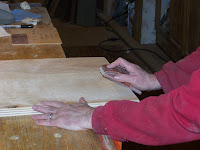
I use a sanding block with 100 grit paper to knock the fuzzy bits off of the edges. I do this not to pretty it up as no one will see it, but to prevent those fuzzy bit from getting between the parts and making them fit too tight in the slot - or not fit at all. It's much easier to sand them off now than after the panel assembly is together and problems develop.
The next step is to apply glue to the backer panel and the ribbon panel - but just down the center - and join them together. I center the ribbon panel on the backer: there should be a 1/16" difference in width on each side between backer and ribbon panel. This provides expansion room for the solid wood ribbon panel. I use clamps and weight to press the panels together while the glue dries hard.
The final step is to cut these assemblies to finished length, sand everything smooth, and pre-finish the edges of the ribbon panel so slivers of raw rood do not show if the panel shrinks up after assembly.
Now, on to making the rail stock.


No comments:
Post a Comment
Appropriate comments are welcome. All comments are reviewed before being posted. Spam messages (anything not a direct discussion of this message) and all profanity will be deleted. Don't waste your time or mine by posting trash here.