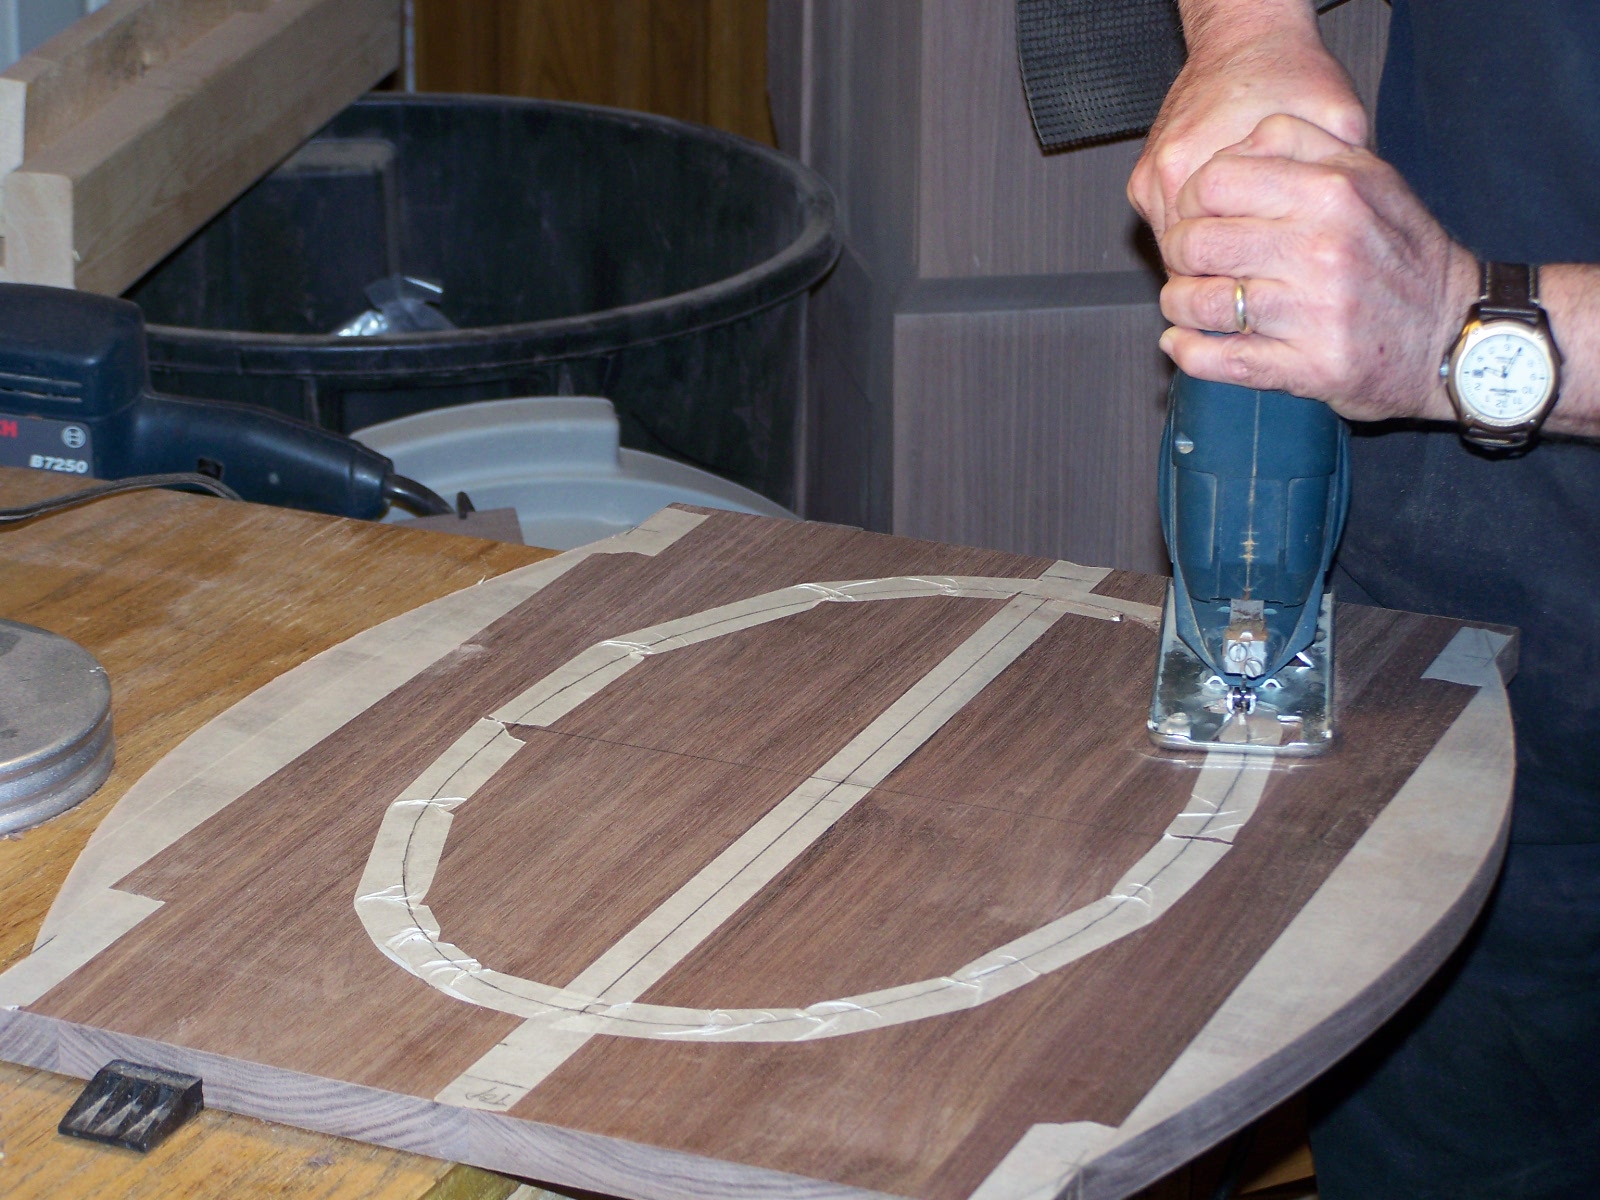
In this step I’m making the front door for the head case, behind which the clock works will reside.

I start by surface planning the two halves I made last time to near finished thickeness: about 1/16” over. Then I joint the two halves where they will join together, glue and clamp them.

When the glue is set up I scrape off the glue pips and use the wide drum sander to smooth the panel and bring it to finished thickness. This is my door blank, a little oversize, but ready to be made into a door. So now I trim it down to finished size and square it up.

The door will have wings that reflect the shape of the elliptical window in the door, so I lay out those wings using a drawing bow, a simple, old fashioned, shop made tool using a flexible strip of wood, a strong string and a block of hardboard that slides along the string; slide it toward the center to make a sharper curve, toward the end for a gentler curve, friction from the string as it winds through the block keeps the shape locked in.

After tracing the shape onto the board I cut it out on the bandsaw using a fairly fine toothed blade and following the line carefully; I’ll want minimal wood needing to be sanded away when I’m done.

Because this one has to be done by hand, and removing hardwoods with sandpaper is laborious and tedious – two of my least favorite "ious's".

Next I lay out the ellipse for the window using a simple geometric method employing a thin stick of wood with marks that correspond to half the length of each axis of the ellipse, walk these two marks along the two axes and make dots at the end of the stick then connect the dots.

With the shape drawn I drill a starter hole and cut out the window with a saber saw. Again I work slowly and stay close to the line. This time I will use a drum sander chucked into the drill press to smooth and fair the cut, but the less wood I have to remove this way the better. If I were making a lot of these, I’d make a template and use a router with a piloted bit. But I’m not, this is a one-of-a-kind piece.

Finally I lay-out and drill pilot holes for hinge mounting screws and test the fit. I have a teeny bit of tweaking to do to be sure it clears the top plate when I install it but otherwise it’s good. It’s pretty plain right now, but it fits right. I’ll do the edge decoration and preparation for glass in the next step.
 I’ll start the day by trimming the parts blanks I made yesterday to finished length. To be sure the ends are square, I’ll cut a bit off each end, but where the two side pieces meet at the top I shave off just a little so the grain pattern is disturbed as little as possible, that way the grain will flow up up one side and down the other.
 I set up the chop saw to cut the 45 degree miters at the apex corners. To set the stop block I get it close, then schooch it in a hair at a time until the point of the miter is right at the edge of the board, don’t want to remove any length of the board.
 To make the 22-1/2 degree cuts I set up the table saw with the blade set at 67-1/2 degrees (90 degrees minus 22-1/2 degrees) mount the rip fence on the wrong side of the blade and attach my shop made tenoning jig to the fence backwards. Stand each board in the jig, make sure it’s sitting flat on the table saw top, clamp it in position and carefully make the cut.
 A little masking tape allows me to test fit the first case. If adjustments are needed, it’s best to figure that out before all the parts are cut. No adjustments were needed.
 Next I cut the little rabbet in the inside-back edge of each piece where the plywood back panel will sit. I do this by setting the blade ¼” high and set the fence so the OUTSIDE edge of the blade teeth are ¼” from the face of the saw. One pass with the board face down, flip it up on edge and run it again to complete the rabbet.
I also cut a groove on each inside face that the glass will slide into.
Next I cut the little rabbet in the inside-back edge of each piece where the plywood back panel will sit. I do this by setting the blade ¼” high and set the fence so the OUTSIDE edge of the blade teeth are ¼” from the face of the saw. One pass with the board face down, flip it up on edge and run it again to complete the rabbet.
I also cut a groove on each inside face that the glass will slide into.
 After sanding the inside faces, I’m ready to glue up the cases. I start by applying glue to the miters, being careful to stay back from the inside edges; glue squeeze-out in those tight corners would be a bear to clean up. Then I attach the three pieces of the case together with strips of masking tape…
 …set the assembly up on edge and wind it around into a triangle. Another strip of tape at the final corner holds it in shape while I clamp the corners together with – more masking tape! Yes, masking tape. If the joints are cut well, it doesn’t take much pressure to hold the joints together while the glue sets, so I apply some pressure with one hand, and stretch a piece of tape across the joint with the other. Do this on both edges of each joint and it’s done.
 I stack the completed cases and let the glue dry for a while.
 While I wait for the glue to set up a bit I mill out the small pieces needed for the feet and the filler strips that hold the glass in once installed. That doesn’t take nearly as long as the glue does, so I go find something else to fiddle with for a while.
  Once the glue has tacked up, I set up the router table with a ¼” up-cut end mill bit and set the fence so the ¼” wide groove will be centered over the 1/8” groove cut from the inside of the case. This slot will house the filler strip that holds the glass securely in place.
And that pretty much uses up this day. Tomorrow I’ll do some decorative routing and make the little bits. See you then!
Once the glue has tacked up, I set up the router table with a ¼” up-cut end mill bit and set the fence so the ¼” wide groove will be centered over the 1/8” groove cut from the inside of the case. This slot will house the filler strip that holds the glass securely in place.
And that pretty much uses up this day. Tomorrow I’ll do some decorative routing and make the little bits. See you then!