Friday, October 28

Final parts making was the order of the day - and it was a long day today because it's raining out and I was stuck inside anyway.
 I started by sanding both sides of the panels.  The plywood backer did not get as much attention as the oak side, but it did get sanded smooth.  The oak side got sanded to the finish stage.
After sanding I took the panels into the finishing room and shot the edges with lacquer.  There are two reasons for doing this.  One concerns the fact that the solid wood ribbon panel will expand and contract with changes in the humidity.  It's been raining yesterday and today, so it will be expanded. Finishing the long grain edges insures that after assembly if the panel contracts (and it will) an unfinished stripe of wood will not emerge from the groove in the tray rail.  That would be unsightly.  The other reason for finishing the corners is to help prevent glue from bonding the corners of the ribbon panel to the corners of the rails.
While the lacquer dries I sand and begin assembly of the stand.  I'll continue working on this any time I've got down time in building the trays.


 To cut the tray rails I install a jig that serves as a backer to prevent tearing out the back side of the rail stock as I cut the miter joints and it is calibrated with the exact length each rail needs to be for a perfect fit. As long as I got the tray panels the right size there should be no tedious paring away at over length rails to sneak up on a proper fit,
 The rails are cut from long strips of stock and each piece is cut sequentially so the grain in the wood wraps around the corners in a most wonderful way.  I hold the corners together with masking tape and check for a precise fit at all corners and to the panel.
 Once I'm satisfied with the fit I take each rail piece loose so I can apply just the right amount of glue to just the right places and slip the rail back into place.  The tape helps hold everything in place as I work.
 When all the pieces are glued I apply clamps to firmly hols the pieces in place.  I'll leave these in place overnight to allow the glue to achieve maximum hold before I work with them further.

In the mean time I finish assembling the stand.
 I also shape and assemble the latch blocks.  These parts will hold the tray table legs in teh open position while the tables are in use.  I should probably try to patent these, they're really quite clever.
One last chore before the girls and I head home for some Chinese food and a schlocky Sci-Fi movie (our standard Friday evening fare) is to make up a mess of plugs that will be glued in over the recessed screws to hide them.  I use scraps from the table to the color matches well.

And that's going to do it for the day and the week.  next week I'll do the final assembly by jointing the trays to the bases, plug the screw holes and do the finish sanding.  Then all that's left to do is to apply the finish and they'll be ready to box up so they can ship out as soon as they're purchased.

Thursday, October 27

Completing the tray panels will be my primary task for today.  I start by removing the clamps and the tape that held the panels together during the gluing and clamping process.
Then I use the surface planer to smooth both faces of the panels, removing any glue ridges that may have snuck past my damp rag yesterday and bringing the panel to the finished thickness of 1/4".
Then I cut the backer panels I need from a chunk of Baltic birch plywood.  This material is solid birch, no voids and is expensive stuff made for use in furniture and high end cabinets. 

At this point I cut the panels to finished width and rough length.  You'll see why in just a bit.

Then I center the ribbon panels on the backer panels and glue the two together.  The backers are needed as a stable surface to which to glue the tray rails.  The ribbon panels, being solid wood, will expand and contract a little across their width, making them a poor foundation for the rails. This assembly leaves just a scosh of expansion room inside the rail assembly yet allows me to glue the rails solidly to the backer.

While the glue on those tries I make the parts blanks I'll need for the tray stand, pieces.  Rail stock has already been milled, I'll cut it to length later.
I apply masking tape to the walnut where I will need to make pencil lines so they are easy to see.  The templates give the the shape and the centers for the various holes I'll need to bore to make the stand.

I cut out the curves on the band saw and finish them off on the big belt sander.
When the glue in the tray panels assemblies is dry I mount the big crosscut sled and trim the panels to finished length by trimming both ends so they are square and the ribbon panel is exactly flush with the backer panels.  The ribbons will not expand along their length, so I want the ends flush for maximum strength.

I also got the stand parts made and the sub-assemblies put together.  I'll let the glue dry overnight because I 'm out of time for today.  Time to pack up and head for home: Marie will be arriving soon with a truck-load of groceries and I'll need to help carry then in the house. Tomorrow I should complete assembly of the tables and possibly the stand as well.  All that will be left then will be the finish sanding and applying the finish.

I'm running a little behind on the scheduled completion time because I was sick as a dog for a week, but even with that I'm only a couple of days late now.  And we are no longer promising delivery dates, because we are no longer doing custom work.

See you tomorrow!

Wednesday, October 26

Making ribbon panels will occupy most of today's woodworking time, but first I assemble the table bases by attaching the spreaders I made yesterday to the leg pair sub-assemblies made earlier.  This is done with screws alone - no glue as I may have to take them apart and adjust the width.  I won't know that until I get the trays done.


I prepped some parts blanks previously, I pull those out now and slice the boards into 5/16" thick ribbon strips.  I am careful to keep the strips in order as I cut them off so the grain pattern flows effortlessly across the panel when I'm done.
I make the panels by laying the ribbon strips down flat and arranging them for the most pleasing look possible.  Once they are edge-glued into a panel all the seams will disappear and the panel will look like a single wide piece of wood.

Sometimes I like to include a special feature as a center stripe in the panel, but i do this only if I can get the grain to match up - no sudden pattern changes allowed.  I cut more than enough strips to make the two panels and will make up as many panels as I can.  The extra will get set aside for next time.
I use a square to even up one end of the panel then use three strips of wide masking tape to bind the strips together into a panel.  this then can be sort of "rolled up" and put on a special gluing fixture I made that opens up one joint for gluing then supports the glued section keeping those joints closed up.

When all the joints are glued I move the panel over to a set of clamps.  As I apply pressure I check to be sure the strips are aligned well: I only have 1/16" of wood I can remove in the smoothing process, so it has to be pretty close to perfect before I start.

These panels will be allowed to sit in their clamps overnight to achieve maximum glue hold before I work with them further.

The rest of the afternoon will be spent roughing out stand parts.  Then I'm off to help Marie with a brush-pile burning project as part of our fall clean-up process.  It's supposed to rain again tomorrow, so this needs to be done today.  Burning a wet brush pile does not work so well!

Tuesday, October 25

Today I made the spreaders, the part that holds the legs in position and prevents side-to-side wobble.
I started by selecting rough cut lumber for the parts blanks.   I can use pieces that were set aside from other projects as long as I can cut around any defects.  I do prefer to be able to get both the upper and lower spreader from the same board so the color matches.  I'll also make some extras as a hedge against mishaps.  If not needed they'll go on the parts rack to be used another time.

The lumber is jointed, and surface planed to smooth and flatten it then bring it to finished thickness.
The final step is to trim the parts to finished width and length.  Now I use my template (above) to lay out the curved edges and the latch block hole on the upper spreaders.
I rough-cut the curves using the bandsaw. I'll leave 3/32 or so of wood outside the line and I don't have to be especially finicky about cutting a smooth curve.  On this step I'm just removing the bulk of the waste wood.

I slip the parts blank back into the template/jig and use a piloted flush trim bit in the router table to finish the curves.  The bit rides along the curved edge of the template and trims the part to the exact same shape.
Next I bore the latch block slot - an oval made by boring overlapping holes using a Forstner bit; about the only tool that will drill overlapping holes.  Any minor nubbins that are left will be sanded out later.

The router table is next, where I round-over the long edges and the tab-slot.
Then I fit the drill press with a right angle fixture to hold the spreaders vertical so I can drill pilot holes that will mate up with the counter-bored screw holes I drilled in the legs previously.
The rest of the afternoon is spent sanding the parts smooth.  I use a pair of sanding blocks on the flat faces and a piece of folded sandpaper for the rounded over edges and slots.  It's tedious work, and I bounce a light off the surfaces regularly to be sure I've sanded out all the ripples left by the planer and jointer.  It's much easier to do this now than after the bases are assembled.

By the end of my woodworking time I have the four spreaders I'll need for this two table set all done and ready to be assembled to the leg pairs to make the table bases.  I'll get to that tomorrow.  Right now I need to get the tractor out, hook up the wagon and haul a load of firewood up to the house; we're expecting colder weather this weekend and I want to have wood laid in ahead of time.

See you tomorrow!

Friday, October 21

Today we make legs. 

The process starts by rough cutting the lumber to approximate size, jointing and surface planing it smooth and trimming to finished size. Then I  use my leg templates to lay out the six pilot holes and 5 counter bores and 1 countersink that will allow me to use screws to assemble the table bases.  I bore these holes with a drill press.

Then I sand.

After that I pre-finish the insides of the scissor joint where the legs pivot and the pivot point at the top of each outside leg that attaches to a mounting block.  I use washers to prevent the wood of the legs from rubbing heavily together and assemble the joints with wood screws.  Most of the screws will be hidden under wooden plugs once I'm certain everything fits properly.

By day's end I have four leg-pairs made up and ready to go - enough for the two tables we need.  These are the first sub-assembly of the table bases. 

Why aren't I making up enough for a dozen tables?  Mostly because that  would delay production of the set that we've promised by the end of the month.  I'll do a run of tables later, after I got the things that I was foolish enough to promise by a certain date done.  I'm not supposed to be doing that anymore, but old habits die hard.

Our shop is closed on weekends, Mondays are Radio Program day so check back with us on Tuesday.

See you then!

Thursday, October 20

I was reminded today that there is an order for a pair of tray tables in line ahead of the oversized stopper rack, so, even though I'm already in stopper rack mode, I need to put all this stuff away and drag out the tray table stuff.
But first, I boxed up the three stopper racks and stuck them in the store room, this way when an order comes in all I have to do is run a label and out they go.

We bought flats of boxes sized to fit these racks so I would not have to be forever scrounging for boxes the right size.  They also look nicer.

Packing, on the other hand is whatever I have on hand, mostly what I've saved from incoming packages when I order supplies.  I appreciate the corn starch "foam peanuts" because a little water (like rain) will cause them to instantly melt away to nothing, unlike Styrofoam which hangs around for a bazillion years.  I also save recyclable plastic air pillows for filling larger voids and shredded paper.

Once that's done I clean up a bit, put away the stopper rack templates and supplies and get out the tray table templates, jigs and fixtures.  I also find that I have some parts left over from the last run, so I start off with a leg up on the process.

Now I need to decide what parts I will need to make and select lumber for them.  Then I'll start the milling process by prepping the lumber.

Wednesday, October 19

Wednesday Oct. 19, 2011

Today I'll be shooting lacquer, so I begin the day by assembling and filling the HVLP spray gun I use with semi-gloss lacquer and setting up the finishing room.  I have a 3 foot diameter spinning table that helps quite a lot in finishing multiple items like this.  Lacquer is deadly stuff... wait... let me rephrase that: lacquer THINNER is deadly stuff.  The lacquer itself is quite harmless once all the thinner that makes it a sprayable liquid has evaporated out of it.  But the thinner itself is another matter - it is a carcinogen that can be absorbed right through your skin as well as inhaled.  If inhaled it inhibits brain function and kills off brain cells - wearing gloves and a respirator with an organic vapor cartridge is required while working with the stuff.  I also set up a fan to pull contaminated air out and open a second window to allow fresh ait to be drawn in by the fan.  This helps keep the rest of the shop free of the lacquer stink that will cause nausea and headache if I breathe the fumes.

The racks will get three full coats and a fourth coat on the shelves.  I'll scuff sand the racks with a very fine sanding sponge after the second coat just to smooth the finish.

Once they're done I'll let them sit over night.  I do this not so much to let the finish dry: it dries quickly, but to let them air out a bit before sealing them up into boxes and placing them on the shelf ready to ship out to some lucky people.

Once these are boxed and stored away I'll clean up the shop a bit and start in on our next project; a special stopper rack that is 5 tiers high and seven spots wide for a total of 35 stoppers displayed.  Why didn't I build that along with these?  Because this is so atypical that it doesn't really flow in with the steps it took to make these 3 tier racks.  this is a re-creation of a custom job we did for the fella a couple of years ago.  Technically we're not doing custom work any more, but he is a past customer, and he begged.  OK, no he didn't, I'm just an old softie.  Gonna have to lose that habit.

Tuesday, October 18

Tuesday Oct. 18th

Did I say I'd be back on Monday?  I'm sorry I meant Tuesday.  Although technically I was here Monday but as I have mentioned before, Mondays are Radio Program day.

Today I need to pin the three racks I've been building.  This time I'll pin the shelves with walnut dowels.

Last time I placed masking tape tabs on the shelves and used a pencil and Incra ruler to lay out the pin locations.  Then I used a snapper to punch the pin hole centers.  I've set up the drill press with a twist drill the right size for my dowels and have set the depth so it will drill through the shelf and 1/4" into the rack body.  I'll drill the holes in all the lower shelves, adjust the drill press table to drill the middle shelves and drill all of those, reset it again for the top shelves and finally drill the back band.
I have hope I did my lay-out correctly because the rear pin holes are very close to the edge of the next shelf.  If I was off by just a a little the drill will crew a divot out of the front of the shelf, and that means more time and effort invested into sanding that out and re shaping the shelf edge.  Since we don't have time to spare, I try not to use it up in foolish ways.
Next I apply glue to a pair of holes and drive dowels in until they bottom out.  You can tell when they bottom because the sound they make as you hit them with the mallet changes from a woody 'ping' to a deep, solid thud. 

Once they've bottomed I use a flush cut saw to trill off the dowels, glue another pair of holes and drive them in again.

Between each driving I sand a small champher on the end of the dowels to help them go into the holes smoothly.
After removing the masking tape it's time to sand the pins flush and smooth.  I use sanding blocks for this, one equipped with 100 grit paper. for fairing the stump (it only protrudes by the thickness of the masking tape, but this is enough to get a good smooth surface after sanding) and 150 for the finish sanding.

When this is done I'll blow the dist out and set them aside.  Tomorrow I'll load the HVLP gun with lacquer and spend the day finishing.  I' not looking forward to that.  Lacquer always makes me sick to my stomach (my beard prevents the respirator form sealing up as completely as it should) and I'm still feeling puny from being sick last week.  But, at least i do have a dedicated finishing room.  I can go in there to shoot the lacquer then while it dries I'll retreat to another part of the shop and work on something else between shooting sessions. 

Saturday, October 15

Saturday October 15

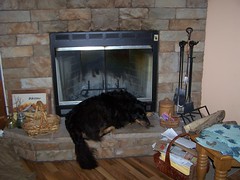
I’ve been sick as a dog this week, in fact on Wednesday I even had a sick dog to commiserate with; Zadie got into some bad road-kill or something and spend the day laying near the fireplace.  Occasionally she’d lift her head and look bleary eyed at me laying on the sofa as if to say, “Are you still alive?”  I’d nod and she’d lay her head back down and go back to sleep.  By evening, Zadie as her usual exuberant self again, my malady is taking a little longer. 

I am doing better though and hope to be back in the shop on Monday.

Friday, October 7

Friday October 7th

My woodworking time today was spent hand sanding the shelves for the 3-Tier stopper racks then gluing and clamping them to the rack bodies.  Sanding takes a bit of time because of the gentle round-overs on the shelf edges and the holes.  As I sand each shelf I glue and clamp it to the rack body.  By the time the second rack is done I can remove the clamps from the first rack and use them on the third. I can keep this rotation going for as long as needed.

Once the glue dried and I could remove the clamps I took the racks back to the work room, affixed tabs of masking tape and laid out the peg holes in the shelves using my small Incra ruler and a thin lead mechanical pencil.  When all the shelves are laid out I'll use the drill press to bore holes for the walnut dowels that will be my shelf pegs.

Positioning these holes is fairly important to insure that the hole does not bust through the wood of the side pieces.  Even just getting too close to the side will allow glue to weep through the wood when I drive in the dowel - and that makes a mess when it comes time to finish the wood.

This session is about used up, so I'll let the glue set up overnight and bore holes next time.  See you then!

Thursday, October 6

Thursday, October 6th

My woodworking time today was spent pegging the 3-tier bottle stopper rack bodies that I've built.

First I lay on a strip of masking tape.  This gives me something to write on to lay out the hole locations, protects the wood from glue and offers a teeny bit of "stump" on the pegs when I use a flush-cut saw to cut the dowel off so I can sand them flush with the rack body.
I bore the holes with a drill press, drilling through the side piece and into the base plate so the pegs will serve as a fastener as well as decoration.

These pegs are maple to match the shelves.  Pegs I install through the maple shelves will be walnut to match the rack body.

Now we're ready to install shelves.

Wednesday, October 5

Wednesday Oct 5th

I'm back to making bottle stopper racks today - and gardening - and dealing with the produce.  I'll have bodies for 4 3-Tier racks when I'm done, but only have shelves made up for 3 racks.  The extra body will get set aside and saved for the next run.

Following this I'll make a 2 custom rack: one a stopper rack that holds 35 stoppers the other an enlargement of a memorial candle rack we built some years ago.  That big monster on the assembly table behind the stopper racks is the old one - they want one twice that size!

Then I'll get started on some tray tables.

Tuesday, October 4

Old Timey Days entrance & signs

I spent last week building a n entryway arch and 10 large sign boards for the Old Timey Days section of the county's annual Harvest Street Festival.  It had been raining on and off, so it was necessary to build them inside the shop.  The entryway proved to be just a bit snug!  It's 15 feet long and 8' high.

We used wood from a 60 year old barn that was recently torn down, most of it is red oak, but I encountered some white oak, poplar and even maple as I cut the boards into parts.
Somehow it did not seem nearly as massive once it was set-up on the street downtown.  Still, we received many great compliments on our rustic entryway.  The Tourism Department Director and volunteers did the decorating.  Pretty nice huh?

Once the event was over, the entryway breaks down into four parts (two fence panels, two uprights) and the branch/arch with the removal of just 8 screws.  This makes it easy to take down and store away until needed again, and just as easy to put up again next time.