Saturday, January 29

Stopper Racks - DONE!

Sorry, no photos today.

I completed the lacquering of the three bottle stopper racks.  When that was dry I attached the "feet", packaged them and processed the shipments with FedEx.  They are scheduled to pick up all three shipments here on Monday.  All are listed as being two day deliveries. So, Donna, Daniel and David, you should have your racks by Wednesday.

Thanks!

What We’re Building:

Utility Trailer Make-Over for David B. - In Progress, sort of
4 Tray Tables, all walnut (custom size) with stand for Shelly - Building Jigs
Kitchen organizer - Marie B.- Producing Design
4 TV Tray Tables and stand in maple for Jeffrey P.
Computer Desk for Laptop for Marie B.
Printer Cabinet for Marie B.

Thursday, January 27

Bottle Stopper Racks – Pegging

My task for today is to get the wooden pegs installed in the three stopper racks I’ve been building.  The first step is to put pieces of masking tape on the locations where I will be laying out the peg holes.  This reduces the amount of sanding that will be needed later to get the pencil marks off, but mostly it makes the pencil marks show up well on the walnut bases that are standard.

With the holes laid out I take the racks to the drill press and bore holes through the shelves into the side pieces.  After putting glue in the holes a short piece of dowel is pounded into the hole until the sound changes, indicating that it has hit bottom.  Then I use a flush cut saw to remove the excess dowel.  A flush cut saw has no “set” to the teeth so it can cut next to the shelf surface and not chew it up.  These pegs now help reinforce the rack’s structural integrity as well as adding a decorative touch.

When all the pegs are in for the first rack (Donna’s all red oak 3-tier) I sand it again to smooth the plug ends and take it into the finishing room for the first coat of lacquer.  Then I peg David K’s 4 tier Cherry & Maple rack, and finally Daniel’s 3-tier standard (walnut & maple) rack. This is the order in which these folks placed their orders.

With a little luck all three racks will be ready for pick-up by FedEx on Monday.

What We’re Building:

Utility Trailer Make-Over for David B. - In Progress, sort of
4 Tray Tables, all walnut (custom size) with stand for Shelly - Building Jigs
3-Tier Bottle Stopper Rack, all red oak for Donna – In Progress
4-Tier Bottle Stopper Rack cherry & maple for David K. – In Progress
3-Tier Bottle Stopper Rack (Standard) for Dan G.- In Progress
Kitchen organizer - Marie B.- Producing Design
4 TV Tray Tables and stand in maple for Jeffrey P.
Computer Desk for Laptop for Marie B.
Printer Cabinet for Marie B.

Wednesday, January 26

Bottle Stopper Racks – Shelves

Today I will make and attach the shelves to the bodies I built yesterday. I start by sorting the shelf parts. I made extra blanks that I will tuck away for use on other racks, so I can sort though them and pick those that match up best and group them into sets for each of the bases.

I determine orientation (which face to go up which edge is front) and bundle the shelf blanks into sets of 4 using masking tape. I use my template to mark the bundles for center points of each stopper hole and radius on the front corners.

The I set up the drill press with a Forstner bit, stop fence and bottom board. The fence insures the holes all line up properly and keeps the bundle from whirling around and smashing my fingers should the bit catch or I lose my grip. The bottom board allows me to bore all the way through the bundle without tearing up my bit on the cast iron table. Both of these are just pieces of scrap wood.

With the holes bored, I remove the tape to separate the shelves – keeping them sorted into bundles. Then I set up the router table with a round-over bit which I will use to ease the edges of the holes and the ends and front of the shelves.

Now it’s time to sand everything: outsides of the bodies, both sides of the shelves and the retainer bar that goes in the back. I do all of this by hand with sanding blocks.

When the sanding is done I take all the parts into the assembly room and glue and clamp them together. I’ll let these set up overnight for maximum strength before I go on to the final step. We’ll get to that tomorrow.

See you then!

What We’re Building:


Utility Trailer Make-Over for David B. - In Progress, sort of
4 Tray Tables, all walnut (custom size) with stand for Shelly - Building Jigs
3-Tier Bottle Stopper Rack, all red oak for Donna – In Progress
4-Tier Bottle Stopper Rack cherry & maple for David K. – In Progress
3-Tier Bottle Stopper Rack (Standard) for Dan G.- In Progress
Kitchen organizer - Marie B.- Producing Design
4 TV Tray Tables and stand in maple for Jeffrey P.
Computer Desk for Laptop for Marie B.
Printer Cabinet for Marie B.

Monday, January 24

Bottle Stopper Racks – Making Parts

I’m sorry I didn’t get around to posting updates on this new project last week.  I’ll get you caught up now.

I’m building all three of the bottle stopper racks at once to take advantage of the efficiencies that can be had by making multiple parts at once. I should be building a few extras for on-hand stock, but that would slow the process down too much and these folks have been patient with me so far.

I start by getting out my template set and checking to be sure I have the materials and tools I’ll need on hand.  Then I mill all the material to rough dimensions by jointing one face and edge, surface planning the opposite face and ripping the blank to width by cutting away the remaining rough edge.

I resaw some 4/4 blanks to create thin stock for the shelves.  Because these have been jointed and planed I only need to surface the inner faces to remove the band saw marks and they are done.

Next I glue up the body blanks.  I like to cut the side and base from one piece of lumber so the grain pattern flows continuously down one side, across the base and up the other side.  I’m not sure that many people even notice this detail, but I do.  When the glue is set I surface plane the blank to finished thickness.
And sand them to 120 grit on the big, wide drum sander.

Then it’s time to cut the body blank into pieces. First I cut the blank to finished width in the table saw and true-up the ends of the blank.  Then set up a saddle block on the back-side of the rip fence and use that to set the length to be cut off to become the side pieces.  Then I use the miter gauge’s flip stop to trim any excess length from the base piece.

All my basic parts are available now.

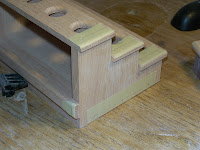
The first fancy step is to strap the two ends of each rack together with masking tape – making sure I keep track of which face will be inside and which way is up – lay out the grid on both side and remove the waste on the bandsaw to form the stair-step shape of the rack sides.

Now I sand the *inside* faces only of the rack bases, the rack sides, and the baffle plates.  When done all these parts go into the assembly room.

Where I carefully apply glue, align all the parts and clamp them together until the glue sets up hard.  This is trickier that you might think when doing it by myself; I have (on this rack) 6 pieces to hold in perfect alignment as I insert the pieces and apply the clamps.  It takes a little while because I have to keep checking to be sure nothing moved.

That gets you caught up on this project.  Another few days and these should be ready to box and ship.

See you next time!


What We’re Building:

Utility Trailer Make-Over for David B. - In Progress, sort of
4 Tray Tables, all walnut (custom size) with stand for Shelly - Building Jigs
3-Tier Bottle Stopper Rack, all red oak for Donna – In Progress
4-Tier Bottle Stopper Rack cherry & maple for David K. – In Progress
3-Tier Bottle Stopper Rack (Standard) for Dan G.- In Progress
Kitchen organizer - Marie B.- Producing Design
4 TV Tray Tables and stand in maple for Jeffrey P.
Computer Desk for Laptop for Marie B.
Printer Cabinet for Marie B.
Sunday, January 16

Steamer Trunk - DONE!

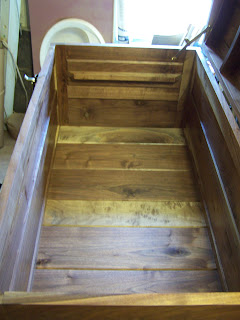
David’s walnut steamer trunk is complete and ready to go.  I hope you enjoy these shots.


The photos above were shot using the flash on the camera instead of setting up floodlights
so the color came out a bit light, but the detail is good.  The actual color of the trunk
is more that of the shot below - taken without flash.  The color is right but
the detail is all muddled up and hard to see.


What We’re Building:

Utility Trailer Make-Over for David B. - In Progress, sort of
4 Tray Tables, all walnut (custom size) with stand for Shelly
3-Tier Bottle Stopper Rack, all red oak for Donna
4-Tier Bottle Stopper Rack cherry & maple for David K.
3-Tier Bottle Stopper Rack (Standard) for Dan G.
Kitchen organizer - Marie B.- Producing Design
4 TV Tray Tables and stand in maple for Jeffrey P.
Computer Desk for Laptop for Marie B.
Printer Cabinet for Marie B.

Friday, January 14

Walnut Trunk – Lacquering

Today I lacquered David’s trunk, in between…
Fixing Mom’s computer

Trying to fix Mom’s car.

Fixing Tim’s sled

Repairing the log splitter

Using the newly repaired
log splitter to split firewood.

As well as all the usual writing and business stuff I’m doing these days.

Sheese, what a day!  But it's over now.  Heading home for supper.

What We’re Building:

Walnut Steamer Trunk for David B. – Almost Done
Utility Trailer Make-Over for David B. - In Progress, sort of
4 Tray Tables, all walnut (custom size) with stand for Shelly
3-Tier Bottle Stopper Rack, all red oak for Donna
4-Tier Bottle Stopper Rack cherry & maple for David K.
3-Tier Bottle Stopper Rack (Standard) for Dan G.
Kitchen organizer - Marie B.- Producing Design
4 TV Tray Tables and stand in maple for Jeffrey P.
Computer Desk for Laptop for Marie B.
Printer Cabinet for Marie B.

Wednesday, January 12

Walnut Trunk – Hinges & Latches

I spent my woodworking time today installing the rest of the hardware; hinges, latches, the lock and the strap handle bales.  This involved laying out the locations, punching for the screw holes, drilling pilot holes and installing the screws to hold the hardware in place.

Then testing to be sure everything works as it should.  It does.  Now that all the hardware is attached, the next step is to strip it all off again.

But I’ll stop here for today, Marie is due home any moment with a load of groceries to be carted inside, see you next time!

What We’re Building:

Walnut Steamer Trunk for David B. – In Progress
Utility Trailer Make-Over for David B. - In Progress, sort of
4 Tray Tables, all walnut (custom size) with stand for Shelly
3-Tier Bottle Stopper Rack, all red oak for Donna
4-Tier Bottle Stopper Rack cherry & maple for David K.
3-Tier Bottle Stopper Rack (Standard) for Dan G.
Kitchen organizer - Marie B.- Producing Design
4 TV Tray Tables and stand in maple for Jeffrey P.
Computer Desk for Laptop for Marie B.
Printer Cabinet for Marie B.

Tuesday, January 11

Walnut Trunk – Knuckles

The first step for this afternoon is to sand the grid work of both the box and the lid with 100 an 120 grit papers. I use a random orbit sander for this because we have grain running in two directions and trying to do this with a sanding block will leave cross-grain scratches where I try to get up close to the joints.

Before I can mount the corner knuckles I need to glue in some square filler pieces on the bottom of the trunk. Nothing fancy here, just a pad that will help support the leaf of the knuckle and share the weight of the trunk.

The knuckles are make for a square cornered trunk, mounting them as they are would leave large gaps. I’ve seen plenty of trunks done this way and always figured that the points sticking out were a snag hazard, I want to do a little neater job.

So I use a wood faced vice to hold one leaf the knuckle while I “stretch” it out a little to match the slope on the lid of the trunk.

Then I press the knuckles in place, mark screw hole locations with a punch, drill pilot holes for the screws and attach the knuckles with screws.

The knuckles for the box need no stretching so they go on more quickly.

I’ll stop there for today, see you next time!

What We’re Building:

Walnut Steamer Trunk for David B. – In Progress
Utility Trailer Make-Over for David B. - In Progress, sort of
4 Tray Tables, all walnut (custom size) with stand for Shelly
3-Tier Bottle Stopper Rack, all red oak for Donna
4-Tier Bottle Stopper Rack cherry & maple for David K.
3-Tier Bottle Stopper Rack (Standard) for Dan G.
Kitchen organizer - Marie B.- Producing Design
4 TV Tray Tables and stand in maple for Jeffrey P.
Computer Desk for Laptop for Marie B.
Printer Cabinet for Marie B.

Friday, January 7

Walnut Trunk – Banding

Today I Installed the banding pieces in the trunk.  These are short, decorative pieces that fit between the long rails to form a gridwork.  Before I do that I sand the recessed panels with sanding blocks.  I go through all but the final finish grade of sandpaper.  It’s much easier to sand these now while they are open full length than they will be when the banding breaks them up into a grid.

I previously milled out several long strips and surfaced them down to the proper thickness to match the height of the rails above the flat panels.  I very carefully square up one end of a strip, lay it in place and carefully mark where it needs to be cut, taking this dimension directly from the trunk rather than trying to measure.

I’ll cut it just a hair long on the miter saw, then sneak up on a perfect fit.  The goal here is to get a fit that is snug, but not so tight that it must be forced in.  If I force it, the pieces will deflect the outer rails and could make fitting the lid difficult.

I sand the edges of the strips before installing them, but not the faces.

I fit all the pieces for one side at a time.  When all are ready I glue the banding pieces to the panel.  If the fit is not quite tight enough to hold the banding down against the panel with friction, I can apply a little extra pressure with a clamp until the glue sets up.

I’ll let the glue set up before I work with these again.- just to make sure I don’t cause any to pop off because the glue wasn’t hard enough to stand power sanding. 

That’s it for today, I’ll see you next time!

What We’re Building:

Walnut Steamer Trunk for David B. – In Progress
Utility Trailer Make-Over for David B. - In Progress, sort of
4 Tray Tables, all walnut (custom size) with stand for Shelly
3-Tier Bottle Stopper Rack, all red oak for Donna
4-Tier Bottle Stopper Rack cherry & maple for David K.
3-Tier Bottle Stopper Rack (Standard) for Dan G.
Kitchen organizer - Marie B.- Producing Design
4 TV Tray Tables and stand in maple for Jeffrey P.
Computer Desk for Laptop for Marie B.
Printer Cabinet for Marie B.

Walnut Trunk – Tray Completion

After removing the clamps and inspecting my glue-up job I take the tray back out to the tool room and do the construction sanding on the outside of the tray’s surfaces.  The insides were completely sanded prior to assembly.  Construction sanding means I use 100 grit and 120 grit papers to remove and glue ridges, even  up any discrepancies at the corners and complete the shaping where the rounded over upper edges of the ends meet the side pieces.  Then I sand away any pencil marks or milling marks (the tiny ripples that can be left by the surface planer and jointer) to produce smooth even surfaces.  When that’s done I move on to finish sanding the entire exterior with 150 grit and 180 grit papers.

When the sanding is completed, I brush the loose sanding dust out, vacuum it, then use a tack rag to get what dust was left behind.  Now it’s ready for lacquering.  Into the finishing room I go, assemble and set up the HVLP sprayer and fill it with semi-gloss lacquer.  I’ll shoot two complete coats, allowing them to dry between, then scuff sand the entire tray to smooth the surface and shoot one final coat.

This tray gets no hardware mounted to it, so it is done and will be set aside while I complete the rest of the trunk.  That won’t be long now!


Thanks for looking in, I’ll see you next time!

What We’re Building:

Walnut Steamer Trunk for David B. – In Progress
Kitchen organizer - Marie B.- Producing Design
Utility Trailer Make-Over for David B. - In Progress, sort of
4 Tray Tables, all walnut (custom size) with stand for Shelly
3-Tier Bottle Stopper Rack, all red oak for Donna
4-Tier Bottle Stopper Rack cherry & maple for David K.
3-Tier Bottle Stopper Rack (Standard) for Dan G.
Computer Desk for Laptop for Marie B.
Printer Cabinet for Marie B.
4 TV Tray Tables and stand in maple for Jeffrey P.

Wednesday, January 5

Walnut Trunk – Tray Construction

My first task today was to rip the tray blank to width on the table saw, then install the big cut-off sled and cut the panel to length. One end was even and squared up as well as I could, but this end had all the random lengths sticking out. The cut-off will make good firewood this evening while we watch a movie together.

The second task was to put away the sled and install my tall fence on the table saw. This will help me cut the little rabbets on the underside of the tray panel. I use a piece of that cut-off scrap to set it up and tune in the cut for a perfect fit, then run all four edges of the tray panel through.

Care must be taken to keep the panel edge sitting on the table saw top; if it lifts a lump will result that will mean that the side or end piece will not fit. I also use feather boards to help insure that the panel stays pushed back against the tall fence. If it creeps out a little, the panel edge will be too thin and gaps will result.
When this is all done I finish sand the panel and shoot the edges with lacquer so raw wood will not be exposed when the tray panel shrinks up from low humidity. It’s humid today, has been for weeks. Then I sand the insides only of the tray sides and ends.

When the sanding is all done I test fit the parts. The tray panel is a little less than 1/8” too wide and the sides will not draw up against the end pieces like they should, so I take the assembly apart, shave off the needed amount of wood from one edge and run that edge through the table saw again to widen the rabbet. Now it fits perfectly.

My final task for the day is to apply glue to the corners and draw them together snuggly with clamps. I’ll leave the clamps on until tomorrow.

Thanks for looking in, I’ll see you next time!


Still to Build:

Walnut Steamer Trunk for David B. – In Progress
Kitchen organizer - Marie B.- Producing Design
Utility Trailer Make-Over for David B. - In Progress, sort of
4 Tray Tables, All Walnut (custom size) with stand for Shelly
3-Tier Bottle Stopper Rack, all red Oak for Donna
4-Tier Bottle Stopper Rack Cherry & Maple for David K.
3-Tier Bottle Stopper Rack (Standard) for Dan G.
Computer Desk for Laptop for Marie B.
Printer Cabinet for Marie B.
4 TV Tray Tables and Stand in maple for Jeffrey P.

Tuesday, January 4

Walnut Trunk – Tray Panel; Smoothing

I opened the day by pulling the covers off the walnut lumber stack and carrying in more than enough lumber to build Shelly’s set of tray tables.  This lumber will need to sit a while to acclimate to the shop conditions or the lumber will tend to do all manner of ugly things as I cut the boards into smaller pieces.  The lumber is dry – it’s been air drying for several years, but it has been quite humid and cold outside and not so much inside.  Besides, I still have to complete David’s trunk before I can move on to the next project.

I removed the clamps from the tray panel blank I glued up last time, scraped the glue ridges off of the joints and sanded the panel smooth on the wide drum sander.  This is a slow process so that took a while.  Near the end of that process Tim came in to pick up an old tank-like rear time roto-tiller to take I down to his shop for restoration.

This thing has been loving on my loading dock for a while, weighs as much as Tim and I put together and getting it down into Tim’s trailer was just more fun than humans should be allowed!

It's Advil Time!

Thanks for looking in, I’ll see you next time!

Production List:

2 Walnut Tray Tables with Stand for Jacklyn & Mark - In Transit
Walnut Steamer Trunk for David B. – In Progress
Kitchen organizer - Marie B.- Awaiting Details
Utility Trailer Make-Over for David B. - In Progress but Stalled
4 Tray Tables, All Walnut (custom size) with stand for Shelly
3-Tier Bottle Stopper Rack, all red Oak for Donna
4-Tier Bottle Stopper Rack Cherry & Maple for David K.
3-Tier Bottle Stopper Rack (Standard) for Dan G.
Computer Desk for Laptop for Marie B.
Printer Cabinet for Marie B.
4 TV Tray Tables and Stand in maple for Jeffrey P.