Monday, March 31

Posts

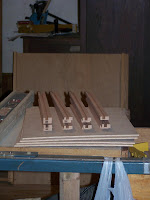
I spent the morning laying out and boring holes in the base plate. I applied strips of masking tape along the lines where the holes will line up so I could see the lay-out marks better. I can drill right through the tape and not hurt anything. Some of the holes will be where the upper and lower parts of the posts will attach, some are where spindles fit and others are for screws that will come up from below to attach lower cradle rails to the base plate.

Once all that was done I used a router to round over the edges of the plate – with a larger diameter used at the front edge of the seat – and sanded the plate top and bottom to remove milling marks, rough edges and to fair out those last glue joints.

With that done I milled the post stock to size, squaring it up as I went. Then I located the centers of the ends and bored dowel holes in post ends – at least in those that get dowels, not all do.

Then it was time to clean up and put away the toys and go home for some supper.

See you tomorrow.

Doug

Friday, March 28

Base Plate

I started out this morning by pulling the clamps off of the 2nd half panel I glued up yesterday and using a flush plane to cut away the glue ridge on both faces. This saves wear and tear on the planer blades.

Then both half panels and the seat extension piece took a few trips through the surface planer. The base plate is made up of 5 planks of wood, one “half” panel has 2 planks the other 3, the 3 plank piece just barely fits through the planer. This process smooths away any ridges resulting from misalignments between the planks and brings all pieces down to exactly the right thickness.

Next I joint the two half panels and glue & clamp them together, paying particular attention to the alignment of the center joint; fairing that on out will have to be done by hand.

While the glue on that is drying I bandsaw the rockers to shape. This is a bit tricky because of the odd shapes and occasional tight curves. I cut just outside of the lines to leave a little wood for removal of the saw marks.

That is done on by stationary belt sander. I start with a 60b grit belt and grind then to shape, then switch to a 100 grit belt followed by a 120 grit belt to smooth the rockers out.

The glue on the base plate is set up now, so I remove the clamps, trim off the glue ridge then rip it to finished width on the table saw. Then I mount the big crosscut sled and trim it to finished length. The sled helps me to get the ends square and even.

Finally I attach the seat extension piece to the front edge where the rocking chair portion will be with glue and clamps. This will set over night.

I close out the afternoon by working on a bid request for four, nine foot tall dresser/shelving units. These are part of fancy walk-in closets in a house being built in Maryland and the contractor needs a price ASAP.

Doug

Thursday, March 27

Chunkin’ Lumber

The morning was spent laying out, cutting, and labeling rough walnut lumber into the blanks that will become the various parts needed to build Warren’s Nanny Rocker. These parts blanks are cut well oversize so that crooked or rough edges can cleaned up as the parts are milled to finished size.

In the afternoon I surface planed to 7/8”, jointed and glued up the five pieces that comprise the base panel into two half panels. Our surface planer will handle panels up to 13” wide, the base for this rocker is 18” wide. These half panels will be planed again (to ¾”), jointed down the center and glued up into a full panel. That final joint will be faired by hand.
One day we’ll add a wide drum sander to our tool collection and will be able to glue up and smooth a wide panel like this in one step. Until then we make do with the tools we do have.

Once both half panels were glued up I cleaned up the shop and closed up for the night.

Doug

Tuesday, March 25

Out Sick

I was afraid this was coming. I was not feeling well yesterday, was worse this morning. But I hoped that by strapping on my uniform and reporting for duty like a good little soldier I would work my way through it.

Sometimes it does work that way, most times really. I think moving about and having something to occupy my mind other than the aches and pains helps me to deny their existence. Once I’ve successfully ignored them for a while they give up and go away.

But not today. Perhaps some extra rest will be all I need. Sorry Warren.

I did succeed in getting some of the lumber chunked up into parts blanks before abandoning my post.

See you next time.

Doug

Monday, March 24

Getting the Ducks in a Row

This morning was spent on non-woodworking duties around the shop.

The afternoon was spent poring over the plans, familiarizing myself with the process, looking for the ways I will modify the plan to suit the changes Warren and I have discussed, and creating paper patterns or templates for the tricky shaped pieces.

It’s a bit early to quit for the day, but there is little sense in getting started cutting billets today. I’ll wait for tomorrow and have a good full day for that. So I’ll work on some web site maintenance for this last hour.

See you tomorrow.

Doug

Friday, March 21

A New Beginning

Today I clear away the packaging debris, and choose walnut lumber for Warren’s Nanny Rocker. Actually, the rocker is for Warren’s daughter, who is expecting a new baby sister soon and she is looking forward to helping out with the new family member. You may CLICK HERE to view a discussion of what is involved in our lumber preparation and selection process. Since this is Good Friday we will be closing the shop early this afternoon. I’ll see you back here again on Monday. Have a blessed Easter. Doug

Thursday, March 20

Going, Going… Gone!

Yesterday I got the sanding done quickly. Combine that with the fact that Marie was going to be quite late in coming back here and I had time to go ahead and finish the tables before closing up shop. Two coats of Semi-Gloss lacquer HVLP applied, scuffed in between coats and a skim coat of semi-gloss polyurethane on just the ribbon panels to protect them from modern living. The poly needed to cure out for at least 8 hours, so the timing worked out great. This morning I needed to start the day off by buying a new water pump for the truck and having a mechanic put it on for me. When I got back I carted in all the packaging supplies from the lumber shed and went to work on preparing them for shipment. A couple of years ago we decided that we sell enough of these tray tables to be worth having custom boxes made up for them. They take a pretty big box, and not a size you run across out behind the A&P. Since we ship these UPS we need to be careful not to step over the size limitation line. So, we designed a box that is just big enough to safely accommodate the Classic Tray table set and it’s packaging, yet *just* inside the limit to stay out of the really expensive shipping class. If we step over the line I can send them cheaper by truck than by UPS. But the box company won’t run off just a couple dozen custom made boxes for someone – they need to sell at least one full skid of flattened out boxes at a time – several hundred boxes. So we have enough to last a few years. But then we designed these heavy duty tray tables… they are the same basic dimensions, overall, but the parts are heavier, thicker. So when you stack four of them on a stand, the package is about 3 inches deeper… too deep to fit into our custom tailored boxes. So, we break up the set and send the parts in two boxes. All four tables get strapped together with cello twine with Styrofoam padding in key areas and laid into one box. The other box contains just the stand. But even at that the stand doesn’t quite fit inside, so we remove one screw from each arm, pivot them parallel to the frame and strap the arm and removed screw in place. You will need a #2 Phillips head screwdriver to put the two screws back in place and secure the arms. Nothing but these two screws is removed completely, the arms are still held in place by one screw each. Just swing them up and insert the missing screw. Being in two boxes also confuses the shopping cart software, which is not especially smart about such things. But then, this same shopping cart is expected to calculate shipping costs on everything from a pair of bag handles to a set of tray tables. Anything larger than the tray tables will have to go by truck, and the cart can not handle those computations at all (yet – we’re working on that). The cart takes the weight which is generated by adding up the weights of all the pieces-parts used to build the thing, plus the assigned packaging materials and plugs that into UPS’s internet based rate calculator with the customer’s address information to come up with an estimated cost. But the on-line UPS calculator used for this does not ask about size, so oversize (OS-1) fees are extra. Shipping an order in two boxes is extra. Shipping two oversize boxes is extra, extra. See what I’m getting at? If we offered just one product, we cold set up a flat rate table of shipping fees to the various parts of the country (or world, as we have shipped our work to Hawaii, Canada, Ireland and Australia). But we don’t, so we can’t. We have considered just adding an averaged shipping cost to the product price, then flagging everything as Free Shipping! (You didn’t *really* think those folks who offer always free shipping just absorb that cost did you?) But that would penalize folks who live within a couple of states of Tennessee by making them pay inflated shipping fees resulting from shipping to California, Oregon, Texas and Florida – which we do quite often – thus raising the average cost. Would that be fair? Would you care if you didn’t know? Is that being dishonest? I once bought a credit card machine. They charged me $65.00 for the machine and $45.00 for shipping. I was appalled! Yet if they had charged me $100.00 for the machine and $10.00 for shipping I’d have been fine with that. Some of my customers seem to feel the same way, judging from comments I’ve received lately. Would you? The bottom line is that under the current situation, on an order like this, where the shopping cart calculated only half of the shipping cost we have to add an extra fee to the final payment. If you want to contact us and have us run a manual cost for you we can do that. But, even then the cost will change if your order is not an On Hand order that will be shipped out in a day or two. If you’re on the production queue for two or three months and the fuel costs keep sky rocketing, shipping costs *will* go up. I noticed on todays shipments that UPS has begun adding a Residential Delivery Surcharge just like the trucking companies do. That’s disappointing. But because we bill you ONLY for what they bill us in shipping costs, no mark up; no slush fund to work out of, what they bill us is what we need to bill you. If you’d prefer we hid those charges inside the product cost and offered “Free” shipping, please let me know; I’d be very interested in your opinions. Time to go. Tomorrow I get started on Warren’s Nanny Rocker. Well, actually it’s for his daughter so she can help care for her soon-to-arrive baby sister. See you then! Doug

Wednesday, March 19

Begin Finishing

Today I start the finishing process. The first step is to very carefully inspect each table and the stand. I’m looking for anything that might have gotten past me before, but will be paying special attention to any nicks or dings that are too large to be sanded out without significantly changing the part’s shape. The will need to be filled in with wood filler, allowed to dry hard and sanded flush with the surrounding wood. Then the finish sanding can begin. In our shop finish sanding is always done by hand. Even large pieces with expanses of flat areas that lend themselves to being sanded more quickly with a power sander will have the final grit of sanding done by hand; with the grain, to be sure the sander left no swirls; as random orbit sanders are prone to do. This process is not especially exciting or interesting to watch, so I’ll post the days notes now and focus on getting the work done without interruptions from the shutter bug. My plan for the day is to get the finish sanding done and the pieces vacuumed and tacked off ready to finish tomorrow. If anything significantly different happens, I’ll post an update. Otherwise… See you tomorrow, Doug

Tuesday, March 18

Building the Stand

Today I completed the construction phase by building the stand for Ira’s tray table set. The parts had been roughed out previously, so all I needed to do was trim them to finished size and shape them. I started with the handle because it requires the most attention in shaping it. Then I bored a pair of matching holes in the top of each foot and the bottom of each upright. These holes house a set of dowel pins that hold the side frames securely together.

Then I was able to assemble the basic frame. The final step was to cut the arms to shape, glue the retainer tabs in place sand the assembly smooth and install them on the stand frame.

And that does it. Construction is done. Time to run the third progress payment so we can begin finish sanding in the morning.

See you then,

Doug

Monday, March 17

Final Assembly

Friday and Monday were spent doing the last of the parts making and final assembly on the tray tables. I was not able to post anything here on Friday because it was raining and when our telephone lines get wet our internet connection gets v-e-r-y s-l-o-w. Too slow to upload pictures because the connection times out before a single picture transfers. So I’ll get you caught up today.

This process started with the removal of the band clamps, a little cleaning up around the corners and a trip to the router table to round over the outer edges of the rails. Most of the parts needed are now stacked on a parts cart eagerly waiting to become Ira's tray tables.

I test fit the leg sets to the underside of the trays to be sure the leg sets are exactly the proper width and the mounting blocks fit snugly into the corners. All is good.

The final part to be made is the latch mechanism.

Before I start trimming the parts to finished size I check the table saw blade to be sure it is perfectly vertical. The base angles of the latch blocks will greatly affect the way the latch tabs fit into the holes in the upper spreaders. That done I mill out the latch blocks and shape them on the router. Then I mill out the latch tabs. For safety’s sake I do all the major shaping with the tabs in stick form, then cut them apart and do the final shaping by hand. The tabs then get glued into the notch in the top of the latch block and tested in the table assemblies.

Now that everything fits so well it is time to prepare for the final assembly. I start by using cut-offs from this project to make the screw hole plugs I will be needing. Making my own plugs from cut-offs allows a much better match with the tables color and graining.

Then I take the leg sets apart and re-assemble them with glue in the joints and install the plugs in the screw holes to hide them away. I trim and sand the plugs as I go, then permanently attach the leg sets and latch blocks to the trays.

Dolly doesn’t care for rain at all so she spent Friday being my shop buddy. Normally she will bed down in the office but today she wanted to be close by – once I quit running power tools that is!

By Monday afternoon the tables are done. All that remains is the stand and we’re ready to begin finish sanding.

See you tomorrow!

Doug

Thursday, March 13

Assembling Trays

I got an early start this morning because I have some maintenance type things to tend to this afternoon, when it will be nice and warm but before the rain starts. So I started off with scraping and sanding the final full ribbon panel. Then I set up the big crosscut sled to trim the ribbon panels to length. This is done in two passes, trimming a little off each end to that the both come out smooth and square. When done I have nice rectangular panels that will serve as Ira’s tray table tops. Making them the way we do – using strips of solid wood – take a lot more labor than simply cutting a piece of veneered plywood and popping it into the slots, but should the tables ever become scratched, the scratches can be sanded out and refinished very easily, With plywood the veneer is only a few thousandths of an inch thick and sanding it at all risks sanding right through the veneer, exposing the glue and substrate below, ruining the table. In addition, with veneered plywood the veneer tends to be saturated with glue so stains won’t color the plywood the same as it does natural wood unless you seal the wood so the stain doesn’t penetrate it either. Then the color is the same through out the piece. It’s too light, but it’s all the same color.

Because we’re not using the 1/8th inch Baltic Birch that we usually use, I need to “adapt” the ¼” cabinet grade birch plywood to the purpose. Mostly that means cutting a shallow rabbet along the edges where the backer board will go into the groove in the rails. Then I mark the center on both ends of the ribbon panels and their backer boards, apply a little glue down the center of each and clamp them together. I let these sit while take my lunch break.

After lunch I finish sand the insides of the tray rails. It’s much easier to do this now than later because later I will have to worry about scratching up the panels as I try to sand the rails, especially the end rails that run across the grain of the panels. By doing the finish sanding on the panels and the insides of the rails before they are assembled I can eliminate that risk of damage.

I fit the rails to the panels, paying attention to the lay-out marks so they go on in order, and use tabs of masking tape to hold them together while I check the fit. I cut the backer boards just a hair large so I can sand them down to a precise fit. This takes a little time as I want it to be right. If I rush it and sand away too much, then that causes problems.

Once they fit properly I flip over one rail -- leaving it taped at one end like a hinge -- and apply glue to the rabbet and the lower lip only of the groove inside the rail. This too is cautious work, I don’t want glue slopped in a spot that will bind up the ribbon panel or come gooshing out an inside corner, where it is mighty hard to sand it out again so it won’t show as white stains under the finish. But I do want the parts that are supposed to get glued together to be glued together solidly. These parts are too small to use screws or nails as mechanical back-up. Band clamps with corner clips draw the parts together securely and will hold them there until tomorrow morning. Since there is tension in these joints I want them to stay securely clamped until the glue is good and hard.

This takes the rest of the afternoon. I’m quitting a couple of hours early today to take care of the afore mentioned maintenance chores. We’re expecting rain starting tonight and going through the weekend and into the early part of next week. So doing these outdoor chores on the weekend has been precluded. Besides… it’s a gorgeous, 72° day out there and I have a touch of spring fever. It will be nice to get out and enjoy this while we have it. It *is* only mid-March, we will have another cold snap I’m sure. I just hope our fruit trees don’t bloom before a hard frost like last year. We got no fruit at all from any of our trees last summer.

See you tomorrow!

Doug

Wednesday, March 12

Big ‘Uns Out of Lil ‘Uns

Today I made full tray table panels out of the half panels that we made yesterday. This starts by using a flush plane to shave off the glue pips and/or ridges from both sides of the half panels. Getting rid of as much of this as I can now save a good deal of wear and tear on the surface planer, which is the next step.

I switch the planer down to the slower feed speed to get the smoothest result possible. If the planer knives had had much use on them I’d have swapped them out for a fresh set as well. Then I feed all the half panels through several times, taking off just 1/64 of an inch on each pass to minimize any tearing out.

Ideally a wide drum sander would be the tool to use for this, but I don’t have one. It’s on my wish list. But, being a good steward of the resources entrusted to us, Marie won’t allow me to go out and buy all the tools I want to have on credit. That attitude may seem un-American – especially right now – but it has kept us out of the poor house when things get slow. So, we tuck away our pennies and when I have $1200 worth I’ll get a Performax sander. Until then, this beats the daylights out of doing it by hand with a scraper.

One of the more satisfying things about building these tables are these panels. I get a lot of compliments on the way they come out with no visible seams; smooth, flat and flawless. Usually. Once in a while I mess up and have to make another because the joints in one didn’t joint up the way they should. But that's rare.

The next step is to joint the seam in the middle between the two half panels. Again, the goal is to have it disappear once glued up. But, unlike the ribbon strips in the half panels, there is no “flex” involved here, clamps will not draw the joints closed because the half panels will not bend – they have to be perfect to start with.

Once the joint is perfect, I take the pair of panels into the assembly room to be glued and clamped. While the first one is setting up for an our or so I joint the rest of the pairs. When the first one comes out of the clamps I glue and clamp the second, then go sand the first one smooth and flat and fill any work holes with wood filler.

We like worm holes; they add character to a piece of furniture. But in a table top these small pits serve as places where spilled drinks or food bits may hide and fester, so I fill up all the little pits and will sand them smooth tomorrow after the filler has hardened thoroughly.

While waiting for the third full panel to set up I complete Pamela’s stopper rack by sanding all the parts, gluing the shelves and back rail to the body I assembled yesterday then pinning the joints with dowel rod. These pins go through each part into the one below and are glued in place so they are structural as well as decorative. When it was done and sanded again I shot it with three coats of lacquer, scuffing between the 2nd and 3rd coats.

Then it’s back to Ira's tables; gluing up the fourth full tray table panel, sanding and filling the third, then cleaning up the mess and getting ready to go home.

See you tomorrow!

Doug

Tuesday, March 11

Tray Rails & Ribbon Panels

Over the past two days I have made good progress on making the tray tops.

I started, on Monday, by taking the long trips I’d milled out previously for tray rails and laid them out for cross cutting into the individual rails. I’m milling the rails for each table from one long strip. By cutting them in sequence and keeping the pieces in order the grain of the wood will flow around the rail.

After cutting to rough length, I trimmed them to width and planed them to thickness. Then I set up the table saw with a dado head and cut the big groove that will house the tray panel. That done, I turned by attention to cutting the backer boards for the tray panels from a 4’ x 8’ sheet of plywood.

This is one of the few uses we have for plywood and we must use it here to give the tray rails something solid to mount to. The ribbon panel, being solid hardwood, will expand and contract across the grain with humidity changes. If I glue the rails to that, the joints will pop loose and the tray panel will, more than likely, crack and split because it can’t move as it needs to. So we use a thin piece of plywood as a spine upon which we hang the rails, leaving the ribbon panel free to move. We use cabinet grade Birch plywood for this, not the cheaper construction grades. I prefer to use Baltic Birch plywood in my furniture, but with the weakening of the American dollar imported materials are becoming increasingly expensive. Baltic Birch is now outrageously priced – when I can even get it. Most of my suppliers have let it go out of stock and stay that way because of the price.

Tuesday morning I came in and got right to work mitering the tray rails. I cut them a smidge over-size to start and sneak up on a perfect fit. A good miter fence, and very sharp saw blade help this process to go well. One work of sagely advice: if you want to mount a sacrificial backer to the miter fence, do it BEFORE you calibrate the gauge to the blade. When cutting at an angle, moving the work piece forward (away from the fence) will cause it to be cut shorter than you expect. No, I did not learn that the hard way, at least not this time. When test fitting, I use a clamp to gently draw the parts against the backer.

Most of Tuesday was spent making ribbon panels. I start with the billets I milled out before. These pieces were chosen for the way the grain runs through the wood so that they will experience little if any tendency to cup. The broad faces of these billets have been surface planed perfectly smooth to serve as my glue joints. Now I use a thin kerf blade on the table saw to rip the billets into thin strips which get laid on their side to for the panels. By keeping them in order patterns are formed in the wood that can paint some beautiful pictures.

After I have enough ribbons to make a panel I stop the saw and bind the strips together.with masking tape. I cut the tape at the center joint and mark the two half-panels for orientation. Then I take them into the assembly room where I have a glue-up station set up. The tent-like jig holds the panel for me with the joint I’m gluing opened up for easy access. I must work quickly and get the panel into the clamps before the glue starts to cure.

I have enough space to clamp up only two half panels at a time so while these two set up I go back to cutting ribbon strips and forming panels. After an hour or so I can remove the clamps, set the joined half panels aside and glue up two more.

When I’ve finished cutting and bundling the ribbon panels and still have a few more to glues up I clock out on Ira’s card and in on Pamela’s so I can begin her bottle stopper rack. Small projects like this are ideal as fillers for these otherwise wasted pauses in a larger project.

By day’s end all eight half panels are glued up and the body of Pamela’s rack has been cut out and glued up. I have accomplished my goals for the day and can now go home happy.

See you tomorrow!

Doug

Friday, March 7

Assembling Leg Sets

Most of this day was spent sanding. Sanding legs, sanding spreaders, sanding mount blocks for Ira's HD TV Tray Tables. Some of this was done with my big old Bosch random orbit sander, some with a sanding block, some with strips of sandpaper and elbow grease.

This is just the first round of sanding; what I call construction sanding, done with 80 and 100 grit papers. The purpose is to fair off any waves left by the planer or swirls left by the table saw, remove any small chips on corners as well as rub marks (shiny spots) left by all the machining steps these parts have gone through. I sand each set of legs, spreaders and mount block, then assemble them with just screws, no glue yet.

Here is why I’m so picky about making templates. When screws need to pass through one part into another it is a great thing when all the holes line up. We want the parts to fit together evenly and the screws to go in without imparting unwanted stresses on these parts.

The assembled leg set looks like this. It is not done yet. Once I’ve assured myself that everything will fit properly to the underside of the tray I’ll take the spreaders loose again and reassemble them with glue and screws, then plug the screw holes to help them disappear. I will also dismantle the leg pairs and the leg-mount block to pre-finish the areas between them. That way we won’t risk bare wood peeking out when the legs are in a certain position (something other than the position they were when I finished the tables.)

I got all four leg sets sanded and assembled. Everything looks good so far. It’s Friday and time to get things cleaned up and put away for the weekend.

See you Monday.

Doug