Friday, December 10

Tray Tables – Latch Blocks

Today’s work will be done in two steps and I will post each separately.  First, fellow woodworkers, we will make and attach the latch blocks that hold the tray tables in the ‘open’ position so they can be carried around.

This starts with setting up the table saw with my miter fence and an ATBR blade; which stands for Alternating Top Bevel with Raker.  The alternating bevel teeth cut cleanly through hard wood and the raker tooth squares up the cut to provide a flat bottomed kerf.  I set up the saw using my template piece, then fine tune it using a piece of scrap wood cut to the same dimensions as the latch blocks.

The goal is to get a slot in the top of the block that is just the same depth as the thickness and just wide enough to provide a tight fit for the tab stock.  We want no play at all here or the tab will not stay in place.  Once I get it right I cut the slots then shape the blocks on the router table, and complete the tabs.

When all the parts are made and sanded, I apply glue and a clamp to draw the parts together.  Because of the tight fit, I need only leave the clamp on for a few minutes, then I can do the last of the shaping – rounding over the back of the tab to match the block.

The final step is to glue and clamp the completed latch blocks to the underside of the tables.  These will stay clamped up overnight.

This completes construction of the tables.  Next I will turn my efforts toward building the stand.  Stop in again and we’ll look at that.  Thanks for reading!


Wednesday, December 8

Tray Tables – Assemble Bases

Today, fellow woodworkers, we will complete the building of the table bases and attach them to the table trays.  First up: make the leg mount blocks.

I mill out the small blocks that will become the leg mount blocks using the same steps I always do; jointing 2 faces, planning one face, rip to width, cut to length.  Then I need to round over most of the edges on these blocks.  The blocks are small and holding them by hand puts my fingers far too close to the high speed cutter of the router table so I use a small wooden hand clamp to hold the blocks.

Once they are shaped I drill the pilot hole, sand, pre-finish the face inside the leg pivot.  Before I attach the blocks to the top of the legs I must modify some screws.  The ideal size for this task would be 1 5/8” screws; I’ve not been able to find a supplier of 1 5/8” wood screws, so I shorten 1 ¾” screws by grinding off 1/8” and repointing them.

Then I take the spreaders I roughed out yesterday and use the template and a flush-trim bit in the router table to dress up the rough edges left by the band saw; the bearing on the router bit rides on the template and cuts the part to the exact same shape.

When all of the spreaders are shaped, I put the round-over bit back in the router and round the long edges of the spreaders and the latch-tab hole.  Then I cut the spreaders to finished length.

Next I set up my end-drilling jig on the drill press, get it positioned just where I need it to be and clamp it down tight.  Now I’m ready to drill deep pilot holes in the ends of the spreaders.  Because these are end-grain, and end grain tears out easily, I use at least 2” screws here.

With all the prep work done I finish sand the spreaders and mount them to the legs with screws.

As I assemble each base I glue in shop-made screw hole plugs made from scraps from this project for a better color match.  Then the base is set aside to let the glue set up a bit while I work on assembling the next base.

When all bases are assembles and plugged, I go back to the first one, trim off the screw hole plug stumps and sand smooth.

Finally, I am ready to glue and clamp the leg mount blocks to the under sides of the trays.  I seat each aside as I get them completed and will let the glue set up overnight.

Join me tomorrow when I make the latch blocks and stand.  See you then!


I’m getting quite a few requests from customers to know the status of pieces they’be ordered.  Below is the production list.

Still on the List:
4 Cherry Tray Tables with Stand for Tina - In Progress
2 Walnut Tray Tables with Stand for Jacklyn
4-Tier Bottle Stopper Rack – Standard
----- Christmas Delivery Cut-Off ------
Utility Trailer Make-Over for David B. In Progress but Stalled
4 Tray Tables, All Walnut with stand for Shelly
Walnut Steamer Trunk for David B.
3-Tier Bottle Stopper Rack, all red Oak for Donna
4-Tier Bottle Stopper Rack Cherry & Maple for David K.
2 3-Tier Bottle Stopper Racks (Standard) for Dan

REMINDER:  As of December 31st, 2010 Smoky Mountain Woodworks will discontinue accepting custom woodworking orders.  Orders received by that date will be completed, but new custom orders will not be accepted. 

Tuesday, December 7

Tray Tables - Leg Sets


Today, woodworking Buddies, I will be a leg man.  We will make up the leg pairs that will become the bases of these tables.

Previously I made up blanks for the legs that are sized and squared but not cut to length.  I get out my leg templates and get ready to get started.

The first step is to set up the leg cutting jig on the miter saw.  This will insure that the legs are all the same length.  This is just a simple stop-block jig that I clamp to the fence with the right edge just kissing the saw blade. I cut all the legs to length, then check for any tear-out or chipping, and fill any problems with cherry wood putty.

While I wait for the putty to dry I start on the spreaders.  I use this template to lay out the arches, the snap-clip hole and lay-out the length.

Then I cut the arches on the band saw.  These are rough cuts, I’ll dress them on the router table later.  Two arches on the lower spreader, one on the top.

Next I set up the drill press with a Forstner bit and use the lay-out punches to drill two holes side by side, then drill out the waste between the holes.  This is something only a Forstner bit is able to do. 

OK, the putty is dry, so I sand the legs to smooth the putty and use the leg templates to lay out all the screw holes that will be used in assembling the table bases.  I wave to watch the notations on the templates; some holes are drilled from the inside face of the leg, others from the outside face.  Most holes are counter-bored for a plug, one is drilled just flush.  If I get it wrong, I have to make another leg.

Then it’s off to the drill press where I have a tapered bit with counterbore set up so I can drill pilot holes and counterbores all in one step.

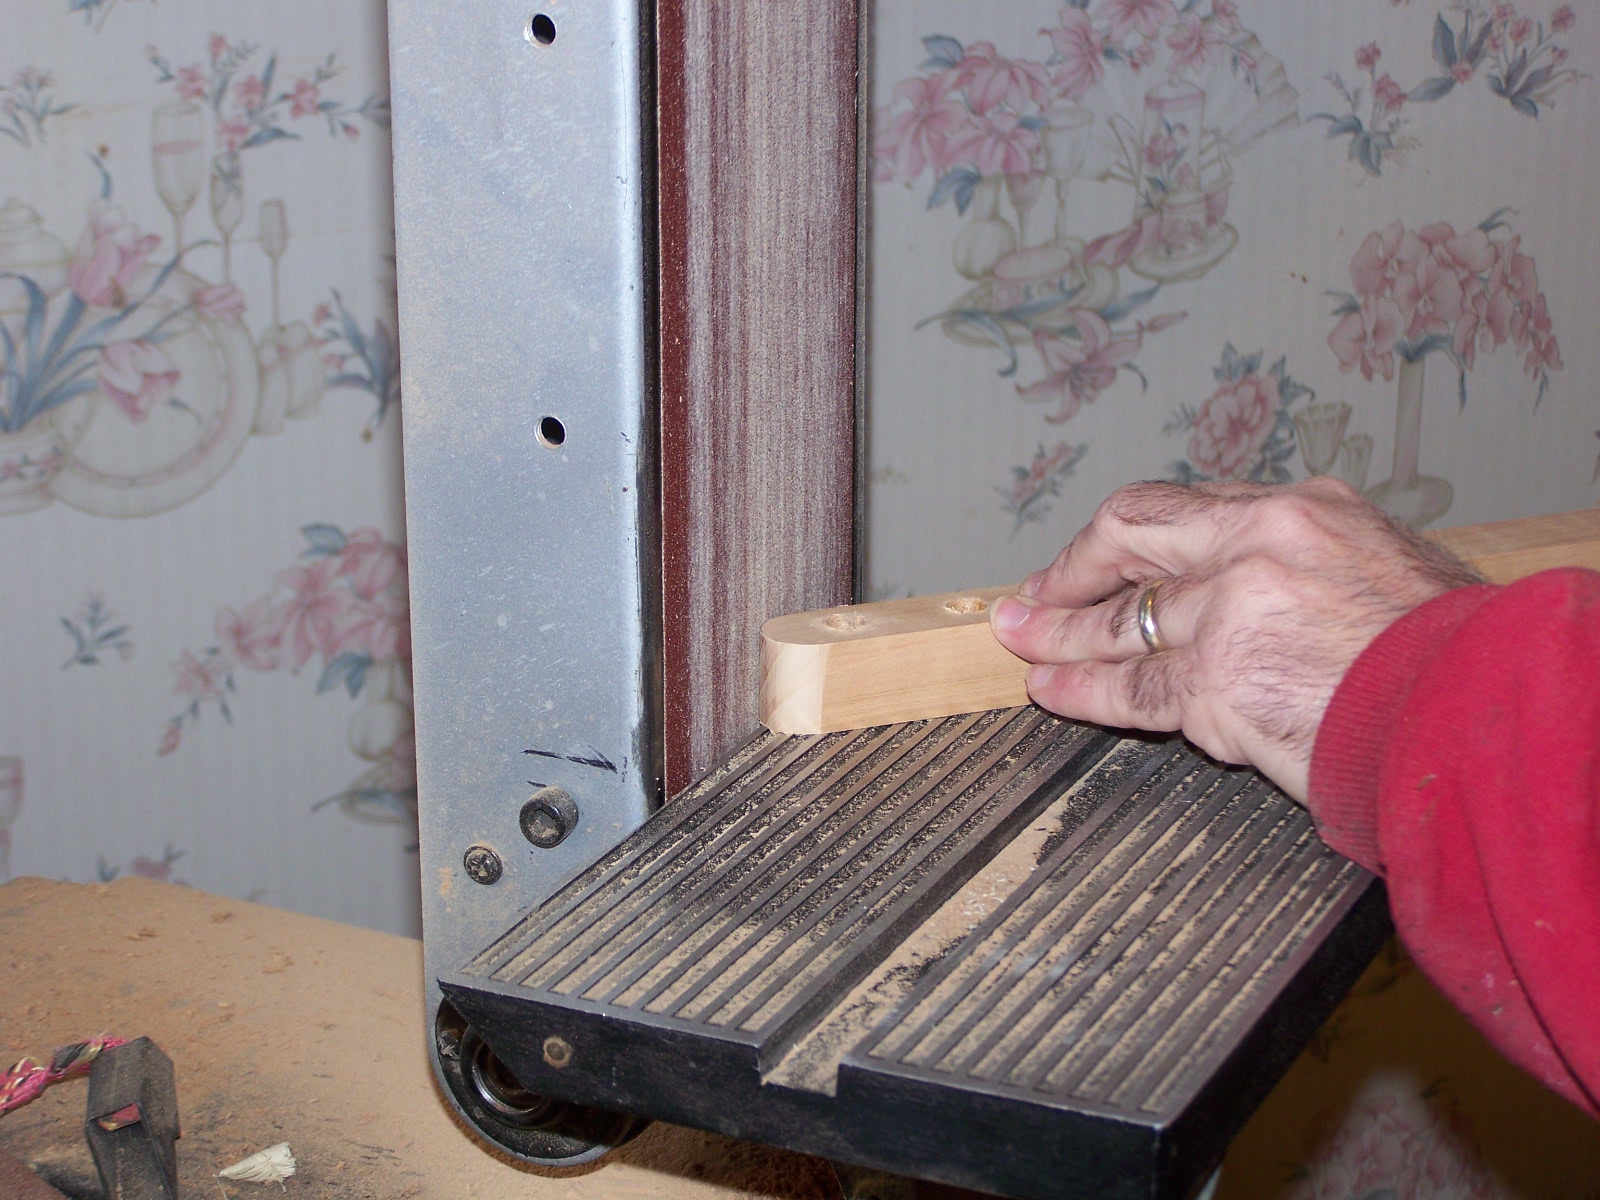
The last step in this phase is to shape the legs on a stationary belt sander.  The top of the legs are semi-circular so they can pivot under the table top, the lower ends are rounded over for a more pleasing look.

The rest of the afternoon is spent finish sanding the legs using a combination of power sander and sanding blocks.

As I sand each leg pair I take them in the next room and pre-finish the inside surfaces of each pivot joint and the ends of the legs then assemble the main pivot – the point the two legs fasten together to form a scissors action.

This was a long day.  It’s late and I’m going home now.  Tomorrow we’ll complete the leg sets and (hopefully) attach them to the tables.  See you then!

Monday, December 6

Tray Tables – Completing Trays

This is Monday and, as I normally do on Monday, I spent the morning doing my weekly radio program so I can get the disk in the mail to the radio station.  After lunch and the mail run I removed the clamps from the tray assemblies.

The first step is to sand the glue ridges from the corners of the trays.  I need the rail surfaces to be smooth for these surfaces will be the guide for a round-over router bit and any lumps will cause similar lumps on the routed face.

The round-over bit is a little dull, so I remove the guide bearing and sharpen the cutting edges.  I start by dragging it along the edge of a medium sharpening stone to restore an edge to the cutter carbide.  Then, clamping the bit into a vice I use diamond paddles to hone the surface; first a fine paddle then super fine.  The hardest part about this is keeping the paddles flat to the small cutter face.  Once done I reinstall the guide bearing and install the bit in the router table.

I round over the upper and lower edges of the trays to give them a particularly nice feel in your hand as you carry them.

The rest of the afternoon is spent hand sanding the trays.  This is the finish sanding step; It’s much easier to do this now than after the tables are fully assembled.

Tomorrow we’ll get started on making the legs.  See you then!

Saturday, December 4

Tray Table: Tray Rails

Today, woodworking friends, we will make and install the rails that frame the table tray and form the ever-so-helpful “lip” that keeps things from sliding off as you carry the table.

You may recall that when I made the rail stock, I “unwound” thick pieces of cherry by resawing them and turning them inside out so the grain patterns will match almost perfectly.  To keep this process going I must keep the pieces oriented properly and paired up.  I work with one tray table at a time, cut the rails, fit them and set that one a side with rails dry fitted to the tray panel before starting on the next.

I start by setting the miter saw to 45° left and attaching a simple jig to the saw.  The right end of the jig has a 45° bevel on the front corner – this serves as a backer to prevent tear out and as an aid for lining up a cut in mid stick - the other end is marked for the correct finished length of both the long and short rails. I cut a miter on the end of one stick.

Then flip the stick over (always keeping the groove facing out so I’m cutting inside miters) and place the miter I just cut on the line, I miter the other end.  This cuts the first piece free of the stick.  This was a short rail, the next will be a long rail, then a short rail and the final long rail, wrapping the pieces around the tray as I cut them off.

This is where the genius of “unwinding” a thicker piece of wood comes in; ALL four corners will grain match.  I could do this with a long stick of wood, and it would be much simpler to mill, but only three corners will match well.  The fourth corner will be formed from opposite ends of a long stick.  Using the box-maker’s trick of unwinding the wood means that even the final corner will match well.

Here is a shot that helps to illustrate the expansion gap I leave in the long-grain sides of the panel.  The end-grain sides need no such gap and are cut to fit tightly in the bottom of the groove.

Gluing the rails to the panel means working quickly enough to get the tray done before the glue tacks up, but working carefully enough not to get glue where I don’t want it.  This is tricky and I use a small artists brush to apply the glue.  I take one rail off of the dry-fitted assembly, apply glue and put it back on, then take the next rail off for gluing, working my way around the tray.

These parts are far too delicate to allow screws or even nails.  The glue joints have to be perfect.

When all rails have been glued and are properly aligned, I apply clamps to draw the corners of the rails together snugly.  This should not take a lot of pressure.  I will leave the clamps on over the weekend so the glue has a chance to reach maximum strength before I work with these further.

One more step and the table tops will be done.  Please join me again on Monday.

Thursday, December 2

Tray Tables - Panel Assemblies

Here it is Thursday and another week has almost slipped away.  First let me announce that as of December 31st 2010 Marie and I will be closing down the custom woodworking end of Smoky Mountain Woodworks.  Demand for custom work has fallen off so badly for so long that I must turn my attentions elsewhere to keep the bills paid.  We will continue to build the more popular items and offer them for sale, but I will no longer have the time to get full custom work done in a reasonable amount of time.  I will continue to work on the orders we have received until they are complete, but we will not accept new custom order after the end of the year.

We are working on a set of Cherry tray tables for Tina.
Next up is asset of walnut tray tables for Jacklyn.
Then a walnut steamer trunk for David (and completing the trailer)
Then a four tier stopper rack for Sue.
And Shelly wants a set of custom TV Tray Tables, if she can get PayPal to cooperate.

So, we were working on the tray panels for Tina’s tables. I had completed the glue-up and smoothing of the ribbon panels and roughed out the backer panels.  So now I need to glue the backer to the ribbon panel.  I do this with a strip of glue just down the middle of each.  Why do I need a backer, and why not glue the whole thing?  Both are related to the same issue; expansion.

Solid hardwoods will expand and contract across the grain with the raising and lowering of atmospheric humidity. Applying a finish slows it down, but does not prevent it.  Trying to glue the side rails to a panel that will move like this guarantees that the rails will pop loose.  So I use a thin plywood backer panel under the ribbon panel as a backbone to which I glue the rails.  The ribbon panel gets glued to the backer just down the middle so it can expand and contract without cracking. 

When I cut the parts to finished size, the ribbon panels are 1/8” narrower than the backer.  Then, when I glue them together I center the ribbon panel on the backer leaving 1/16” on each side as expansion space.  The groove in the rails hides this and holds the ribbon panel flat.  After gluing and positioning the two panels I apply a clamp at each end and use a heavy weight in the middle to apply pressure for a good bond.

Once the glue is dry it’s time to trim the panel assemblies to finished length.  When I glued up the ribbon panels I squared one end of the ribbon strips so it was fairly straight and even.  Both the ribbon panels and the backer panels are ½” longer than the finished dimension.  I start by trimming just a bit off the even end to be sure backer and ribbon panels are both perfectly flush, straight and square using my large cut-off sled.

Then I flip the panel over so the same side as before is against the fence and trim the other end to finished length.  Because I make so many of these, I have a lay-out mark and label on the sled in ink.

After cutting them to length, I check to be sure they’re square by measuring across both diagonals.  If the diagonals are equal, the panel is square.
I used to use 1/8” Baltic Birch Plywood for these backers, and the design is set up for that.  When Hurricane Katrina hit New Orleans the price on all forms of plywood skyrocketed and most forms of plywood became very scarce.  BBP was one of the worst for some reason.  To keep going I started using a thicker, cabinet grade plywood that became available again much sooner.  To get this thicker panel to fit into the slot in the rails, I need to cut a precisely sized rabbet around the edges of the bottom of the backer panel using the table saw equipped with a sacrificial fence (so I can cut right out to the edge of the panel).

The final step in this process is to sand the panel assemblies to smooth both faces and remove any small chips from the cherry face that occurred during surface planing.  I use the wide drum sander for this.  This requires very light passes at a slow feed rate, especially when I get into the finer grades of sandpaper.  It takes the better part of a day for this step alone.

When this is done I take a sanding block and put a very small chamfer (bevel) on the upper edge of the cherry ribbon panels, and the edges of the grooves in the tray rail parts.  This will help the parts slide together without snagging when we get to that point.

And that does it for the tray panel assembly.  Next I’ll cut the rail parts and fasten them in place.  But this day is almost over, and I need to get this much posted for you, so I’ll get to those tomorrow.  Please join me then!

Friday, November 26

Tray Tables - Ribbon Panel Prettification

Welcome back woodworking fans, I hope your Thanksgiving celebration went well.

Today I’m going to finish out (prettify) the ribbon panels for Tina’s tray tables.

I start by trimming the panels to finished width on the table saw.  I take equal amounts off of each side so the panel stays centered.  If I’ve dome my job well then he glue joints will be nearly invisible in the completed panel, so taking the excess all off of one side would probably be OK, but I want to trim both edges to be sure they are both straight and parallel, so I might just as well keep it centered up.  Sometimes I do put a special feature as a center stripe in the panels, making a habit of trimming he edges equally eliminates the possibility I’ll forget about a special feature and cut the panel in a way that throws it off center.

Next I use the surface planer to flatten the ribbon panels.  I take very, very light cuts on the slowest feed speed to help prevent chipping out the surface of my panels.  This can be an aggravating problem if the knives are not razor sharp – and mine aren’t right now.  And can be a problem even when they are sharp because the grain direction on the ribbons will run in different directions and when cutting against the grain the knives will lift the grain and tear out chunks.  Planing with the grain prevents this.
I do the final smoothing on the wide drum sander with a fine grade of paper.  This takes FOREVER because I can take off only a few thousandths of an inch per pass, but does help to sand out and minor tear-out.  Deep tear out, if any, needs to be filled.  Fortunately that didn’t happen this time.

That’s going to do it for this time.  Hope you have a great weekend!

Wednesday, November 24

Tray Tables -Ribbon Panels

Welcome back!

Once I got my e-mail and administrative chores done this morning I got right to the task of making up ribbon panels for Tina's Folding Tray Table set. 

I take the sets of ribbon strips I cut yesterday and, working with one set at a time, lay the strips down flat on the table and in order.  Most of the time I'll tip them all the same direction so that the wavy pattern in the grain all waves the same direction and "flows" across the panel.  Once in a while I get a really unique pattern that is best  highlighted by flipping every-other strip over giving me arrow like stripes.

So I work one panel at a time, laying in strips.  If one set is not enough to make the needed width, I check to see which other set is closest to this one in grain pattern and continue with that.

When I have enough strips to make the needed width and I'm happy with the pattern I use a framing square to get one end of the strips all evened up and square to a side.  Then I hold them in place by placing 3 strips of wide masking tape across the panel and rubbing it down well to make sure it bonds to all the strips.  Then I fold the panel in half and take it into the assembly room to be glued up.

I built this fixture to hold the panel as I apply glue.  The tape holds the panel together and acts as hinges at each joint, the acute angle at the top opens up the joint so I can get glue into the joint, and the long flat run out the back supports the glued up section and keeps the joints closed up.

When all the joints have been glued I lift the panel off of the fixture and lay it onto the three bar clamps that are set up ready to receive it.  The masking tape is placed where the bar clamps sit to prevent glue-to-metal contact discoloring the wood.  I wipe the excess glue from the back of the panel with a *damp* rag.  Actually I'm not so much concerned with removing the glue as I am removing any ridges of glue.  By just sort of spreading those out, I also seal the wood on the back of the panel and prepare it for being glued to the backer panel later on.  I avoid over-wetting the wood which might affect the glue joints.  The rag need be only damp enough to help move the glue around.  I add two more clamps and make sure all are applying an even, medium pressure.  Going gorilla here will just force the glue out of the small joints and cause problems later.  What is needed is firm, continuous contact between the wood faces in each joint.

With the first one done, I'll go take my lunch break, make a mail run and look in on Mom.  When I get back this panel will be tacked up enough to remove the clamps and glue up another.  While that one sets I'll work on making parts blanks.  Then I can glue up the third.  I have one tray completed, so I only need parts for three more.

I'm going to post these notes now (I'm doing them during my lunch break) because Marie and I have someplace else to be this evening, so if not now, then it would be tomorrow.

Tomorrow, fellow woodworkers, we will... oh, wait... tomorrow is Thanksgiving isn't it?  Well, then I'll see you back in here on Friday.  Have a Happy Thanksgiving!

Tuesday, November 23

Cherry Tray Tables - Getting started

Today, fellow woodworkers, is Tuesday and I’m behind schedule again. I expected to spend Monday morning working on the weekly radio program and Monday afternoon working on David’s trailer then closing out the day by taking stock of the cherry TV Tray Table parts I have on hand - we recently made another set of these and I made extra parts, indenting to complete the additional set in time to offer it for Christmas.

I think it was Charlie Brown who said, “Life is what happens when you’ve made other plans.” That was my Monday. Part of it involved a mushroom cloud rising above my newest venture The Simple Life Prattle. This kind of takes the place of the older Mountain Man Wannabe blog. Details aren’t really relevant here, so I’ll just apologize for the delays and get on with today’s tasks.

After dealing with e-mail and some routine maintenance I pulled out the cherry table parts and took inventory. It’s actually better than I remembered. I knew I had the one tray dry fitted and ready for sanding, and enough leg blanks to make 4 tables. But I also have enough rail stock for the other three tables all grooved and routed, ready to cut and fit as well as stock for the stand’s feet and handle, latch blocks, and leg mounts. That leaves only a hand-full of parts blanks needing to be made up.

So my first task is stock selection. I look through the boards I have in the next room and select boards that are suitable for each of the parts I have to make. I’ll start with the ribbon panels for the three remaining tables. So I select some nice flat-sawn stock with fairly even coloring. By ripping a flat sawn board into thin strips and laying those strips flat, next to one another we get some beautiful quarter-sawn patterns in the grain. You never know for sure exactly what you’re going to get until the strips are cut. A few cherry table sets have come out with a quilted pattern that was especially beautiful. It is this aspect that insures that not two sets of tables will be exactly alike. I do want to get the wood for all the tables from one tree, and preferably from consecutive boards so all 4 tables in the set match well.

Next up I joint one wide face and one edge, making them both flat and smooth and square to one another. I do the wide face first by laying the board on the bed of the jointer so the whirling knives in the bed remove just a little wood on each pass until that face is flattened. Then I flip that board up on edge and run the jointed face along the fence, allowing the knives to work the edge of the board.

This is Scrappy, he’s a black lab pup who owns the Preacher across the road from us. Normally my “girls”; Dolly and Zadie go out for a play-date with Scrappy in the early afternoon. It’s raining today and they chose to stay inside and snooze in the office, so he came looking for them. Sorry Scrappy, They’re feeling wimpy today.

The next step is to cut the blanks into ribbons. I do this at the table saw with a thin-kerf rip blade installed and the fence set to 5/16”. This will give me 1/16” of extra thickness that can be removed to smooth the panels after glue-up. That’s not a lot, so I have to be careful how I cut the ribbons and get them good and even.

I mark each blank before cutting it, then keep the ribbons oriented as I cut them off so that grain patterns remain consistent as they flow across a panel. The pencil marks help me get them back in order if I drop a bundle while moving them around. Not that I’d do anything like that mind you, but just in case.

Doing it this way takes quite a lot of time because each time I cut a strip, I have to walk around the table saw and take the strip off the back side, lay the strip in position on the side wing, walk back around front and cut another strip. Having someone on the back side of the saw taking off the strips cuts this process to about 1/5 the time.

OK, so that’s one blank done, 3 to go. Then I’ll finish off the day by writing and posting these notes for you and head home. Drop in again tomorrow as we make up ribbon panels.