Showing posts with label Bottle Stopper Rack. Show all posts

Thursday, January 27

Bottle Stopper Racks – Pegging

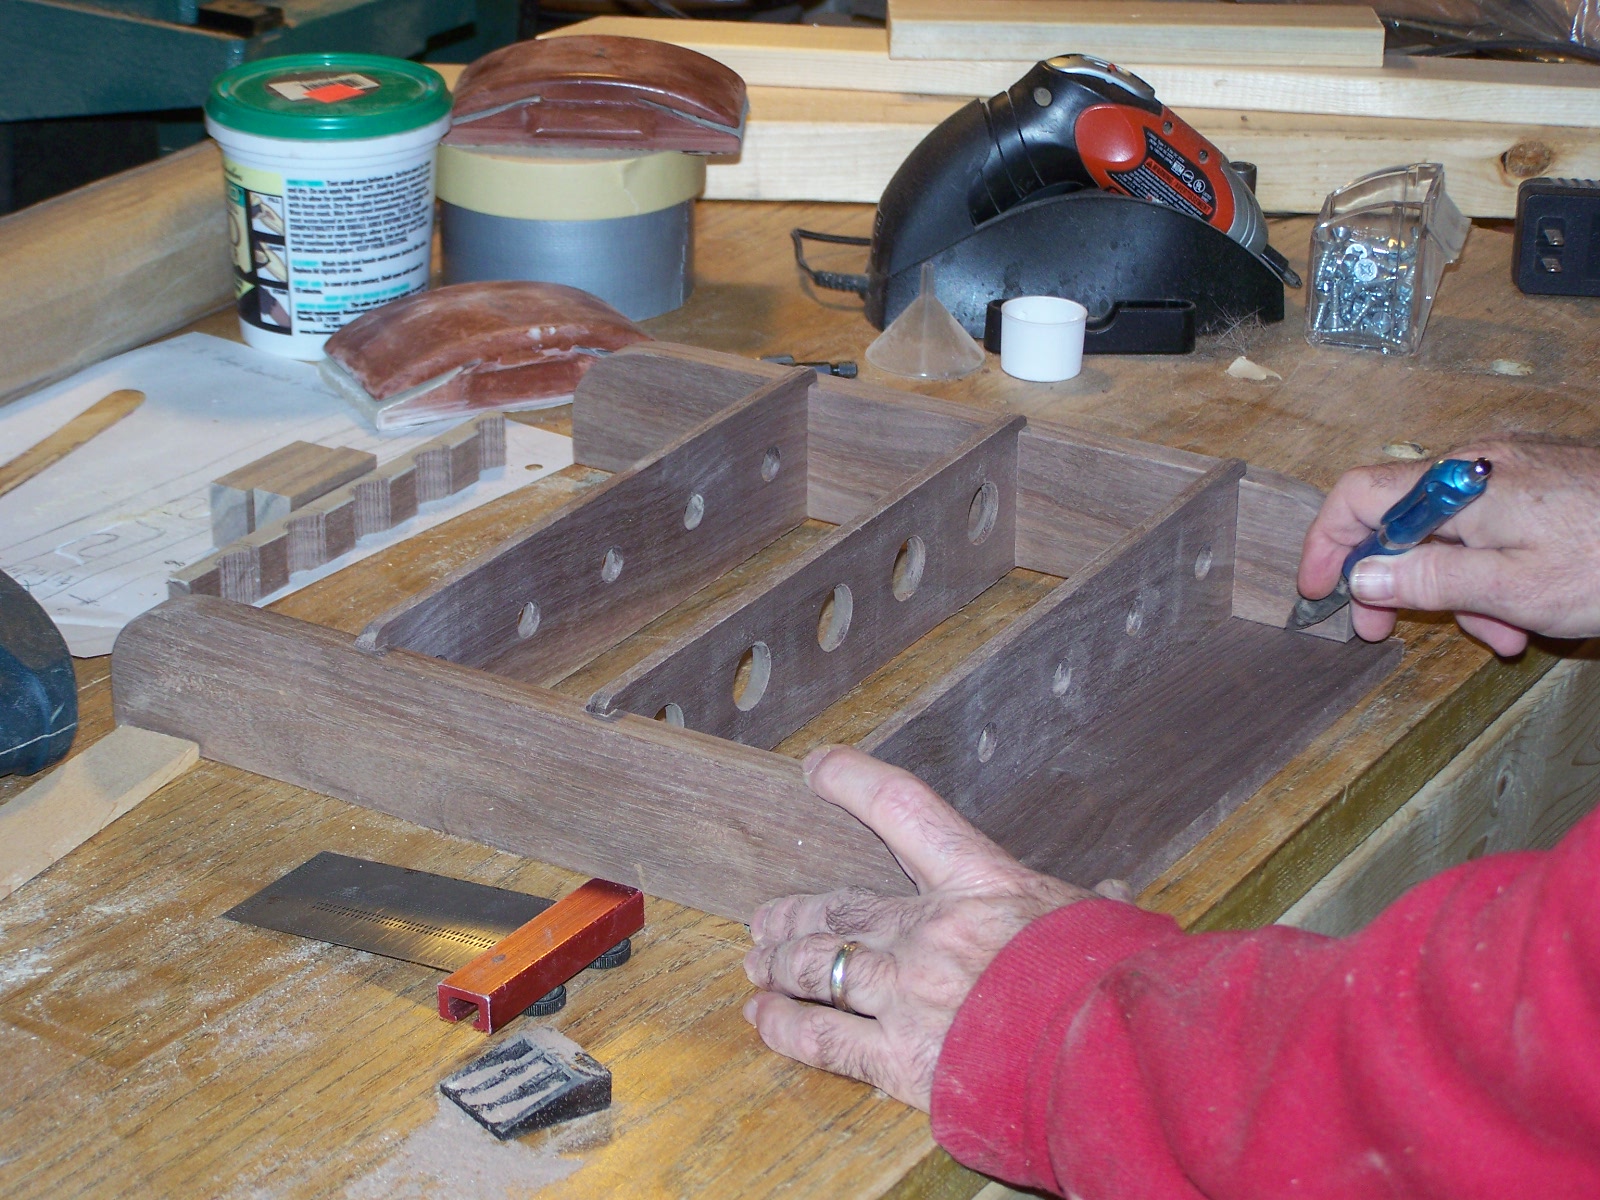
My task for today is to get the wooden pegs installed in the three stopper racks I’ve been building.  The first step is to put pieces of masking tape on the locations where I will be laying out the peg holes.  This reduces the amount of sanding that will be needed later to get the pencil marks off, but mostly it makes the pencil marks show up well on the walnut bases that are standard.

With the holes laid out I take the racks to the drill press and bore holes through the shelves into the side pieces.  After putting glue in the holes a short piece of dowel is pounded into the hole until the sound changes, indicating that it has hit bottom.  Then I use a flush cut saw to remove the excess dowel.  A flush cut saw has no “set” to the teeth so it can cut next to the shelf surface and not chew it up.  These pegs now help reinforce the rack’s structural integrity as well as adding a decorative touch.

When all the pegs are in for the first rack (Donna’s all red oak 3-tier) I sand it again to smooth the plug ends and take it into the finishing room for the first coat of lacquer.  Then I peg David K’s 4 tier Cherry & Maple rack, and finally Daniel’s 3-tier standard (walnut & maple) rack. This is the order in which these folks placed their orders.

With a little luck all three racks will be ready for pick-up by FedEx on Monday.

What We’re Building:

Utility Trailer Make-Over for David B. - In Progress, sort of
4 Tray Tables, all walnut (custom size) with stand for Shelly - Building Jigs
3-Tier Bottle Stopper Rack, all red oak for Donna – In Progress
4-Tier Bottle Stopper Rack cherry & maple for David K. – In Progress
3-Tier Bottle Stopper Rack (Standard) for Dan G.- In Progress
Kitchen organizer - Marie B.- Producing Design
4 TV Tray Tables and stand in maple for Jeffrey P.
Computer Desk for Laptop for Marie B.
Printer Cabinet for Marie B.

Wednesday, January 26

Bottle Stopper Racks – Shelves

Today I will make and attach the shelves to the bodies I built yesterday. I start by sorting the shelf parts. I made extra blanks that I will tuck away for use on other racks, so I can sort though them and pick those that match up best and group them into sets for each of the bases.

I determine orientation (which face to go up which edge is front) and bundle the shelf blanks into sets of 4 using masking tape. I use my template to mark the bundles for center points of each stopper hole and radius on the front corners.

The I set up the drill press with a Forstner bit, stop fence and bottom board. The fence insures the holes all line up properly and keeps the bundle from whirling around and smashing my fingers should the bit catch or I lose my grip. The bottom board allows me to bore all the way through the bundle without tearing up my bit on the cast iron table. Both of these are just pieces of scrap wood.

With the holes bored, I remove the tape to separate the shelves – keeping them sorted into bundles. Then I set up the router table with a round-over bit which I will use to ease the edges of the holes and the ends and front of the shelves.

Now it’s time to sand everything: outsides of the bodies, both sides of the shelves and the retainer bar that goes in the back. I do all of this by hand with sanding blocks.

When the sanding is done I take all the parts into the assembly room and glue and clamp them together. I’ll let these set up overnight for maximum strength before I go on to the final step. We’ll get to that tomorrow.

See you then!

What We’re Building:


Utility Trailer Make-Over for David B. - In Progress, sort of
4 Tray Tables, all walnut (custom size) with stand for Shelly - Building Jigs
3-Tier Bottle Stopper Rack, all red oak for Donna – In Progress
4-Tier Bottle Stopper Rack cherry & maple for David K. – In Progress
3-Tier Bottle Stopper Rack (Standard) for Dan G.- In Progress
Kitchen organizer - Marie B.- Producing Design
4 TV Tray Tables and stand in maple for Jeffrey P.
Computer Desk for Laptop for Marie B.
Printer Cabinet for Marie B.

Monday, January 24

Bottle Stopper Racks – Making Parts

I’m sorry I didn’t get around to posting updates on this new project last week.  I’ll get you caught up now.

I’m building all three of the bottle stopper racks at once to take advantage of the efficiencies that can be had by making multiple parts at once. I should be building a few extras for on-hand stock, but that would slow the process down too much and these folks have been patient with me so far.

I start by getting out my template set and checking to be sure I have the materials and tools I’ll need on hand.  Then I mill all the material to rough dimensions by jointing one face and edge, surface planning the opposite face and ripping the blank to width by cutting away the remaining rough edge.

I resaw some 4/4 blanks to create thin stock for the shelves.  Because these have been jointed and planed I only need to surface the inner faces to remove the band saw marks and they are done.

Next I glue up the body blanks.  I like to cut the side and base from one piece of lumber so the grain pattern flows continuously down one side, across the base and up the other side.  I’m not sure that many people even notice this detail, but I do.  When the glue is set I surface plane the blank to finished thickness.
And sand them to 120 grit on the big, wide drum sander.

Then it’s time to cut the body blank into pieces. First I cut the blank to finished width in the table saw and true-up the ends of the blank.  Then set up a saddle block on the back-side of the rip fence and use that to set the length to be cut off to become the side pieces.  Then I use the miter gauge’s flip stop to trim any excess length from the base piece.

All my basic parts are available now.

The first fancy step is to strap the two ends of each rack together with masking tape – making sure I keep track of which face will be inside and which way is up – lay out the grid on both side and remove the waste on the bandsaw to form the stair-step shape of the rack sides.

Now I sand the *inside* faces only of the rack bases, the rack sides, and the baffle plates.  When done all these parts go into the assembly room.

Where I carefully apply glue, align all the parts and clamp them together until the glue sets up hard.  This is trickier that you might think when doing it by myself; I have (on this rack) 6 pieces to hold in perfect alignment as I insert the pieces and apply the clamps.  It takes a little while because I have to keep checking to be sure nothing moved.

That gets you caught up on this project.  Another few days and these should be ready to box and ship.

See you next time!


What We’re Building:

Utility Trailer Make-Over for David B. - In Progress, sort of
4 Tray Tables, all walnut (custom size) with stand for Shelly - Building Jigs
3-Tier Bottle Stopper Rack, all red oak for Donna – In Progress
4-Tier Bottle Stopper Rack cherry & maple for David K. – In Progress
3-Tier Bottle Stopper Rack (Standard) for Dan G.- In Progress
Kitchen organizer - Marie B.- Producing Design
4 TV Tray Tables and stand in maple for Jeffrey P.
Computer Desk for Laptop for Marie B.
Printer Cabinet for Marie B.

Wednesday, December 15

Stopper Rack - Done!

Today, woodworking buddies, I completed the 4 tier bottle stopper rack for Susan.  That is in the finishing room now being lacquered.  As soon as it is dry I’ll scuff it and shoot it one more time.  Then I can package it up before I go home and it will go out of here tomorrow.  Assuming FedEx can get up our mountain – we’re expecting freezing rain tonight and icy roads by morning.  For the body of this rack I found a board with some gorgeous flame pattern graining to it.  It's really pretty!  Click the picture for a closer look.

Jacklyn’s two table set of walnut tray tables is going well.  I rounded over the inside edge and grooved the rail stock this morning and worked on smoothing the ribbon panels this afternoon.  This evening I cut the leg blanks.  So far, so good.  I’m hoping to get them done and ready to ship on Monday.  It will mean long days and working all weekend, but I think it can be done as long as no more emergencies come up.

That’s all for today.  Back to making saw dust.


Still on the List:
4 Cherry Tray Tables with Stand for Tina - In Transit
2 Walnut Tray Tables with Stand for Jacklyn - In Progress
4-Tier Bottle Stopper Rack - Standard - In Progress
Cutting Board Holder - Marie B.
----- Christmas Delivery Cut-Off ------
Utility Trailer Make-Over for David B. - In Progress but Stalled
4 Tray Tables, All Walnut with stand for Shelly
Walnut Steamer Trunk for David B.
3-Tier Bottle Stopper Rack, all red Oak for Donna
4-Tier Bottle Stopper Rack Cherry & Maple for David K.
2 3-Tier Bottle Stopper Racks (Standard) for Dan - Pending Payment

REMINDER:  As of December 31st, 2010 Smoky Mountain Woodworks will discontinue accepting custom woodworking orders.  Orders received by that date will be completed, but new custom orders will not be accepted.

Tuesday, December 14

Christmas Rush - Home Stretch

Today’s activities, woodworking ones, included getting Tina’s TV Tray table set on the FedEx truck and on it’s way to her, then sanding Susan’s bottle stopper rack body the parts for which I made yesterday and glued together.  The shelves were on hand from a previous run, so all they needed was some sanding.  So I’m ahead of the game on that one.

Then I ripped out the ribbon strips for Jacklyn’s walnut tray table set and glued up the ribbon panels.  The backer boards are cut already.  And this evening I milled out the rail stock blanks.  Tomorrow I will finish making these parts and (hopefully) get the trays assembled.

I did some checking last night and found that there are a great many people having trouble with the Picasa photo handler that Google set up to handle photos in Blogger, so I am not alone.  One troubleshooter suggests that it is a conflict with Internet Explorer and other browsers don’t have the problem.  I’ll try it with Chrome (Google’s own browser) and see if it works.  If so, I’ll go back and install the photos for the past few episodes.

Looks like it worked!  See you tomorrow.

Thursday, October 21

Beginning the Finish

I spent the morning getting hooked up with another publisher: Triond.  They provide content to a couple of dozen E-Zines and Elana, a fellow writer on Hub Pages says they pay pretty well.  To set p an account, they required an original, publishable article, so I had to write one.  This was important because as woodworking has slowed to a crawl, I've been going back to my writer's roots.  And I've done pretty well  considering.  It just takes time to research and write good stuff, then more time for Google to find it and start sending readers my way.  The number of readers determines my pay rate.  Occasionally I get a magazine gig like Going Pro As a Woodworker for Wood News Magazine; a ten part series - that was fairly lucrative.  Most everything else is a little here and little there - write enough and it starts to add up.

This afternoon I'm applying lacquer to David P's bottle stopper rack.  It will take two coats, allowed to dry between than scuff sanded followed by a third and final coat.  When he final coat is dry I will attach the loop hangers and get it ready for packaging and shipment.

If all goes well, I'll get all of that done before I go home tonight so I can schedule a pick-up for tomorrow.

Wednesday, October 20

Stopper Rack Assembly

I start off today with mounting the router bit I’ll need for rounding over edges on the shelves.  Since it is a ¼” shank bit I need to install an adaptor into the chuck – the chuck is made to accept ½” shank bits – then install the bit and set the height.

I round-over the front upper edge and the upper edges of each hole on each shelf, then set he shelves aside for sanding in a little while.

But first I mount a 5/16” wide dado head on the table saw and tune it in for width and depth of cut on scrap wood.  Then I use the special jig to cut the dadoes in both side pieces.  This jig insures that not only are the shelves equally spaced, but the dadoes are square to the long edges (no twisted shelves) and that they are perfectly placed vertically to prevent slanted shelves.

The final piece to make is the stiffener apron under the bottom shelf.  I assemble the rack and take the width for the apron directly from the rack, then cut that part to length and finished width.

I slip the apron into a template jig and use a band saw to cut away most of the waste of the arch, then use the jig with a piloted straight bit in the router table to take the arch to finished size and shape.

Now comes the *really* fun part: sanding.

All the parts are hand sanded starting with 100 grit paper and working up to 220 grit paper.  This takes a while.

When all the sanding and inspecting is done, I break out the glue pot, a small artist brush and some clamps.  Carefully applying glue inside the joints, I assemble the rack, making sure all the parts line up along the back, and apply clamps.

I’ll let this assembly set overnight to be sure the glue sets up well.  I’ll spend the rest of the afternoon working on David B’s  trailer.

Tuesday, October 19

Rolling On

I dug out the template set for the wall hung stopper rack, enough walnut to make the project and reviewed David P.’s specifications.  His is a custom rack not only in the sense of it being all walnut, but also the number of shelves, the hole sizes and the height of the top “ears” are all to be made custom.  We can do all that with little fuss.  The only thing that gets messy (thus expensive) is if we are to change the spacing between the shelves.  The complicated looking device in the upper right of the photo is the jug that holds the side pieces as I cut the slots for the shelves into them.  It took me about a day to design and build that.  Changing the shelf spacing means building another jig set up for the different spacing, thus investing several hours at the shop rate.  Unless the new jig is expected to be used for other racks this cost gets billed back to the customer.

In searching out the parts I have on hand for Donald’s TV Tray Table, I found that the parts I have made up are for an all cherry table, not a classic.  “Oh, Rats!” thought I.  Then it occurred to me that when I  built our first pair of classic tables -- for photographic purposes -- one of them ended up in service in our living room as an end table.  Where did the other go?  I found it tucked away safe and snug in storage.  I’ll crawl up into the loft of the lumber shed this afternoon and get out one of the custom boxes we had made up for shipping these tray table sets.  Of course, Don only wants one table, so I’ll cut the box down some to reduce the unneeded bulk (and lower shipping costs a little).

I’ll go ahead and package Donald’s table – just to insure it doesn’t get banged up lounging around in the workshop – but will wait to ship until both pieces are ready – FedEx charges us a fee every time they must come up the mountain to our shop for a pick-up.  That should be before week’s end.

Then I will turn to the 12” x 18” x 4” memory box that Brian O needs and of course, back to David B’s trailer.

By Day's End

I have the table securely packaged and ready to ship.  I have not run the label yet because the software expects the package to be picked up by the next day and when it's not it starts popping shipping exception reports.  Besides, it will send Donald a notice that his order has been shipped - and it hasn't.  Not really.

I also got the parts for the stopper rack roughed out.  I was a little concerned about being able to use a router bit to round over the upper edges of the holes - my usual bit for that has a 3/4" diameter guide bearing and the smaller holes are only 1/2" diameter.  That won't work.  But I scrounged around in a drawer of old 1/4" shank bits and found a bit with a 1/2" diameter bearing and about the right radius of round-over.  I'll use that and everything will be just hunky-dory.

Time to clean up and head for home.

Thursday, April 17

This morning I attached the loop hangers to Philip’s Wall Hung Bottle Stopper Rack and packaged it for shipment. It will go out on today’s UPS truck. Today we’ll be working on Step 3 and Step 4 of our Over the Sink Cutting Boards. Step 3 is gluing the strips we cut yesterday into a board blank, Step 4 is surface planing the halves of each blank to smooth them and bring them to finished thickness and gluing the halves together into a full board, which we then trim to finished size and shape. Click those links to view the details, or Click Here to start the story at the beginning. Because I'm working on two boards for two orders, they are each in a slightly different stage of construction. Blogger is crashing when I try to post photos again so, please go to the web pages to see them. Sorry... it just does this sometimes. See you tomorrow! Doug

Wednesday, April 16

Karen’s two tier bottle stopper rack got packaged up and shipped today.

Phillip’s oak Wall Hung Stopper Rack got finish sanded and lacquered. In the morning I’ll attach the loop hangers and package it up for shipment.

The rest of the day was spent working on the two Over Sink Cutting Boards. Today I milled out the strips of maple that will become two cutting boards.

CLICK HERE to view the full details of this days cutting board activities.

See you tomorrow!

Doug

Tuesday, April 15

Today I didn’t do anything with Warren’s Nanny Rocker except to move it out of the finishing room and onto a table in the assembly room. The rocker itself is done, I’m just waiting on the bedding. We’re waiting for the mattress Marie ordered to arrive so she can make the fitted sheet and mattress pad.

I completed Karen’s two tier bottle stopper rack by installing the wooden pegs. Once they were all in I sanded the whole rack and shot it with two good coats of semi-gloss lacquer, scuffed between coats. This photo was taken right after scuffing. This order is now done and ready to be packed up and shipped once the lacquer hardens well and the silicone “feet” are applied. I’ve found that the feet tend to fall off in shipping if I apply them too soon. It appears that solvents evaporating out of the lacquer even after it’s dry to the touch soften the adhesive backing on the feet and cause them to come loose. By giving it a few hours extra the problem is completely averted.

I also milled out and assembled the parts for Phillip’s oak Wall Hung Stopper Rack and it is currently in clamps for the night. I’ll sand and finish it tomorrow.
To finish out the afternoon I surface planed the maple I will be needing for the two Over Sink Cutting Boards that are next on the agenda.

See you tomorrow!

Doug

Monday, April 14

Monday

Most of the day was spent lacquering the Nanny Rocker for Warren’s daughter. CLICK HERE to view all the details of today’s Nanny Rocker activity.

While waiting for each coat of lacquer to dry I used the time to mill out the parts for and assemble Karen’s two tier bottle stopper rack . Once the glue sets up good and hard I’ll lay-out and drill the holes for the wooden pegs that add a decorative touch as well as reinforcing the joints. There are no nails or screws in this piece. That will get done tomorrow.

Catherine’s bag handles were packaged up this morning and have been turned over to Willis, our UPS driver. They’re going to California, so they’ll take a few days to make the trip.

Hope you had a very pleasant day,

Doug

Thursday, January 3

Catching Up

During the morning session I removed the clamps from Jim’s stopper rack, sanded it again to remove any marks the clamps may have left and installed the hanger loops.

Jim ordered this rack unfinished so he could paint it to match their décor. When we leave a piece unfinished, we stop working on it after the construction sanding (80 & 100 grit papers) and we credit back to our customer the amount that was billed by the shopping cart for finish sanding and applying the finish.

Depending on the finish you will be applying, Jim, you may need to sand it first with the finer grits reserved for finish sanding; 120, 150, 180 & 220. But for a paint, 100 may be fine, check your pain't instructions.

Then I boxed up the rack, ran a shipping label through UPS via our bookkeeping software and set the box out on the dock.

Lunch time!

After lunch I got started again on Mike’s cane/walking stick. Technically, this is a walking stick because it has a knob top, not a handle. Mike was good enough to allow us to set his order aside to work on these others since he was not in a tremendous hurry to get it; he has been learning to walk again after an accident which involved a motorcycle, a truck and Mike being hurled through the air over the trucks hood. He has progressed from wheel chair to walker to what he called an aluminum aircraft strut, and now feels he’s ready to get about with just a walking stick to steady himself.

I stopped working on it a while back because I needed to search out a larger tool rest for my lathe. The rest that came with the lathe (the black one - left) is only about 6” wide. That is enough for the kind of turning I have done in the past, I just kept moving the rest as I progressed across a piece, turning the beads and coves and what have you as I went. But this stick requires a long, very slight taper – just 1/8” difference in diameter from one end to the other. That is just 1/32” taper for every 8” of length. Getting a smooth taper over that kind of length requires a tool rest long enough to slide the tool a fair distance, so I ordered the longest one that would fit my lathe: 10” (the silver one - right). It woks very well and I like the tubular design much better than the original rest, which is soft iron and tends to be nicked by the corners of the tools and need to be filed smooth again periodically. With the added width I can now fair out about 1/3 of the sticks length at a time. Much better.

After mounting the stick between the drive spur and tail stock bearing, I mounted my steady-rest – that black thing about half way along the stick. It has two bearings on an arm below the work and one on an arm above, by placing the wheeled supports so they just touch the work I can prevent (or at least greatly reduce) the sticks’ tendency to “whip” as I turn it. Long thin spindles like this tend to flex, especially when a cutting tool is put to them. This flexing as they spin at around 2900 RPM causes, at best, a ridgey surface on the wood like that if a length of twisted rope, and at worse the spindle to break and come flying off the lathe at me. Which is very scary, so I try to avoid that!

Once it’s properly supported, I lay out the location for 5 sizing cuts; one at the base of the top ferrule, one at the upper edge of the lower brass tip and three more equally spaced between them. Diameter at the top ferrule is 31/32”, and 27/32 at the lip of the lower tip, that means that each cut will be 1/32 smaller than the previous one as I go from top to bottom. I use a pair of machinists calipers and a parting tool to cut these narrow grooves at each position, then remove the waste between each groove with a fingernail gouge. I finish up by smoothing the shaft with a skew chisel followed by 60, 80, 150 and 180 grit sand papers. The final sanding is done by hand (lathe off) and with the grain (lengthwise).

Now it’s time to fit the ferrules to the ends of the shaft. The foot of the cane consists of a tapered brass cap, a threaded connector and a rubber tip. I taper the end of the shaft to match the taper inside the cap, then drill a ¼” hole in the end of the shaft with a drill bit in a stationary chuck mounted to the tail stock. Unlike most applications where the bit turns and the work is held steady, here the work is spun by the lathe and the bit in it’s chuck remains still as I feed it into the end of the shaft with the tail stock. The knob ferrule is not tapered, so it’s a little easier to get right quickly. Both the ferrule and the cap will be attached to the shaft with Epoxy. The threaded connector will also be glued into its hole and the tip can be threaded off for occasional replacement of the rubber tip. I’ll include one spare tip with the stick when I ship it.

And that is going to do it for today. Tomorrow I’ll begin finishing the stick with antique oil. That will take a couple of days at least; depending on how many coats it takes to get the proper finish.

Next up: Gary’s cradles. I’ll be pulling lumber for those tomorrow. I should have done it yesterday, but we awoke to find it had snowed, and moving 10 foot long, snow covered, tin sheets around in 20 something degree weather is something I’d rather avoid. We’re supposed to be back up near 60° this weekend; I’ll just hold off for a day or two and find other things to work on in the mean time.

Doug

Monday, December 31

Rack ‘Em Up

Being Monday I spent the morning doing bookkeeping chores, being month end AND year end, I came in at 5:00 this morning to get some extra time to work on these things.

After lunch I got going again on Jim’s Wall Hung Stopper Rack. I still needed to make and sand the side pieces, fit the shelves I made earlier into them and make the apron.

Once all that was done I took the parts into the assembly room and assembled them. They are there now, hidden under a collection of clamps that will remain in place overnight.

Once they come off I’ll sand the rack again to remove and clamp marks, install the hangers and ship it off. Jim want’s to paint his rack to match their room décor so it’s going out unfinished.

Tomorrow is New Years Day and the Smoky Mountain Woodworks workshop will be closed. The web site will be open to serve you.

Thanks for stopping in, see you next year!

Doug

Wednesday, December 12

Multi-Tasking

Among today’s accomplishments was to get the final half-panels glued up for Scotts tables and Cheryl’s tables. Over the next few days I will continue to glue up panels for the oak tables and the cherry tables.

Today I also sliced up a couple of sheets of 1/8” Baltic Birch plywood for use as the backer panels in the Tray Tables. These panels are the backbone of these tables, so they need to be exactly the right size and perfectly square. I broke out the big crosscut sled, my best tape measure and kept the pencil sharp. All went well, only one of the dozen panels came out askew and that only by 1/32 of an inch; but I trashed it anyway. We’ll use that piece for something else.

I also built Kathy’s stopper rack and Karen’s stopper rack, and finished a pair of bag handles for Sandra. Later in the day I packaged the handles up and shipped them out.

And that consumed yet another long day. These 5:00 am to 9:00 pm days are beginning to wear on me. I’ll be glad when we get past the “gotta have it by Christmas” orders and I can go back to a normal workday once again.

See you tomorrow,
Doug

Monday, November 5

Slow Going

My plan for the day was to spend part of the morning finishing the stopper racks, cutting the splined miters in Mark’s Urn then assembling the sides of that project. I’m finding that Honey Locust does not glue well… by that I mean that I can not do as I often do and glue something up, give it an hour to tack up then continue working on it. Locust is so hard and dense that joints must stay clamped for the full duration to achieve a good bond.


I started by lacquering Rafik’s stopper rack and the locust curio shelf I made. When dry, I attached the loop hangers with #4 brass screws. Then I packaged Rafik’s rack and processed the shipping label and customs papers so it can travel to Australia. The curio shelf went on the web site as an On-Hand item.

Then I cut the splined miters that will lock the corners of Mark’s burial urn (box) together, cut the splines, got all the toys I'll need for this ready and glued the whole thing up, holding it together with 3 band clamps. The middle band uses a set of home-made gadgets that use short pieces of dowels and masking tape under the band clamp to put pressure on the corners to help hold them tightly together. The band clamp alone would not do this, the clamps at each end of the box use metal fittings that do the same thing. I also clamped a pair of corner squares into the box to hold it square while the glue dries.

Then I was going to get back to working on the steamer trunks. Really, I was! But that was not to be: A couple of purchases for on-hand items came in, so these needed to be packaged up, payments processed and the shipping labels generated. Then there was the tree.

There is a large old oak tree about 50 feet in front of my workshop that died. Don’t know why, it just never came back to life last spring. Electric lines run to either side of it, the workshop is up hill of it and Joy & Pat’s house is down hill of it. Should it decide to topple over in a winter storm, it’s going to damage something important. So we’ve been looking at options. One of those options stepped up and demanded my attention this afternoon.

What can I say… these things happen.

Hopefully tomorrow will be more productive.

Doug

Friday, November 2

Making Stopper Racks

It was my plan to spend today fitting case parts for the steamer trunks, but it was brought to my attention that month end just crept up on us and there is a need to finish a couple of small projects – today if possible. So I’ll be working on those today.

I started off with Mark’s cremation urn. Well, it’s not for Mark, it’s for Marks Grandmother. Seems she saw born and raised here in the Smoky Mountains, she lived about 6 miles from this very spot. She left as a young woman and went to Massachusetts where she married, had a family and lived a long life. But her heart always belonged to the Smoky Mountains. Grandmother died recently, was cremated and her family wished they could bury her back in her ancestral homeland, but that just isn’t possible. So they thought of interning her ashes in a box made of wood from her beloved mountains.

They contacted a number of woodworkers, but none were able to accommodate their wishes. Finally an internet search brought them to Smoky Mountain Woodworks. They presented their wishes and we agreed to build them a wooden urn for Grandmother, and use locally harvested wood. We decided on some locust I have on hand. Locust is a favored wood for farmers and homesteaders because of it’s longevity. We’ll give a shellac finish and use no metal hardware so that the entire box will be biodegradable.

So, I start off by milling the rabbets that will house the box bottom and lid into a plank made up the other day. I set-up the saw fence carefully, I dare not mess up; I’ve got only the one plank to work with. The first cuts are made with the plank laying flat on the saw table. Then I install my “tall fence” to lend additional stability as I flip the plank up on edge to complete the rabbets. When done I have a pair of recesses where the other parts will fit into the edges of the box.

Now it’s time to set up for the mitered edges. I never trust the angle gauge on the table saw, so I set the angle with a large plastic artists triangle and cut a test piece from a thick piece of scrap stock. Using an engineers square I test the angle. If it’s not right I adjust the angle and test it again. When it’s dead-on square I’m ready to cut the box sides.

The goal here is to cut the pieces sequentially from the plank so the dramatic graining flows smoothly around the corners of the box. That means the saw kerfs between each piece must be kept as thin as possible – again, each cut must me right the first time through; no do-overs here.

Once the four sides are cut out I fit the parts together to see how I did – looks good. That completes my morning shift.

After lunch I got going on the stopper racks again. The parts blanks for these were cut and trimmed over the past couple of days. First up: I stack five shelf blanks, square them and bind them securely with wide masking tape. This will hold the pack in position and keep them from shifting.

Then I use the lay-out template to mark the centers locations of the 5 holes. And bore the holes with a drill press, round the front corners with a stationary belt sander, and pull the tape off to separate the shelves. By boring the holes and rounding the corners as a group I save time and insure uniformity over handling each shelf individually.

This jewel is the sled I built to cut the dadoes in the side pieces so they are perfectly square and evenly spaced. It has runners underneath that slide in the miter slots of the saw, a dado head is installed on the saw to cut each dado in a single pass. After the first cut I slide the side piece down and hook the dado I just cut over the key in the sled and cut the second dado, slide it down again and cut the third, repeat until all five are done. The result is a set of side pieces with the recesses that hold the shelves perfectly milled.

The next step is to round over the front edge and the insides of the holes for each shelf using the router table. Then I break out the sandpaper and make all the parts pretty and smooth. I also test fit the parts. If they’re too tight I sand a little more: don’t want to crack anything.

At the end of the day Rafik’s shelf is done, as is a prototype of a knick-knack shelf based on the stopper rack design and made of Honey Locust cut-offs from Grandmother’s Urn. The urn is not done yet but I’m out of time. I’ll work on that some more this weekend.

See you Monday,
Doug