Thursday, March 31

Tray Tables - Walnut Stand

This morning I finished making the parts for Shelly's stand, sanded them, and assemled the stand.  I'll take my lunch break while the glue sets up and begin the finish sanding this afternoon.

Finish sanding requires sanding everything carefully by hand with 150 and 180 grit papers.  When that's done I'll vacuum and tack rag all 10 pieces and prepare for shooting lacquer.

I will lacquer both sets of tables at the same time.

Wednesday, March 30

Tray tables - Maple Construction Done

I completed construction of the maple tray table set by attaching the arms and plugging the screw holes in the stand.  I would have gotten this done yesterday but we had a funeral to go to.

Here you can see, Jeff, that I did indeed remember to recess the handle.  Normally the posts cone up high enough to support the upper edge of the trays and the handle sticks up above that for easy access.  But due to a special use Jeff has planned (cat roost) he wanted the handle to be lowered so it is roughly level with the top of the trays.  Mission accomplished.

And this is how the set looks all nested together.  All that remains now is a ton of hand sanding and the lacquering.  But I'll spend the rest of this afternoon milling wood and designing parts for Shelly's walnut tables. 

Because her tables are considerably larger than normal, The standhas to be custom fitted to the tables.  Their size has created a number of problems.  One is that when these tables are finished and ready to ship, Jeff's will pop right into one of the boxes we had made to ship them in.  Shelly's tables will require another approach.  I'll have to measure he bundle once it's packaged up and drive to the U_Haul store and see what they have that will fit.  I'll probably have to get a wardrobe box and cut it down.  It will definitely be into the grossly over sized (tier 3) category because the box we use for regular tables was designed to skate along just under the line.

Monday, March 28

Tray Tables - Assembling Tables

This being Monday, I spent the morning doing our weekly radio program, but then put in a long afternoon to get as much done as possible.

I started by sanding the leg mount blocks, pre-finishing their inner faces and installing them on the legs.

Than I sanded the latch blocks, doing the final shaping on the latch tabs.

Finally I glued the leg blocks and latch blocks to the undersides of the table trays, creating fully assembled tables. 

These are Shelly's oversized walnut tables.

Jeffrey's maple tables will remain in clamps all night to allow the glue to set up good and hard before I plug the screw holes. 

All that remains now is to assemble the stands and construction will be complete.

Friday, March 25

Tray Tables - Latch Blocks

Today's task looks simple enough, simpley turn these parts into latch blocks.  But this process involves milling steps that require the table saw, band saw, router table, and the drill press.  each must be set up for it's function, some perform two functions.  And there is a conisderable amount of detail fitting to get the joint between the latch and the block just perfect.  Therefore it took all afternoon to complete these 8 latch blocks.
Once the glue has set up some I'll sand them.  Then we can begin attaching bases to trays to make tables.
Thanks for stopping in!

Thursday, March 24

Tray Tables - Routing the Trays

Today's woodworking session allowed me to pull the clamps off of the walut trays and sand the corners.  This removes and lumpy bits that will cause problems in the next step.

The next step is to set up the router table with a round-over bit and round off the upper and lower outside edges of the trays.  This not only makes for a better looking tray but they feel great in your hand when you carry them.

All done


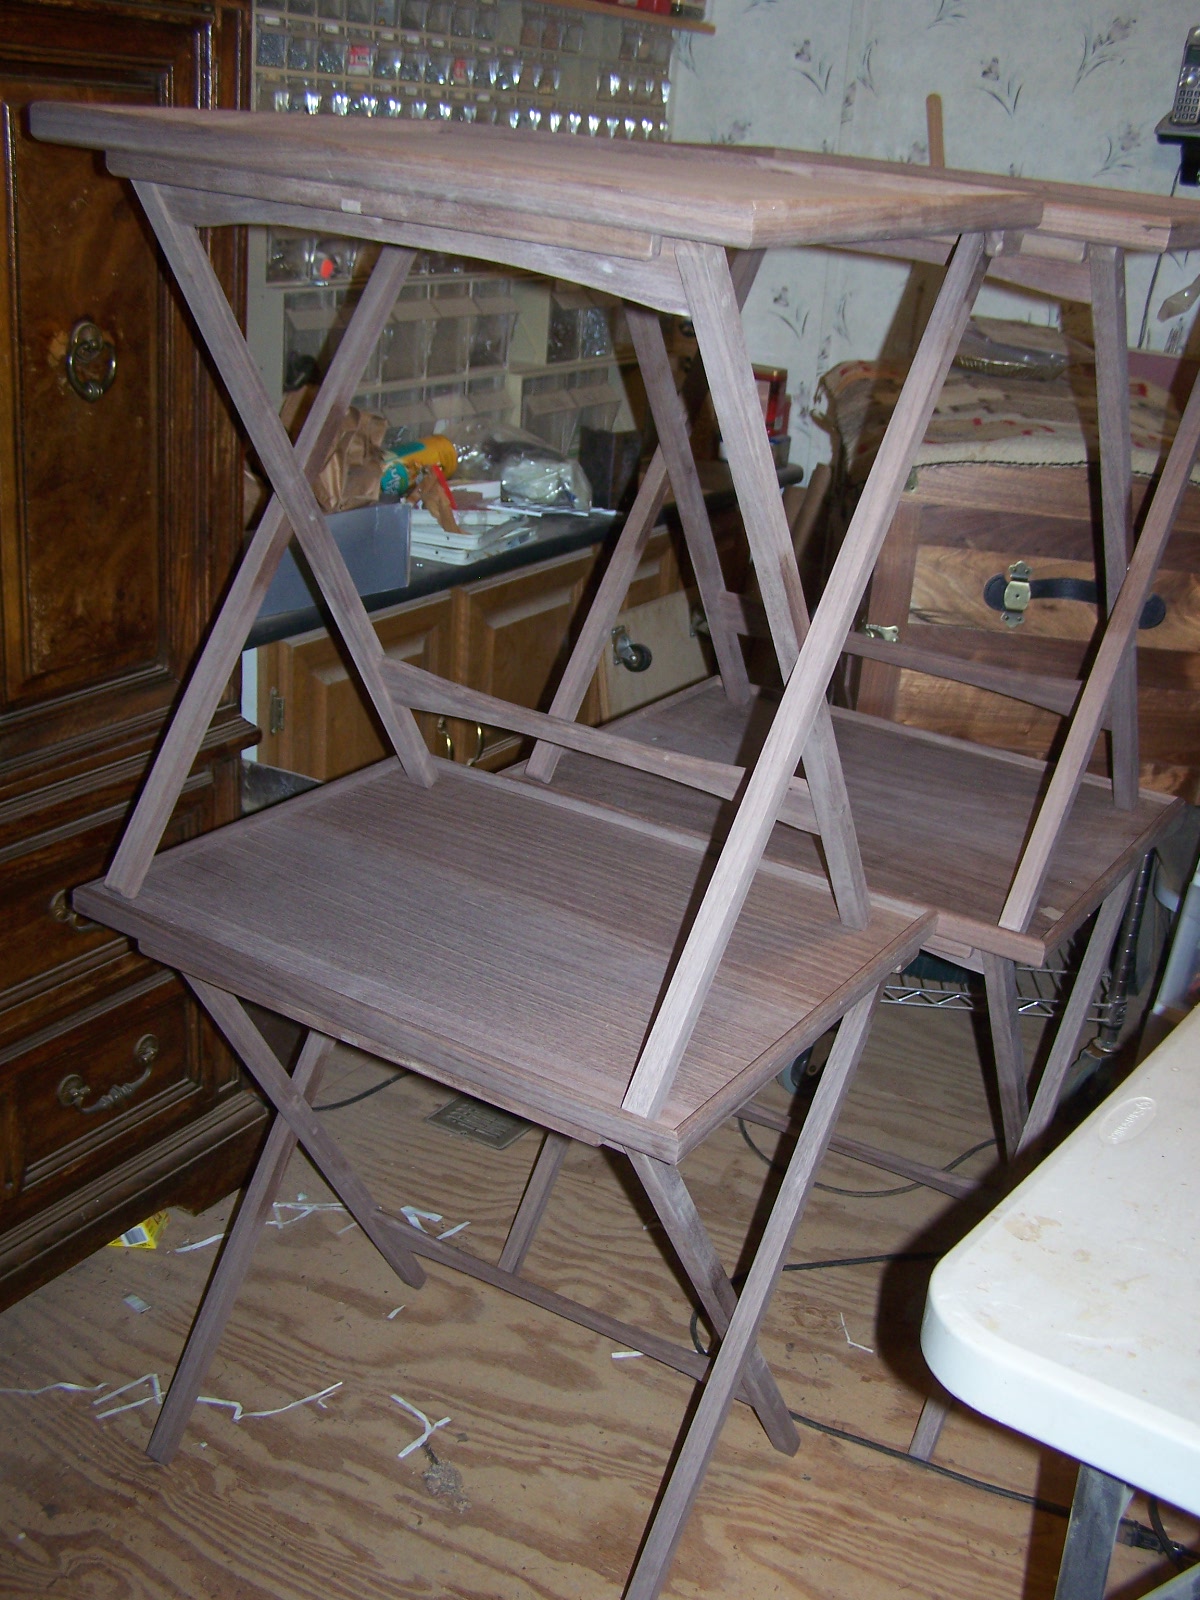
Do not ever do this!
 Next up is to make the leg mount blocks.  I've already cut the blocks to finished size, I just need to route the shape onto them.  But, handling small pieces like this with just my hands is a durn fool thing to do.
So instead I use a small wooden handscrew clamp to hold the pieces and route them safely.  It does take some extra time to get each of the 20 or so blocks gripped firmly in the clamp, but sacrificing the ends of a couple of fingers on the alter of haste would end up slowing me down even more.

I use a jig to mark the location of the screw pilot hole in each block, drill the piolt holes on the drill press and then I'm out of time again.

Tomorrow I'll make the final component for the tables and may get to start putting them together.

Thanks for stopping in!

Wednesday, March 23

Tray Tables - Assembling Tray

Today I will take the tray assemblies that I assembled last time apart, sand the inside faces of the rails, then work quickly to apply just enough glue to just the right places and get the rails back into just the right position so that the corners match up perfectly.  Then I apply clamps to hold the corners snugly together while the glue sets up hard.

By day's end I have the first round clamped, the other 4 will be done tomorrow: I have only enough of these big clamps to do one set at at time.

Thanks for looking in!

Monday, March 21

Tray Tables - Cutting Tray Rails

First I must apologize for the lack of progress; the sinus infection that had plagued me came back in full force.  I went home on Friday intending to take a short nap and awoke 5 hours later.  Normally I can not sleep in the day time at all.  I spent all weekend napping and resting.  Today I'm felling better, but will be glad when I get these tables done and can get away from the woodworking all together for a while.  It's breathing saw dust that causes the sinus trouble, and will undoubtedly lead to emphysema as well.

The tray panels have been assembled and trimmed to size.  The tray rail stock has been milled.  So now I set up to cut the rabbet on the bottom of the tray panels.  This is needed because we changed the design from using 1/8" Baltic Birch for the backer panel to using 1/4" cabinet grade Birch plywood when Katrina hit and the supply of most plywood dwindles and the prices skyrocketed.  This cabinet grade plywood is much more readily available tham Baltic Birch ply is.  To compensate for the extr thickness, i cut these rabbets. 

I start by fitting a piece of the milled rail stock to the edge of the panel and useing a fine point drafting pencil to mark the panel to indicare the amount of wood to be removed.  Then I use a depth gauge to measure this dimension and use the depth gauge to set up the blade on my table saw.
I make one test cut.  The final cut will be done in two passes, here I make just the first cut, and only part way along the panel edge.  Just enough to do a test fit.  Perfect!

Rather than moving the fence to make the two cuts, I set the fence and lock it in , then use a spacer shim on the first pass.  I can not use a stack dado here because the minimum width of the stacked set is too wide for this cut.  I could use a sacrificial fence and bury part of the blade in the fence to get the 3/16" width that I need, but by the time I install the dado head, cut a sacrificial fence, and mount it to my saw, I can be half-way done by using this method.
When I'm done I have a neat raddet around all four edges of the panels.

Next I set up the chop saw to cut the mitered edges on the tray rail stock.  The backer board is something I keep for easy set-up when I make these tables.  It serves to eliminate tear-out while cutting the miters, and is marked for precicely the right length of long and shore rails. 
This will work great for Jeffreys tables, but Shelly's are considerably larger, so my standard measurement go out the window and I break out the calculator to use relational fractions to determine what the proper lengths should be for those.  Then I'll cut another backer board and mark those dimensions on it. 
I'll cut a test set, fit them to the panel and see how they fit.  If adjustments are needed, make them.  When the fit is right, cut all the rest to the same dimensions.
As I cut rails I fit them to the panels.  I like to set the dimensions so the rails are about 1/16" too long.  I can trim the excess of easily, but have a little extra in case anything went amis in making the panels.

The day is done, and all eight table tops are cut and fitted,  Tomorrow I will prep them for gluing and begin assembling them into table tops.

Thanks for reading!

Wednesday, March 16

Tray Tables - Milling Rails

Today I will surface surface plane and sand the faces of the rail stock I cut last time, and trim it to finished width. In this photo the strips are standing up on edge, I will lay them down flat and smooth the wide faces.

Keeping the pieces together and properly oriented is vitally important if we are to acheive a "perimeter wrap" sometimes called a "box-makers wrap" which results in the grain pattern of the wood flowing around the tray in an uninterrupted pattern.  By using one very long strip to cut the rail pieces we can acheive three perfectly matched corners, but to get all four matched requires this box makers secret.  To explain that, I'm going to try a video...

So I spend some time tagging the rails with pieces of masking tape on the outside faces of each set identifying which pieces will the the front rail, right rail, back rail and left rail.

The final step will be to mill the groove on the inside face of the rails into which the panel will fit.  That is done with a dado head on the table saw.

I set up the table saw with a stacked dado head, I test the cut width and cut depth on some scrap wood and tune it in to perfection.  When it's ready I bring my tagged rails over and stack them all so the outside faces are up and teh bottoms of teh rails are on my right - which will be against the fence when I make the cuts.  By having them all properly positioned before I start milling them, I have less to fool with and can pay more attention to making he cuts properly.
I have a narrow push stick to feed the rail into the blade, a fixed feather board to keep the rail tight against the fence, and a hand held feather board to keep the rail held down tightly against the table saw top, insuring that the groove I cut will be a consistent depth.

The final step is to set up the router table with a small radius dound-over bit so I can round off the inside top edge of these rails stock.  Why just the inside-top edge?  Why now?  Why not wait until later or do all the edges now? Because the rail height above the panel - once it is installed will not be tall enough to run a router bit on teh inside edge without allowing the top of the router bit (that cap screw that holds the bearing in place) to damage the panel itself, so this edge must be done before assembly.  Doing the outside edges after the tray is assembled will make nicer looking corners: no misalignments.

I run all the strips through, using feather boards to insure a consistant cut, and when I'm done, I have enough rail stock made up and shaped to make 10 tray tables. I only need enough to make 8, but I like to have some extra just in case I mess up.  If I mis-cut a piece, and have no fall-back plan, I'd have to start from scratch amd mill out and shape another set of rail stock.  If I make no mistakes, I'll tuck the extra away and use it another time.
And that's going to do it for this session.  See you next time. 

Tuesday, March 15

Tray Tables - Rail Stock

Today I started by jointing the center edges of all the walnut half-panels - being mindful to keep them matched up and properly oriented.

Jointing the edge of the panels makes the edges that must join together straight, square and even.  Without this the center joint would be an ugly thing indeed!

Once the first two are done I take them in the next room, apply glue, and use clamps to hold the center joint snugly together while the glue dries.

When that one has had a chance for the glue to set up (a couple of hours) I remove it and glue up the next one.

Then I use a flush plane to remove the glue ridge at the joint and a random orbit sander to sand the area smooth.  I'll sand the rest of the panel after it's been trimmed to size, right now I just want it to lay flat and join effectively to the backer panel.  I will repeat this process through-out the day until all four walnut panels are completed.

While the glue sets up I joint one edge of the blank I prepared for the maple tray rails.  Then I rip one rail set blank off, joint the edge of the wide board again, rip off another rail set blank, until I have 5 strips for rail blanks.

I repeat the process on the walnut blanks.

Then I swap out the band (blade) on the band saw for a 1/2" resawing band and tune in the guides, install the resaw fence, and resaw all of the strips I just cut in half, again marking them to keep pairs together and properly oriented.  This is important.  In order to get the grain in the rails to flow around the table uninterrupted, cutting all the rails for a table from one piece of wood and cutting the rail parts sequentially is essential.

These are the sort of details that set a custom piece apart from mass produced.  Mass produced tables of this design - if any were to be made - would make rails up in bulk and glue them onto the table at random.  They would probably use the most bland, boring looking wood they could find for this to hide the fact that nothing matches up.

But my time for this evening is up and I must toddle on.  We'll pick this up again tomorrow.

Monday, March 14

Tray Tables: Backer Panels

Today I'll cut the backer panels for Jeffrey's tables and finish gluing up Shelly's half-panels.

I start by cutting a half-sheet of birch, cabinet grade plywood to rough size on the table saw.  First I rip the panel into two pieces 1/4" wider than the finished pieces will be.  The cut-off strip from the remaining edge goes in my scrap plywood cart: I use small pieces in making jigs and fixtures.

Then I mount the big sled on the saw and cut the two strips to rough length.  Now I go back and trim all the panels to finished width, but leave them at rough length.  We'll cut them to length later.

I use a sanding block with 100 grit paper to knock the fuzzy bits off of the edges.  I do this not to pretty it up as no one will see it, but to prevent those fuzzy bit from getting between the parts and making them fit too tight in the slot - or not fit at all.  It's much easier to sand them off now than after the panel assembly is together and problems develop.

The next step is to apply glue to the backer panel and the ribbon panel - but just down the center - and join them together.  I center the ribbon panel on the backer: there should be a 1/16" difference in width on each side between backer and ribbon panel.  This provides expansion room for the solid wood ribbon panel.  I use clamps and weight to press the panels together while the glue dries hard.

The final step is to cut these assemblies to finished length, sand everything smooth, and pre-finish the edges of the ribbon panel so slivers of raw rood do not show if the panel shrinks up after assembly.

Now, on to making the rail stock.

Thursday, March 10

Tray Tables - Smoothing Panels

Today I spent a little time playing hydro-engineer; trying to re-route rain run-off so it doesn't wash out our workshop driveway again, I have someone coming to pick up a cradle this afternoon and she will be needing that driveway.

Once I got to the woodworking portion of my day I started by taking the two walnut half-panels that I glued up last night out of the clamps and stripped the bindings off.  Then I glued up another pair.

Then I arranged ribbons so I was happy with them and bound up the other four half-panels so they are ready for gluing.  I would have had time to glue up another set this afternoon except the set I just glued had become a but unruly due to the changing humidity, so I want to let them stay in the clamps long enough for the glue to set up well; if I take the clamps off too soon a joint or two may pop open.

With those done I set about the task of smoothing and thicknessing Jeffrey's ribbon panels.  First I trimmed them to the proper width; as you can see the panels just BARELY fit through our big planer.  The design was done to allow them to be surfaced in one pass.  Shelly's tables are too big for this, so those panels are back to being done as halves that will be joined together in an extra step later.

By the end of the day I have 5 maple panels and the first two walnut half-panels  done.  They are much prettier once they are all smoothed out, aren't they?

I'll set these aside for the night and pick it up again tomorrow, when I'll address backer panels.

See you then!

Wednesday, March 9

Tray Tables - Gluing Walnut Panels

First, yes; the foot is doing better, thank you all for your concern.  Yesterday the reds, purples and blues peaked in their vibrance, it was quite a sight!  This morning they are all beginning to fade, indicating that some real healing is now taking place.

Today's task has been to glue up walnut ribbon panels; or rather half-panels because these ones are so big they won't fit through the surface planer as whole panels.

By using two sets of clamps I ams still gluing up a whole pannel per session, but I must move the first one off the table to make room for the second.  I can get away with this on narrower panels like this, trying to move a wide panel  single handedly sometimes has disasterous results, so I prefer to leave them laying flat to dry.

We had a major wind storm roll through this afternoon.  Really high winds can get scary here with all the trees graoning and knocking together like a martial arts festival.  The wind roaring through the rees ar the ridge of the mountain sound like a freight train.  The weind blew the covers off of two lumber stacks - throwing the concrete block that were supposed to hold them down over TWO other lumber stacks (4 feet wide each with 2 feet between each of the three stacks involved) and they landed just a couple of feet from the back of my shop.  That is some serious wind!

It has died nown now and I have to go out to put the covers back in place before the rain starts and soaks those stacks of lumber.

Thanks for dropping in!

Tuesday, March 8

Tray Tables - Ribbon Panels; still gluing

I spent the day gluing and clamping maple ribbon panels and binding up walnut ribbon panels.  Four of the maple are done, the fifth is in clamps now.  Fifth?  Yes, I make up an extra just in case anything happens to one.  If nothing happens, I'll have an extra panel to use in something else.  Usually I would just use it in teh next set of table I build, but since this is a non-standard wood I'll find something else to do with it.

While glue was tacking up I tackled other chores and unloaded two more truck loads of lumber.  All in all it was a good day.

Monday, March 7

Tray Tables - Gluing Ribbon Panels

Today is Monday… even though Blogger probably won’t announce this posting until tomorrow sometime; this work was done and chronicled on Monday.

But first, let me hark back to last Friday when I was unloading three truck loads of lumber.  It was the last load for the day, it was  getting late, and it was getting dark, and we were hurrying.  This is what happens when you hurry too much and drop a load of lumber on your foot.

No, I was not barefoot at the time.  Yes it hurts.  No I don’t think anything is broken.

I am grateful that it happened late on Friday so I had all weekend to get better.  And, this is Monday; I always do our weekly radio program on Monday morning, so I didn’t have to be up on my sore foot until after lunch.

Today I continued ripping ribbon strips; I ripped walnut today, and began gluing the maple ribbon strips together into panels.  This handy little jig holds the bound panel so I can get glue into each of the joints quickly, yet allows the glued part to lay flat (joints closed) so the glue does not dry out too fast.

Then I lay the glued panel on a set of clamps, make sure the surface of all the strips is as level as I can get them all the way across the panel and apply moderate clamping pressure.  This panel will need to sit for a couple of hours for the glue to tack up, then I’ll glue-up another.  I’ll keep going until all 8 panels are done.

Well, except that Shelly’s oversize tables will not fit through my 15” planer, so I’ll have to glue up her table panels as halves, then surface them and join the center joint,, then hand sand the center joint.  This will take 3 times as long as regular table panels, so I’m doing the maple first.

This is how I occupied my woodworking time today.  See you next time!

Friday, March 4

Tray Tables - Cutting Ribbon Strips

Today I split my time between unloading not one, not two, but THREE truck loads of lumber and cutting about a million ribbon strips that will become the tray panels in these tray tables I'm making in this shot I have the maple strips cut for Jeffrey's tables, now it's on to the walnut strips for Shelly's table. 

Then I'm going home for a long HOT shower and a back rub.

Thursday, March 3

Tray Tables - Ribbons & Rails: blanks

This afternoon I spent my woodworking time selecting wood for the ribbon panels and the side rails for Shelly's walnut tables and Jeffrey's maple tables.  Because these parts will be the most highly visible parts I want to be sure they are especially visually pleasing, and because all the parts are thin, I want the best, long, straight-grained wood I have on hand. 

Laying out my cuts I cut the blanks from the long boards and stack them on my bench near the jointer.  I'll finish this step by jointing one wide face and one edge, then surface planing the opposite face.  Next time I'll begin cutting ribbon strips.

Wednesday, March 2

Tray Tables - Assembling the bases

Today I completed the sanding and assembly of all the bases for both sets of tables.  After the sanding was all done, I attached the spreaders to the legs this extra long screws.  The long screw are because the srew are going into end grain on the spreaders and end grain tends to tear out more easily. To fight this tenancy I use deeply fluted wood screws that are extra long to reach deep into the wood and hold fast.

By day’s end all the bases are done and I’m ready to star making the trays.  We’ll get to that next time.

Well, I have pictures for you, but Blogger/Picasa is again telling me they can not upload the photos.  I'll try again tomorrow.