Showing posts with label Grandfather Clock Case. Show all posts

Wednesday, May 5

Done!

I know there are a fair number of people who have been following this project with great interest, so it’s only fair to post the pictures of the clock with it’s insides inside and the fancy glass in the doors. Unfortunately, neither the lighting nor the camera angles were very good. The clock now lives on a stairway landing. Going up the stairs far enough to get the whole 7½ foot tall clock into the frame creates an odd down-angle look, shooting from the base of the steps gets the hand rail on the picture. But, this is what it looks like – at least as best as I can show you. And so, we are finally done with this project. The fellow who asked for an estimate on a CD End Table responded: it’s more money than he wanted to spend. We're hearing that alot lately. See the post entitled The Fat Lady Sings. So, we’re done here for a while. Live long and prosper. \\ //

Tuesday, May 4

Hauling Glass

On Monday I spent the morning producing the weekly radio program -- or trying to; there was a plumbing emergency at Mom’s house that required my attention so I didn’t get started on the radio program until about 11:00 and spent the early afternoon on that. Then I got a bid request on a 
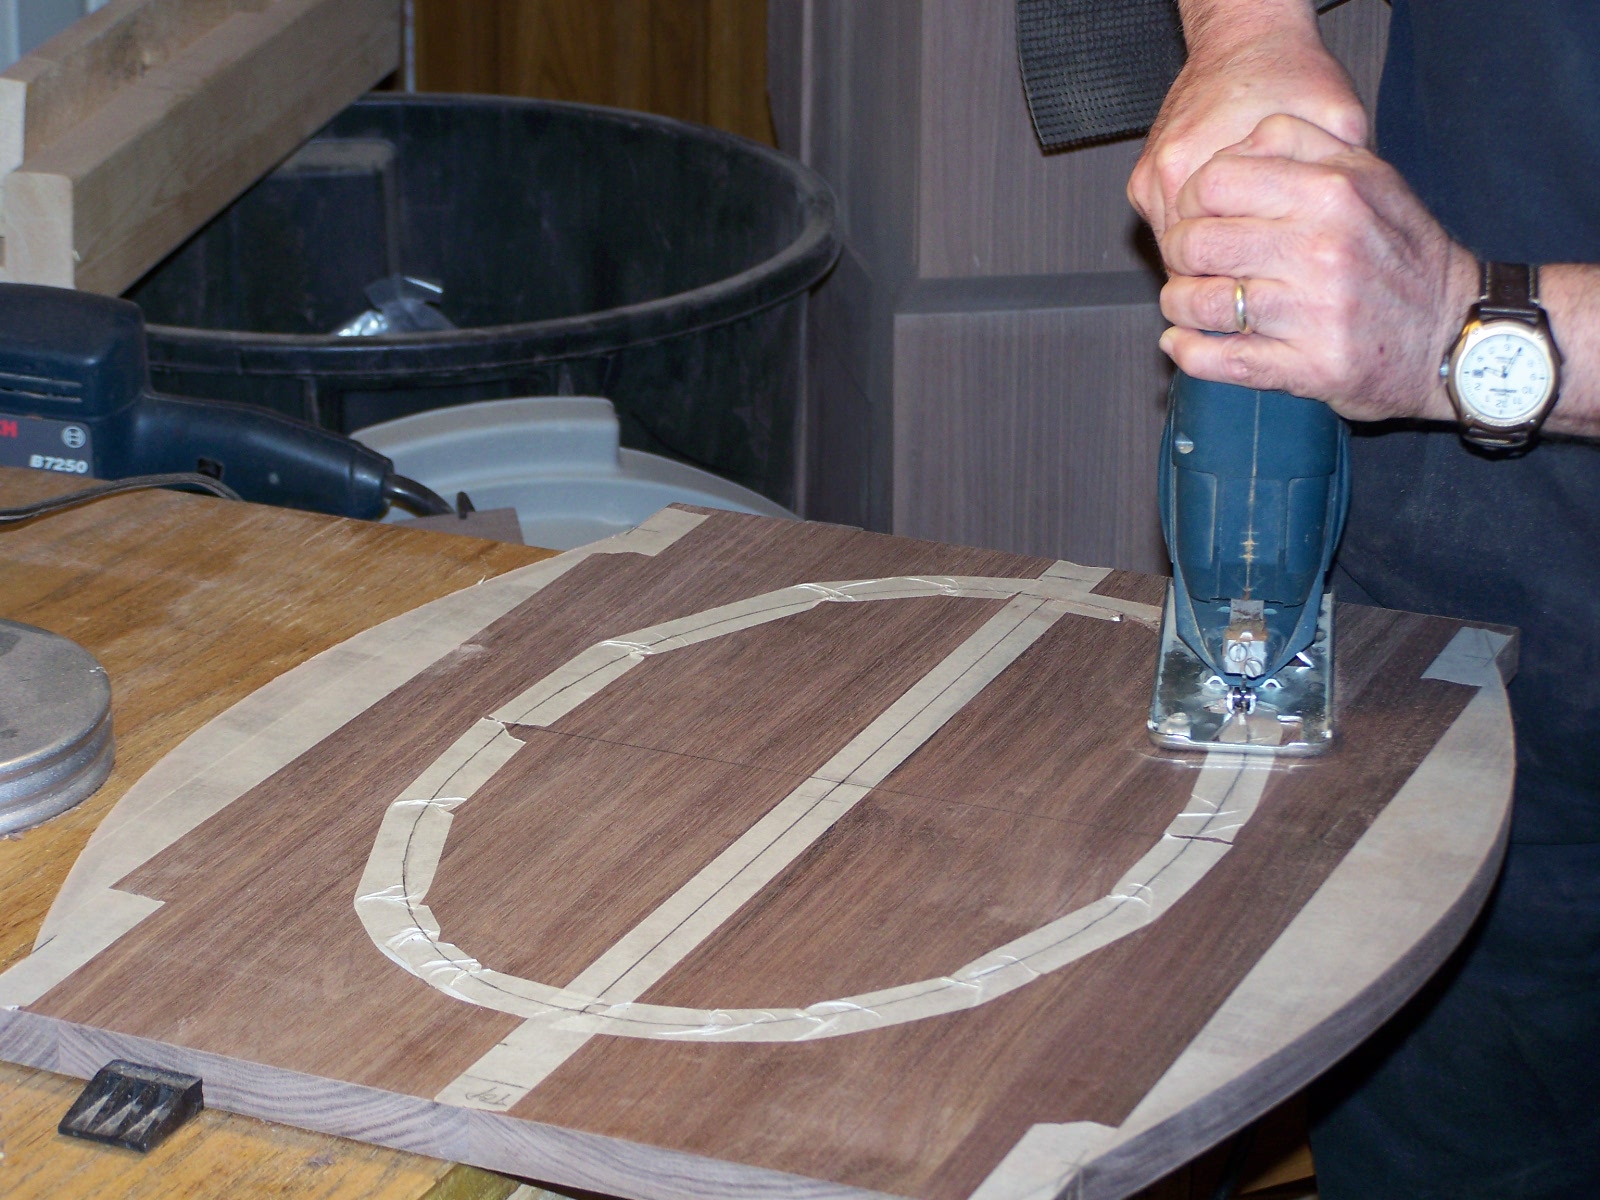
9 Drawer CD Cabinet so I needed to get on that quickly. By late afternoon I was ready to unwrap the glass we brought back from Knoxville over the weekend and mount it into the doors of Harold’s clock. I did most of the fitting on Tuesday. This is what $300 of custom formed, beveled glass looks like. This is ¼” thick , clear, annealed glass with a 1” wide bevel ground around all edges. I also got an oval for the top door, bringing the total cost to almost $400. This piece gave the glass shop a particularly difficult time. The short version of that story is that I ordered the glass from Allied Glass in Knoxville because they have done beveled glass for me before and did an excellent job, but those were rectangular pieces with straight edges. They sub-contracted this job out to a specialty shop in Atlanta – with which they had done business before. When I provided photos and specifications, the Atlanta shop said “sure, we’ve done work like that before.” And quoted a price. But that shop is owned by an overseas company, and that company decided, recently, to increase its profits by firing several of the Atlanta shop’s highest paid employees -- which, of course, would be their most experienced craftsmen. When the Atlanta shop got the templates, they could not figure out how to do what I needed done. They tried to get out of doing it at all, but Vicky at Allied Glass told them that they had already accepted the job, quoted a price and I HAD ALREADY BUILT THE CLOCK! Pony up and get it done! Thank you Vicky! And they did… sort of. They could not shape the glass as I had specified where the long skinny neck joins to the round part, so I’ll have to re-shape the door some to accommodate the glass. Also, the Atlanta shop sent word that producing this piece was SO difficult to do that if they ever have to do another, the price will be at least double. I do this reshaping by chiseling away the wood where the glass curves instead of making a corner. I’ll sand this and re-shellac the area. In order to prevent a stress point, when I sand it I will sand a bevel on this triangular part to match the bevel on the glass. I can not remove that triangular area because of the decorative cove routed on the other face – attempting to re-shape and re-route the entire area would probably not turn out well and would require extensive refinishing. More delay on a job that is already overdue. I test fit the glass several times to get it right, but was warned to be sure I properly support the glass along it’s full length when lifting it or the neck could snap off. So I use a backer panel to lay it on for carrying it around and make sure I have a good balanced hold on it any time I must lift it. With the chopping, sanding and finishing done I can clean all the finger prints off the glass, lay it in the rabbet one last time and install the glass retainers. Then wrap both doors in blankets so they are ready for transport back to Harold’s house to rejoin the rest of the clock. I did mount the clock works (with Ted’s help) into the case, so mounting these doors will complete the project. I’ll try to get a shot of the completed clock because I know there are a fair number of people who have been following this project with great interest.

Friday, April 16

Update

This is not a very good picture, but it will do for the moment. Once I have the glass in I'll move everything around, set up extra lighting and try to get a better photo -- of course the best photo would be after the clock works are in, but I may never see it in that state.

Finishing Up

I was in early this morning to see how the rope trim was sticking to the pendulum door – and to be sure the clamps hadn’t marred the paint on it. Looks good. So I reattached the latch hardware to the door and set it aside. Then glued the rope trim to the base cabinet and clamped it down. Other than putting all the pieces together for final assembly, all that remains is to wait for the glass to be ready so I can fetch and install that. Then it’s ready for delivery. SO I guess I’ll look to making Dan’s flag case on Monday. For today I’m going to do some cleaning up then go mow the lawn. It’s likely that it will rain tomorrow and thwart my standing plan to mow on Saturdays.

Thursday, April 15

More of Same

This morning I continued scuff sanding the first coat of shellac, then tack ragged off the dust and began applying the second coat. When all the head case parts were dry I began reassembling that part of the clock by attaching hinges, latches, and glass retainers. Once the pendulum door was dry I started attaching the rope trim. I had not expected to get this far until tomorrow, but things are going pretty well today. I did get confirmation from Allied Glass that the templates arrived safely and have been handed off to the guys who will produce the beveled glass. I’m posting this while the main case dries. When I’m finished here I’ll go and reattach the ball catches that hold the pendulum door to the case. I’ll let the rope trim stay in clamps overnight to let the poly-glue set up hard. Hopefully that will be sufficient – don’t want to have to resort to epoxy or resorcinol.

Wednesday, April 14

Slingin Shellac

I got two coats of paint on the rope trim yesterday, let them sit over night and put a third coat on them this morning. The third coat didn’t improve the appearance so I stopped there. It didn’t hurt anything, but there’s no point in applying more paint if there is nothing to be gained. Then I began stripping off hardware, sanding and shellacking the rest of the clock case. I got one full coat on everything… then ran out of shellac. So I’ve mixed up another batch and that will be ready to use in the morning. I’ll spend the rest of the afternoon scuff sanding the clock parts to prep them for the second coat tomorrow.
Marie and I will be making a presentation to the ruling body of our church his evening, so I'll be knocking off a little early so I have time to get cleaned up, changed and swing by to pick up Marie on my way in.
See you tomorrow!

Tuesday, April 13

Ropey Stuff

I start the day, as promised, by straining the shellac and applying some to the small side doors to see how it’s going to look. Normally I’d apply 4 or 5 coats but shellac is a naturally glossy finish and Harold prefers a satin finish, so I did not sand as fine as normal and will apply only two coats, sanding in between. This should leave us with a non-glossy finish. My primary task to accomplish today is to get the rope trim pieces cut. These are a pre-made molding strip four feet long. What I have used in the past was maple and a full ½” wide. I ordered the same stuff from the same supplier, but they have switched to an Italian made stock that is some sort of oak-like wood and about 7/16” wide – probably some metric measure. It will work, but the open grained wood will show more unevenness through the brass paint. I did check to be sure they sent me what I ordered. The rope trim will go in the channels on the front of the clock. The head scratcher here is determining in what order to do things. The trim needs to be sealed, sanded and painted brass, the walnut channeling needs to be shellacked, the rope needs to be cut into a bevy of strangely shaped pieces as it winds around the pendulum door frame, and the trim needs to be attached to the channeling. But, shellac will interfere with the glue. Painting the trim after it’s in place could be very messy, the garnet shellac is very dark and would darken the brass paint – and the alcohol in the shellac might mar the paint if I were to do the shellacking last. I could attach the trim with brads after all the finishing is done, but I would need to set the brads and fill over them, then touch up the brass paint. What to do, what to do? To facilitate cutting all the tiny little pieces and minimize tearing and chunking, which oak does more readily than maple, I built a simple little sled attachment for the miter saw and pre-cut places to cut each of the various angles I will need. This helps a lot to speed up cutting the trim pieces. I don’t cut all the way through the sled, just deep enough to cut through the trim strip. And I have to remember that when I measure angles on the door with a protractor, I’m measuring up from a base angle, when setting the cut on the miter saw, I’m measuring down from 90°. To properly cut a measured angle of 46° I have to set the saw at 44° or 29° instead of 31° because of the difference in perspective. Easy enough to do once you figure this out, but it will drive you bonkers until then! I decide to cut the parts first, do all the finishing then assemble last. I may need to use some special adhesive instead of wood glue, but I want to avoid brads if at all possible. As I cut the pieces of trim I sand them to remove as much roughness and grain as possible. Then I use a bright brass metallic paint to cover the sealed wood. This test trip was done by itself to see what it would come out looking like. I did all the other pieces in a batch to waste as little of the paint as possible – I may need to apply several coats. Cutting the 12 individual pieces went faster than I anticipated. I expected to have to re-cut several – and bought an extra rope strip to be sure I’d have enough – but it all went very well and each piece came out right the first time. So, I have time to begin the sanding of all these pieces. As I take them off the door, I number them on the back, and number the positions they came off of, so I’ll be sure to get them back in the right places. I also have to do some hand carving to shape the ropey bits to look more natural as it winds around the door. I was careful where I cut each piece, starting in one lower corner and walking around the door, but a little hand work is needed to finish the job. Then I’ll begin painting them.

Monday, April 12

Completing Construction

One last thing to do in construction mode: make the top plate for the head case. I start by selecting a board with straight, even grain, chopping it up into pieces, jointing the edges and gluing them together to make the blank from which the top will be made. After surface planing the blank smooth, trimming it to finished size and routing the decorative edges, I sand all surfaces and attach it to the head case with screws from inside. No glue is used here. The back edge is permanently affixed, but the screws in the front edge are put in though screw holes that are elongated so as the top piece expands and contracts the front edge can move so the top won’t split. I finish out the day by making up a batch of shellac. This finish starts out as dry flakes of a resinous material that gets mixed with denatured alcohol as a solvent. This will need to sit overnight to let the flakes dissolve, tomorrow I’ll strain it to remove any lumps as I transfer it into another jar for storage. This way I can go start shellacking the parts of the case that are done while I apply the rope trim to the rest. The rope trim will be frustrating, I’ll need a diversion to get away to!

Friday, April 9

Beginning The Frilly Bits

Today I’ll get going on the frilly bits by making and installing the waist banding and the cove that transitions the pendulum case to the head case. I start by milling some stock into blanks, routing the profile onto the edge of the board, then ripping the molding off the board – this is much safer than trying to route a profile on a narrow strip of wood. As I cut the moldings, I must be mindful of where they go and the angles that will be involved: sides slope at 2 degrees, front at 4 degrees, label them to be sure the top edge gets on top, then get good tight miters at the corners. Fitting the molding strips is one of those tasks where I wish I had a third arm sticking out of my chest. I need to wiggle the two strips where the first miters meet until they mate up exactly right, then mark the back of the side piece so I know where to cut it. Once it’s cut I’ll test fit it to be sure I got it right, then bore pilot holes for 1½” brads, start the brads through the holes, apply glue to the back of the molding, fit the moldings in place again, and tap the front brad to set it’s proper location. Then I can fiddle a little with the back of the strip to be sure it’s running level and drive the brads home, set them below the surface and fill the holes with wood putty. The other side is similar except I cut the front piece to rough length (1/16” to 3/32” long) then use the fit between the other side strip and the front to home in on a perfect fit of the front piece. When that is achieved I cut the other side strip to length and attach it. This is the transition cove at the top of the pendulum cabinet, it will serve as a fillet between the narrow cabinet and the wider head case. At right is the waist banding after installation. The nail holes have been filled but not sanded yet – have to wait for it to dry first.
Joyce commented that the wood looks funny. Sanded walnut looks almost grey in these photos, unsanded walnut reflects less light and looks darker. All raw wood looks kind of bland, once I apply the finish it wil liven up and darken considerably. Angle of light and whether or not I use flash can affect the way to wood looks -- this is not a photography studio...
While I’m waiting I start on making the templates for the glass. I use some small sheets of poster board, tape them together, cut them to rough size and tape them securely to the face of the panel. Then I rub the edge of the glass rabbet HARD with my thumb to make a crease in the poster board where the edge of the rabbet is. HINT: Do NOT sand the edges of the rabbet before doing this, you want as sharp an edge as possible, rounding it off a bit makes this almost impossible. Once the outline is determined I remove the tape and poster board and use a sharp pair of scissors to carefully cut out the shape. Bouncing the light off the poster board at an angle helps to make the crease show up. When it’s cut out I lay it in the rabbet and check the fit. If it’s too tight anywhere I mark it with a pencil and cut just a hair more paper off – did I mention this requires a SHARP pair of scissors? When it fits perfectly I label the template so the bevel gets cut on the proper face – the shape may not be perfectly symmetrical and if the glass gets beveled on the wrong face it may not fit (unless I install the glass backward). Now I’ll roll up the templates (no creases that way) and mail them off to Allied Glass in Knoxville to have the beveled glass pieces made. They can be working on that while I complete the case. Now I go back and spend the rest of the day sanding. Sanding the dried wood putty over the nails, sanding the molding strips, sanding the fluted door frame, sanding anything else I see that needs sanding… I’m just a sanding fool this evening! Next up; Golden Rope. I’ll get to that on Monday. I have yard work to do tomorrow (Saturday).

Post Script

I got bored last night and decided to come back and work on this door some more, the glue would have been hard enough by then. I used the wide drum sander to smooth both faces of the filler panel, routed the glass rabbet in the back of it and the decorative ogee on the front. Then got ready to mount the filler to the door frame. But I found that ¾ “ screws were too short – they hold OK for the first install, but if removed and reinserted they strip out. 1” screws are a tad too long and the points poke through the frilly molding on the front side – not good! I don’t have any 7/8” screws, somebody probably makes them but they’re not common, so I whip out my little bench grinder and knock the tips off a dozen 1” screws and use those. Works just fine. Next I install the ball catches that hold the pendulum door to the cabinet and test fit everything. A little tweaking was necessary. I’m not totally thrilled with the fit of the door. The framing fit perfectly, but when the filler was added it bows the frame out from the case in a couple of spots. It’s not real bad, it’s just not perfection. Will sleep on that for a bit.
I'm sleepy now, I'll post this tomorrw. G'Nite!

Thursday, April 8

Pendulum Door

As you may recall, Harold said the front of the pendulum cabinet was too “open” with just the framing around the glass so I need to build a filler panel to tighten the focus onto the pendulum inside. Building the pendulum cabinet door is the current task. Previously I milled the framing strips and cut those strips into the myriad of oddly shaped pieces needed to frame around the shape of the cabinet. The first step is gluing those pieces together. I start by gluing up sub-assemblies. Because of the odd angles I can not get clamps to hold the pieces together, so I use masking tape. Masking tape?!? Yes, masking tape. If adhered firmly to one piece, then stretched tightly across the joint and pressed down to the other piece masking tape can serve as a light duty clamp on good fitting joints. Tape both faces. Location of the tape and the angle of pull is important. When the glue in the sub-assemblies is dry I glue the subs together into the full door frame using the same methods. I reinforce the joints now with upholstery staples. While the glue in the door frame dries I work at installing the angle brackets that will hold the lower cabinet front in place. First mount the brackets inside the case, then place the front in position and mark the screw locations by reaching in through the base. Remove the front panel and drill pilot holes. Then replace the front and install the screws to hold the panel in place permanently. When the door frame is dry I use a large sheet of brown paper to create a template of the shape the filler panels will need to be to fit into the rabbets on the back of the frame. I use the template to lay-out the shape of each side panel. I lay down masking tape where the lines will be then draw on that – much easier to see than pencil lines on the dark walnut. Now I take the panels to the band saw and cut out the shapes. Then I lay the side pieces into the door frame and measure for the trapezoidal shaped pieces that go between them at the bottom and the top. The angles on these have to be absolutely perfect to get good glue joints between these pieces and the side panels. I take my time and sneak up on a perfect fit. A good miter saw is essential. When they fit properly I glue and clamp the middle pieces in place. I’ll let these set up overnight to be sure they hold well before the next step of machining, which will induce a fair bit of stress and vibration that could pop the glue joints if they're not hard enough.

Tuesday, April 6

Completing the Front Door

This time we’ll do the edge routing on the clock head door. Some of this is purely decorative; on the outside of the door I want to use matching profiles around the outer edges of the door and a smaller version inside the cut-out for the window glass. I select these ogee bits for use in this task. After routing these edges the door looks like this. Next up I need to route a rabbet in the inside edge of the cut-out where the glass will sit. For this I use a rabbeting bit set This tool has one large-diameter cutter and a set of bearings that determine the width of the cut: the smaller the bearing diameter the deeper the rabbet. Here I have the bearing for a ¼” wide rabbet installed, now I’ll set the cut depth and be ready to go. When I’m done the back of the door looks like this. Then I spend some time sanding the faces and the routed edges. Finally I install the solid brass ball catch that holds the door closed. That completes the head case, so I’ll take all the parts and set them aside in the other room where they will be out of harm’s way until it’s time to make templates to send to Allied Glass who will be making the fancy bevel edge glass for this project. Now we will move back down to complete the pendulum case door.

Monday, April 5

Making the Front Door

In this step I’m making the front door for the head case, behind which the clock works will reside. I start by surface planning the two halves I made last time to near finished thickeness: about 1/16” over. Then I joint the two halves where they will join together, glue and clamp them. When the glue is set up I scrape off the glue pips and use the wide drum sander to smooth the panel and bring it to finished thickness. This is my door blank, a little oversize, but ready to be made into a door. So now I trim it down to finished size and square it up. The door will have wings that reflect the shape of the elliptical window in the door, so I lay out those wings using a drawing bow, a simple, old fashioned, shop made tool using a flexible strip of wood, a strong string and a block of hardboard that slides along the string; slide it toward the center to make a sharper curve, toward the end for a gentler curve, friction from the string as it winds through the block keeps the shape locked in. After tracing the shape onto the board I cut it out on the bandsaw using a fairly fine toothed blade and following the line carefully; I’ll want minimal wood needing to be sanded away when I’m done. Because this one has to be done by hand, and removing hardwoods with sandpaper is laborious and tedious – two of my least favorite "ious's". Next I lay out the ellipse for the window using a simple geometric method employing a thin stick of wood with marks that correspond to half the length of each axis of the ellipse, walk these two marks along the two axes and make dots at the end of the stick then connect the dots. With the shape drawn I drill a starter hole and cut out the window with a saber saw. Again I work slowly and stay close to the line. This time I will use a drum sander chucked into the drill press to smooth and fair the cut, but the less wood I have to remove this way the better. If I were making a lot of these, I’d make a template and use a router with a piloted bit. But I’m not, this is a one-of-a-kind piece. Finally I lay-out and drill pilot holes for hinge mounting screws and test the fit. I have a teeny bit of tweaking to do to be sure it clears the top plate when I install it but otherwise it’s good. It’s pretty plain right now, but it fits right. I’ll do the edge decoration and preparation for glass in the next step.