Thursday, January 18

Thursday – De Feet

This day was spent making the nifty little feet that go under the cabinet that we’ve been building. This is all part of the Deluxe Sewing Cabinet that we offer, and you can see pictures of the completed item by clicking the title above.

To start with we cut a chunk of rough lumber 4” wide and 52” long. This will provide enough wood to make all of the feet. Then we surface plane it to ¾” thickness. Now we need to cross-cut the plank into two sections; one will become the top plates, the other will become the sides of the feet.

Using our Incra miter fence we cut the one piece into 4 squares for the tops. The other gets cut into 4 rectangles. Each rectangle gets marked for alignment so I’ll be able to match them back up again later.

So much for the prep work. Now we get ready for the serious parts making. First off we set up the table saw to do 45° miters. Using a large artists triangle I get the blade as close as I can, then make test cuts on a piece of scrap. Fit the pieces together and check them with a square. Are they square? If not figure out which way the blade needs to go, make a small adjustment, and re-cut the joint. Test again. Repeat until it’s perfect.

I find it much safer and more precise when working with a series of small pieces like this, to tape them together and run several through the blade at a time. This prevents them from twisting, as the smaller squares tend to do, and allows me to use push sticks to keep my hands away from the blade.

The parts were cut in sequence and marked so that when the corners are assembled, the grain flows around the corner. Just one of this nice touches we like to throw in.

Next we re-set the blade and set the miter gauge for a 15° angle cut. This produces a tapered leg that is far more elegant than a square block supporting the cabinet.

Next we set up to cut the rabbets in the top edge of the side pieces where the top plate will fasten to strengthen and streamline the foot. I set the blade height and fence distance for the first cut and lay the pieces out in the proper orientation. Doing this eliminates any chance (mostly) of my doing anything stupid like cutting the rabbet on the wrong face of the piece. When the flat cut is made in all the pieces, I raise the blade and bring the fence in for the second cut. This time the pieces stand up vertically against the fence.

This cuts a squared-off corner from the board and this falls free. When these are all done I cut a 15° bevel on the two rear edges or the top piece. Now when all three pieces come together the top plate snugs into it’s recesses nicely and the bevels run smoothly up the full length of the back edges.

Then we apply glue and use a bevy of clamps to hold everything in firm contact as the glue dries.

While I’m waiting for the glue to dry, I take advantage of the situation to make another project that is to be made of walnut and uses exactly the same techniques to make the parts. This is a small box (6” square and 3” high) which when turned upside down will become a base for a statue that Joseph wants to display. Here the sides are cut, glued and clamped and you can see the rabbets where the top plate will drop in. Once it’s all glued up we’ll use a router to round-over all the exposed corners then sand it smooth and antique oil it. But that will be for tomorrow. First the glue needs to dry good and hard.

Doug-Bob

Wednesday, January 17

Wednesday – Drawer Pedestal

The day started off by milling 10 more drawer glides for use in the drawer pedestal. These glides have a tolerance of 1/32 of an inch, so we sneak up on the exact size and take care that they are straight. After drilling the mounting holes and sanding them smooth we position them using a special jig. Again; very close tolerances, they must be exactly where we need them to be or the drawers will not run smoothly. Taking a few moments to double check the positioning of the jig is worth while.

Pilot holes are carefully drilled and screws inserted. No glue.

After the glides are mounted to both side panels, these panels are glued and screwed to the back panel. [17002]The 5 spacers or spreaders are them milled, drilled for pocket screws and attached. These not only position the pedestal side panels but strengthen the whole structure.

Finally the kneehole apron is made and attached with glue and screws.

And that is the end of another day.

Doug-Bob

Monday, January 15

Monday – Dog Tired

Last night between 3:30 and 4:00 in the morning something came snooping around our place and set the dogs off on a bark-fest. Marie is blessed with the ability to lay back down after such a disturbance and go right back to sleep. She can also nap during the day. I can do neither. Once I’m awake, I’m awake for the duration. And if I try to nap I just get super groggy. I need to get a good, solid eight hour block of unconsciousness to do well.

So, needless to say, I was a bit off my game today. I got an early start on the bookkeeping and blogging chores though, so those are all caught up, but I was working a bit slow the rest of the day… being careful, double checking everything so I didn’t do anything real stupid.

Still I got one whole pedestal completed. This means milling the shelf blank I glued up Friday down to size and making sure it is square, milling the drawer slides, milling the 5 spacer pieces for the top and bottom of the pedestal then sanding and installing them. The picture on the left is looking at the pedestal from the bottom, showing the shelf installation and drawer slides. The shelf is glued and screwed in place only at the front edge, the rest is allowed to float in it’s slots so it can expand and contract with humidity changes. The drawer slides are also not glued in, just fastened with screws. These can, with some amount of abuse, break. Should that happen, they need to be easy to remove so replacements can be made. The other picture was taken after the cabinet was rolled up on it’s feet (if it had feet – which it doesn’t yet) and shows just the surger pedestal after completion.

A solid top plate will be attached to the three spacers, and making them separate pieces instead of one big one like the shelf eases problems with wood expansion. For one it allows me to solidly glue and screw them to the cabinet to lend it strength and rigidity. The lower compartment in this pedestal is occupied by a deep drawer, so the open space in the bottom will not be visible once the drawer is in place.

Tomorrow we plan to be in Bean Station touring a factory, but that should only take up the morning. I’ll get started on the drawer pedestal when we get back.

Doug

Friday, January 12

Friday – Getting Interesting

The morning session was spent doing the same as what I spent most of yesterday doing; sanding center panels and assembling components.

After lunch I set up the tall fence and cut the rabbets that will house shelves and stiffeners ant the top and bottom of the two compartments. This is a simple cut to make – with the use of a tall fence to support the big part so it doesn’t wobble – but treacherous as all guards and safety devices must be removed.

Next we cut the grooves in the back panel that will house the rear edges of the end panels. To do this we use this toothy monster – a fully loaded dado head. Very careful measurements and double checking the fence setting is warranted before we flip the switch and pass the back panel over the cutter.

Here’s where things start getting interesting; when the parts we’ve been making start going together and start looking like a piece of furniture.

Then the pocket hole jig comes out and I drill a few holes in the rear stiles of the end panels to hold them in place on the back panel. And attach them with 1¼” pocket screws. No glue yet; we will be removing the panels again to add more parts to them. This is just a dry run to see that everything lines up properly.

In this picture we’re looking at the cabinet from the bottom, laying on it’s back. The doors are laying loose on top. The corners all meet up where the corners are supposed to be, so we’re looking good so far. I finish out the day by cutting & surface planing and jointing parts to make the two solid shelves. One gets glued up, the other will get done Monday.

Hope you have a great weekend!

Doug

Thursday, January 11

Thursday – Groovin’

I got out to the shop early this morning to make up some of the time lost yesterday, and (so far) I haven’t had so many telephone interruptions as have been the case recently so I’m actually getting quite a lot done.

It’s lunch time now. This morning was spent jointing and gluing up the panels that could not be obtained from a single board’s width, trimming the others to width and I started grooving the rails and stiles to receive these panels. Here a book-matched set are laid out on the tablesaw after jointing to check the seam between them - no glue yet. This one looks good, it should produce a nicely invisible joint.

The stiles have grooves between the mortises, but not through to the ends, so I have to drop the piece into the blade at a specific point and lift it off again at the other end to avoid leaving ugly gaps at the top and bottom of the joint. No, in all likelyhood no one will ever see them, but taht's not the point. The rails are grooved the full length.


When complete, the grooves are supposed to line up perfectly at each corner so the panels will fit snugly with no gaps. Like this!

Next I sand the panels to 150 grit, pre-finish the vertical edges so unfinished strips don’t develop as the panel shrinks, then apply glue to the mortises and tenons and assemble the panels. Instead of pounding the assembly together with a mallet, I use long clamps to draw the pieces together gently yet firmly.

This is a completed door. After the glue sets up overnight I’ll sand the outside faces of the frames and get ready to cut the dadoes and grooves on the inside faces that will allow the parts to lock together as they are assembled.

Doug

Wednesday, January 10

Wedesday - Starting Panels

This is a short day in the shop because I have a meeting this evening, and a few bookkeeping chores that must be taken care of this morning.

Today we’re working on making the panels that will go into the centers of the frames we built yesterday. We start by selecting lumber that is either wide enough to make a panel by it’s self or will make an attractive book-matched panel by re-sawing the plank, flippingthe two pieces up next to each other and edge gluing the thin pieces together to form a wide panel.

Resawing is done by first running the planks through the surface planer to smooth the wide faces, then on to the bandsaw to saw the board in half edge-wise. After all the planks have been split in half they are run through the surface planer again to take off the saw marks. We do not take them down to the finished thickness because we will want a little extra to use in smoothing the glue joints after the halves have been glued together.

When finished, we have a stack of nice thin panel stock. From this I first select pieces, preferably book matched, that will go into the doors. These are the narrowest of the panels. From there I see of any of the pieces are wide enough to fill the end panels. If so, I mark them and set them aside. The rest will be jointed and glued together then edge trimmed to form the wide panels still needed.

But we’ll get to that tomorrow, now it’s time to go get showered and head into town.

Doug

Tuesday, January 9

Tuesday - Mortising


As promised, today we continued to make the casework framing. We start with completing the tenons by cutting the haunches on the bandsaw. You may note that one is deeper than the other. The haunch that will be toward the end of the stile is cut deeper to leave more wood at the corner of the joint and reduce the chance that the end of the stile will split out during assembly. A few licks with a piece of sand paper clean off the fuzzy bits left by the saw blade and yields a nice clean tenon.

Then we return to the marking gauge, but today we flip it over and use the other side which has a pair of adjustable pins. By carefully setting the distance between these pins and the gap between the inner pin and the face of the tool, we can lay out the mortise sides in one pass.

The ends of the mortise are taken from the tenons that will go into them. Theoretically, the tenons are all the same, so any one should fit into any of the mortises if I lay them out and cut them all alike. But real life doesn’t pay much attention to theory, so I find it less troublesome to set up these cuts by laying the tenon across the edge of the stile. In most cases they do come out to be interchangeable, but once in a while one will be just a tad wider, requiring some extra work with a chisel.

Cutting the mortises is done with a special attachment on our drill press that drills square holes; I make one hole at each end of the mortise, then connect the two. A few moments of clean-out work with a chisel and we have a nice clean mortise. Then we test fit the tenon into it, adjust if necessary and move onto the next. A properly fitted mortise & tenon joint will have a snug fit; not so tight it must be hammered together, but not so loose it just drops in. Too tight and it will be difficult to assemble once glue is in place, too loose and the glue will not bond the wood and the joint will fail. I start with the end panels because they’re smallest and least complicated.

The back panel and doors take more room to work with, so are easier to do once the end panels parts are assembled and set aside elsewhere. The back panel and doors have center stiles that need to be mortised in then assembled in the proper order. When the day is done, we have all the framework needed to build the cabinet... sort of.

The parts are all here now, but there are grooves and dadoes that will be needed where the parts join together. And of course we will need to make the panels that fill in the middles of these frames. We’ll get started on those tomorrow.

Doug

Monday, January 8

Monday - Gettin Cheeky

Here we go into another new week. Today I continued in the process of parts making by laying out and cutting the tenon shoulders and cheeks.

This starts with a marking gauge, which uses a small knife blade to score a line where the tenon shoulder will be. Because the marking gauge can be set for the exact distance from the end of the board and the knife makes a cleaner, finer line than a pencil does (and because pencil is hard to see on a dark wood like walnut) I prefer using a marking gauge over a ruler and pencil.

Then we do a little set-up on the Incra Miter Fence so that the edge of the saw kerf falls precisely on the marked line, and cut the tenon shoulders. The end rails are shorter than the door rails, which are shorter than the back rails all of which are different from the center stiles – but they all get tenons. All but the center stiles are a 2” long tenon, so the blade height remains the same for all of them, but after each set the fence must be recalibrated for a new board length.

When done each end of each board has a groove cut completely around it which serves as the transition of the tenon. Some folks will simply put a dado head on and cut the tenon cheek and shoulder all at once. But I find that this tears out the wood pretty badly as such a large blade exits the wood, making for an ugly joint.

The next step is to cut the cheeks. I use my shop built tenoning jig for this. It hold the rail upright and square to the blade, supporting it and the rail passes through the blade. Two things I find helpful; first I lightly sand the shoulder cuts to remove the “fuzzy bits” that are bound to be there. These bits can hold the rail out away from the tenoning jig just a hair, but a hair off each side means the tenon will be too thin and won’t fit into the mortise well. A sloppy joint is a weak joint. The other is that I chop a correctly sized mortise in a scrap piece of wood and keep it handy. As each tenon is cut, I test fit it into this test mortise to insure a precise fit.

At the end of the I have a pile of parts with very clean, well fitted tenons.

Tomorrow we'll cut the haunches and start chopping mortises.

Doug

Friday, January 5

Friday: Rails & Stiles

I’m back on the job today and I spent the day making the parts that will form the frame of the casework; rails & stiles mostly. No panels yet.

To start this process I took the large, rough sawn boards that were brought in to acclimate several weeks ago, sorted through them to find those with the grain and color I want, then cut them into smaller boards according to my cut list. These boards were each just a bit longer and wider than the parts they will become. Then I surface planed them to make both wide faces flat, smooth and perfectly parallel to one another… and just the right distance away from one another.

Then it’s back to the table saw. Swap out the 24 tooth blade used for roughing for a 40 tooth blade that gives a smoother finish, and carefully trim both edges of each board. This does two things, it makes the board just the right width with nice straight edges and, by trimming both edges, it makes sure that the edges are perpendicular to the wide faces. Sloppy edges mean that the joinery we will cut shortly will not snug up nice and tight. So I want each board nice and square.

Then we trim both ends of each piece to bring them to exact length and perfectly square. Our new Incra 1000SE does a great job of both, because it has two adjustable stops to set the cut-off length. The first cut squares up one end and leaves the board ¼” over-length. Flip down the second stop, flip the board end for end and cut it again to square the other end and make it the correct length. This is a solid, precise tool and I’m glad we bought it.

When the day is over we have all the rails (horizontal parts) and stiles (vertical parts) needed to make the 4 “ends”, the wide back panel, and the two doors. Next week we’ll cut the mortises and tenons needed to create the framework.

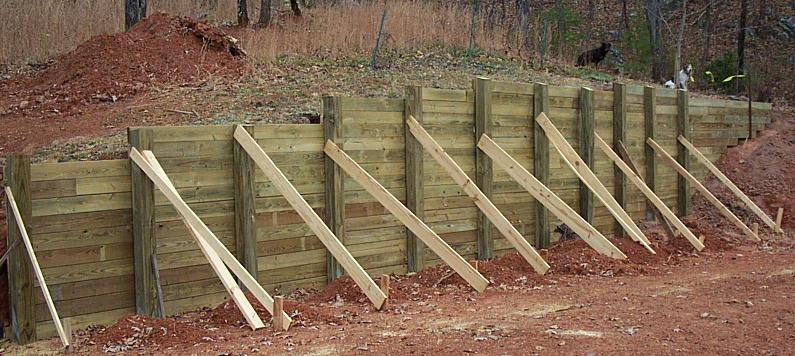
Hope you have a great weekend. If the rain stops, Marie and I will be out on the high hill tomorrow working on tying back the retaining wall with rebar and concrete anchors so we can remove the brace boards. Once that’s done, we can excavate for footers.

Doug

Wednesday & Thursday

These days were spent in personal pursuits. Mostly. Wednesday I was running hither & yon acquiring supplies needed for the next phase of our construction project, trying to fix a friends’ computer, and purchasing some new tools. Thursday I worked on Smoky Mountain Woodwork's RSS feed set-up and our Google Base feed, but at the same time produced the two stain sample boards that have been ordered. These were to be finished in polyurethane, so there were long periods of dry time when I could produce no dust. I had hoped to get more done in the shop, but wasn’t feeling well, and experience has shown me that if I rest a bit when I first start feeling poorly I’ll loose one day; if I push it to get something very important accomplished I’ll end up loosing several days to sickness. So it seemed a good time to do these stain boards and try to rest some. I’ll be back in the shop on Friday. Doug

Tuesday, January 2

Tuesday

Time in: 7:15 am I spent the morning putting the workshop back together and straightening things up again, then spent the rest of the morning configuring the new Incra Miter 1000SE we just got. This marvelous new tool will make it much easier to cut very precise lengths and angles. The shop made miter fence that I made years ago did quite well for a ling time, but recently it developed a bow in the fence that makes getting a precise angle difficult. And it never was much good at getting anything other than a 90° or 45° angle dead on. Time to step up. I’ll scavenge the track and scale to use in a drill press table. The miter gauge it’s self got refitted with a short plywood fence and will be used for roughing out lumber parts, saving the Incra fence for precise work while cutting parts to finished size. After lunch I got shanghaied and taken to Bybee to photograph a beautiful piece of property that Tim & Katherine are trying to sell. I posted an on-line listing for them, and it needed pictures. The address (in case you’re looking for property in East Tennessee) is http://www.fsboadvertisingservice.com/Listing.asp?Listing=40226 When I got back it was late enough that I only had time to work on some small jobs in the shop a bit. The evening session was spent ordering supplies, answering e-mail and doing bookkeeping. Tomorrow I’ve been assigned to ferret out and purchase the supplies we’ll need to install before the foundations are laid: septic line, water line, phone line, Ethernet cable for the computers and conduit to bury them in, as well as rebar and concrete for the retaining wall tie-backs. That will take a good part of the day, but I may get some woodworking in during the afternoon. Doug

Monday, January 1

Monday

Although this IS New Years Day and we had planned on taking it as a holiday, it turned out to be the only convenient time for all concerned to deliver Rev. Calvin’s desk. He lives about 30 miles from here, so we have personally delivered all three pieces of his Pastor’s Study as we got them completed.

This time there were some wrinkles. We had agreed that Marie and I would bring it out in the early afternoon. But Rev. Calvin called me early that morning to let me know that a member of the church had died during the night and he needed to talk with the widow at 2:00, could we reschedule for 11:00 in the morning?

Seemed easy enough, it just meant that I needed to get going on gathering up the tools and supplies I would need to install the desk. I gathered these together and moved the 400 pound table saw out of the way so the desk could come out the big roll-up door. Then started up the truck, turned it around and backed it in to load it. But when I went to start it up again, the battery was completely dead. It fired right up the first time, but now even the warning buzzers sounded sick.

I put a battery charger on it and let it go for a bit, but it did not improve things at all. I borrowed Joyce & Pat’s car and jump started it, and it started easily enough, but when the cables were removed and the truck put in gear, the engine died and would not re-start.

I called Rev. Calvin and explained the situation and asked him if it would be alright if he’d call me when he gets back from his bereavement visit and we’d run it out then… we’ll need to go into town and get a new battery first.

So that’s what we did. Marie and I borrowed the car and ran into Newport to an auto parts store. They tested the old battery (6 years old) and found that it had a dead cell and was only putting out 10 volts. So we bought a replacement, hauled it back to the shop and I installed it. The truck fired right up and purred like a kitten again.

We got the call about 3:15, and headed out. It didn’t take long to put the desk in, but running all the computer cables and moving the components for him (they’re really good folks, so I don’t mind at all doing these extra things for them) took a while. But when we flipped the switch, everything started right up and worked just like it should.

Just call me Doug-Bob the furniture builder, auto mechanic, and computer whiz.

I just thank the Good Lord that He provided me with enough talent in each of these fields to cope with them. I am by no means an expert on the last two, but I get by most of the time.

I was a little disappointed at not being able to get a good angle to take a picture of the whole Pastors Study, comprised of two 3 food wide by 9 foot tall bookcases and the computer desk between them. I’ll work on that again when they get some of the now unnecessary furniture out of the room.

See you tomorrow!

Doug

Saturday, December 30

Saturday – All Done!

The Blogger folks have gotten the difficulty with the picture posting utility straightened out, so I can again show you what I've been up to. Thank you Blogger Folks!

Normally I don’t work in the shop on Saturday, but since we were gone all day Thursday, and we’re running behind again anyway, I decided I’d best spend today finishing up Calvin’s desk.

So, I spent the day removing all the hardware, shooting lacquer, and reassembling the entire desk. There were a couple of tense moments, but nothing I couldn’t (with God’s help) figure out a way to get it to work out.

End result: very nice. I think Calvin will be pleased. In fact, someone who saw this desk deing built was so pleased with it that she ordered a shorter version for a computer desk in her kitchen.

Now, I’ll get back to Dan’s sewing cabinet. The two large plates I glued up a few weeks ago have been through several high/low humidity cycles. One had developed a very slight bow, the other remains dead flat. The one that is slightly bowed will become the lower top so it can draw upon the cabinet casework to draw it flat. The other will become the fold out leaves. I’ll get going on that project again right after New Years.

Happy New Years, and if old acquaintances be forgot… call them up and remember!

Doug

Friday, December 29

Friday

I put in a long day today and got quite a bit accomplished. Unfortunately, this new (non-beta) version of Blogger refuses to accept photos, so I can’t share pictures with you. Sorry. Hopefully they'll get that fixed and I can go back to showing you what has been accomplished. Basically, I trimmed and squared the door/drawer front blank and cut it into a door and matching drawer front. Then I cut the parts needed to build the drawer box, including a pencil tray. I’m using a sliding dovetail joint to attach the drawer sides to the drawer front, so I cut those. Then cut the grooves and dadoes needed to house the dividers and bottom. Before assembling the drawer I needed to stain the oak drawer front, so I took time to do that as well as the door. When it was dry enough to handle safely I put the drawer together and mounted the drawer slides, then mounted the door hinges. The door and drawer front don’t quite line up right so I’m chiseling pockets in the door and case to correct that. I got it almost done before quitting time, and will finish it up tomorrow. Doug

Thursday, December 28

Thursday

Today Marie and I are gone to North Carolina to confer with our builders, iron out all the little details and sign a vast pile of paperwork. This will take nearly all of the day. I’ll be back in the shop tomorrow. Doug

Wednesday, December 27

Wednesday

First thing this morning I built a nice hot fire in the wood stove to take the chill off the air in the shop. It got chilly last night. Once I achieved an air temp of 55° again I rolled the main part of the desk over on the small workbench that has been supporting it, tacked it off and stained it.

Then I had to leave for a bit and let the stain set up. Once it’s no longer tacky I can proceed.

Seems we’ve decided to add a door and a pencil drawer to this project. So I need to make those and stain them before we go further.

I spent the afternoon ripping strips and gluing them together in half-panels, then surface planing the half-panels and jointing the halves and gluing the halves together into the blank that will yield a nice flat door and matching drawer front.

It's a bit early, but I now have a shortage of space again. And we have out of town relatives visiting -- whom I am not spending much time with because I don't get to take extended leaves of absence, so Marie and I will be taking them out to dinner this evening. Therefore, I need to get cleaned up and change clothes anyway.

Doug

Tuesday, December 26

Tuesday

We are rounding third base and heading for home.

Today I trimmed the shelves and the keyboard tray to finished size and sanded them thoroughly. Then I cleaned up the shop a bit.

I removed the pedestal from the desk – to make things easier to handle – and stained everything but the top of the desk. This will all have to set overnight to cure, then I’ll begin putting things back together and getting ready to shoot some lacquer.

Doug

Monday


Today we're taking the day off to celebrate the birth of our Lord, savior and friend. We'll be back at work tomorrow.


Merry Christmas!


Doug & Marie

Friday, December 22

Friday

Kind of a nasty day weather-wise. Not cold by any means -- I didn't even have to start up the woodstove today -- but grey and drizzly all day long. At least I wasn't tempted to go out and work on The Hill!


More visible progress today; I finished up and mounted the modesty panel, attached the storage pedestal to the modesty panel and the desk top then installed the keyboard slide. The rest of the time today was spent milling, jointing and gluing up blanks for the two shelves and the keyboard tray.

That’s about it for today.

Merry Christmas!
And remember, Christmas without Christ is just a mas.

Doug

Thursday, December 21

Thursday – Coming together

Today was one of those gratifying days when you actually get to see some real progress. Making parts is fine, but it’s always a thrill when you get to put some parts together to build something 3-dimensional. Even if it’s only temporarily.

The day started off a bit late because early this morning I received an order for a bottle stopper rack that we have on-hand and needed to get the order processed and get the rack packaged up and ready to ship out on today’s UPS pick-up. I made it.

Then it was back to work on Calvin’s desk. I started by making the front and back rails for the storage pedestal, then assembled the pedestal. I also made the bottom shelf and cut the back panel and put these in place as well.

I also milled out the parts for and glued up the modesty panel – it’s in clamps overnight (standing behind the desk). And I attached the free leg panel. I have to be careful because without the modesty panel in place to brace it, it will be rather fragile.

I’m going to forego the evening session again – feeling a bit worn out again, but getting better.

Doug

Wednesday, December 20

Wednesday - recovering


I’m feeling enough better to get back to work. Spent the morning finishing up the small projects that were ordered for Christmas delivery. There is a third wall hung stopper rack which was posted to the Christmas Shop page. I guess I’ll need to pull that page down in another day or two. Best write myself a note…
And I finished up Jackie's 2 tier stopper rack in cherry and oak. It turned out very nice. That needs to be shipped off to her sister.

This afternoon I was cutting slots in the pedestal sides of Calvin’s desk to house shelf standards, then re-assembled the three panels with glue and clamps. That used up the afternoon. I’ll quit now and not put in an evening session today – still recovering and all.

Doug

Tuesday – Out Sick

I’m severely under the weather today – something is going around, half our church was out sick on Sunday. Today I’m staying in and working on some web site stuff. I plan to be back at it tomorrow. Doug

Monday, December 18

Monday

This morning was spent packaging up the bag handles for In The Bag and milling out parts for the two remaining bottle stopper racks in the list. After lunch I utilized the warm sunny weather to chop out some tie-back trenches up on the high hill. I figured I should use the daylight for outside chores and till go back to the workshop this evening and work late. Otherwise I’m not going to get everything done before construction starts. After supper I indeed went back to the workshop and finished cutting all the mortises in Rev. Calvin’s desk pedestals, then hand fitted and dry assembled them. That pretty will used up this day. Doug

Friday, December 15

Friday

I spent the morning cutting tenons on all the parts of the desk base. I chose to use the bandsaw for this, and broke not one but two bands! I guess they were getting old; still sharp but the welds broke. One can be re-welded, the other kinked pretty badly and will have to be replaced.

During the afternoon I set up the drill press for chopping mortises then laid out the mortises on the parts and chopped all needed to assemble one of the three pedestal panels -- and discovered that my ¼” mortising chisel is bent. What a day!


At least we got good news on our constructio project. Take one large step forward.

That pretty well used up the afternoon. But everything is set up and ready to go next time.

Doug

Thursday, December 14

Thursday

Not much to talk about today; This morning I put a final coat of oil on Catherines bag handles. Then I roughed out the parts I’ll need for the three “legs” under Rev. Calvin’s desk top, then trimmed and thickness planed them to finished size. That pretty well killed the day. During a break I posted some needle cases we turned up in the store room to the Christmas Shop section. Doug

Wednesday, December 13

Wednesday

The weather has been much warmer lately, so I can get an early start: I don’t have to wait for the workshop to warm up to a workable temperature. This morning it was 52° when I went out at 7:30. Very nice.

I spent the morning working on Rev. Calvin’s desk top; planning the two halves that I made yesterday smooth and to thickness, then joining the halves together. Again while glue was drying I was working on Caroline's bag handles.

During my lunch break I started posting some bottle stoppers we found to the Christmas Shop section of our web site. I’ll get the rest done this evening. Click the title of this post to go to the Christmas Shop and see what we’re offering for immediate shipment. Most everything is one-of-a-kind.

Most of the afternoon was spent shaping, sanding, grain filling and sanding some more on the desk top. It’s done and it’s beautiful! Now on to those fiddly bits that go under the desk top.

I finished up the day by giving Caroline’s bag handles a second coat of oil. I’ll see how they look in the morning. If they need to be scuffed and oiled again, I’ll do that right off otherwise they will be ready to ship out.

Doug

Tuesday, December 12

Tuesday – Back on track

Today I was back at the regularly scheduled jobs. Specifically, I was building Reverend Calvin’s desk top. Same procedure as I was using for Dan’s sewing cabinet, just bigger. I got the lumber milled out, strips cut and glued back together (except the center joint) and will let this assemblage set in the clamps overnight.

During the down times for letting glue set up I shaped the bag handle blanks for Caroline’s order.

See you tomorrow!

Doug

Monday, December 11

Monday – side trip

Because we’ve has a fair number of people wanting to know what the new wall hung bottle stopper rack will look like, it was decided that I should take one day to make one or two of these items; for photographing. So today I did just that.

But to make the racks I first had to make a jig that would allow me to cut precisely spaced and perfectly square dadoes in the sides of the rack.

After building the jig, I built two racks, one in our customary Walnut & Poplar, and one in all oak. You may click the title of this post to go look at these racks. These two are available for immediate purchase and shipment.

Tomorrow it’s back to the regular jobs.

Doug

Thursday, December 7

Thursday

Today was a repeat of yesterday, producing the second panel (lower top) for Dan’s sewing cabinet. The final glue-up is in clamps now and I left enough wood in the stove to produce heat long enough for the glue to set up. It’s going to get down into the ‘teens’ tonight, but residual heat in the air and the woodstove should keep it warm enough long enough for the glue to set up properly. The only difference in today from yesterday is that it snowed – not much, just flurries – and that Len, a friend and fellow craftsman came by and cleaned out my wood block collection. He makes hand forged knives and these blocks of exotic woods will provide enough material for the handles of his knives for years. So, if you’ve gone looking for the Block Shop on our web page and couldn’t find it, that’s because it’s not there anymore. Len, like a kid in a candy store, was delighted to get all that colorful and unusual wood, and I appreciate the additional space in my workshop. It was good for us both. Tomorrow Marie and I are going to be helping with a community event in Newport: Christmas In The City, so I may or may not get any woodworking done. It depends on what they need us to do and when. Hope you have a great weekend! Doug

Wednesday, December 6

Wednesday: A change of heart

I spent the morning cutting the boards I planed out yesterday into narrow strips. The decision to do this was a tough one. We started with beautiful, 10” wide, flat walnut boards. I planned to simply joint them and glue them together to make the upper and lower the top plates for the cabinet. But, the more I thought about this, the more it concerned me. While this plan produces beautiful panels with superb graining (even had a little quilted walnut right in the center of the upper plate) there is the possibility that these wide boards will move a little when shipped into another climate. We had that problem with Paula’s cabinet – and that was made of quarter sawn oak, which is supposed to NEVER cup.

So, although it almost brought tears to my eyes to slice up such pretty boards, I cut them into 7/8” wide strips, flipped them 90° and glued them back together into a wide board again. We loose the grain patterns this way but it will be far less likely to lift a corner on us. And since Dan wanted it to look as much like mahogany as possible, the edge grain of these panels will look much more like the graining of mahogany than the swirls of walnut.

If you click the title of this message (above) it will take you to the article I wrote while building Paula’s Sewing Cabinet. It gives lots more detail and photos of the construction of this piece of furniture.

The afternoon was spent gluing and clamping the final quarter of the panel, then surface planing and smoothing the panel. Because the panel is too wide to go through our surface planer in one piece, I made it in two parts. Surface planed them to ¾” then joined them together down the center. That way only one joint will have to be faired out by hand.

The result is a panel 20” wide by 50” long that is perfectly smooth and flat. I’m making this up first so that it will get to sit around in the shop for the coming weeks, through several cycles of humidity, to be sure it will stay flat. This is not a guarantee that it won’t misbehave when shipped into a totally different climate, but it’s all I can do to protect my customers from disappointment. Beyond this it's in God's hands.

Doug

Tuesday, December 5

Tuesday

Another cold day today – and abbreviated as well. This morning I had to run all around taking care of all manner of chores; Newport, Cosby and Edwina. That used up the morning. During the afternoon I surface planed and edge trimmed the boards I’d selected to be Dan’s sewing machine cabinet top plates. Now they have to sit for a day or two more to see if they’ll twist now that they are thinner, then I’ll joint them for gluing up into panels. This evening Marie and I are assisting with the Newport City Tree Lighting Ceremony, so I have to close the shop a bit early, get cleaned up and head into town - again. Tomorrow will be back to normal (whatever THAT is!!) Doug

Monday, December 4

Monday

Brrr… it was cold today; started out in the 20's and only got up the high 30's. A good day to stay in the shop and near the wood stove!

I finished up Yvonne’s stopper rack and prepared it for shipping, as soon as she gives me the OK to process the final billing it will ship out.

I also resawed and surface planed a mess of walnut for Ros’s bag handle order. I’ll turn these over to Brian now and that reduces the clutter in here just a bit more.

I’m continuing to post my exotic blocks collection for sale, but decided that the auction web sites are just too complicated and expensive to make use of for this, so I’ve added a new section to our own web site The Block Shop and will post them all there, where they can stay until sold. That way I don’t need to try to cover the auction listing fees or fumble with their confusing forms.

Click the title above to go take a peek.

I’ll add a few more each day, as I have time.

Doug-Bob

Friday, December 1

Friday

Winter is expected to arrive in full force today. We have a light rain falling now, wind advisories with gusts to 45 MPH and temperatures falling through the day from our current 70° to around 30° this evening. All in all, an excellent day to be spending in the woodshop where it will be warm, dry and secure. This morning I will be sanding and oiling the garden bench so I can set it outside to make room to work on these other projects. Then, while the router table is re-configured anyway, I’ll finish making the parts for Yvonne’s stopper rack before reconfiguring it again to run glue joints, which will be needed on Calvin’s desk and Dan’s sewing machine cabinet. I’ll let you know how it goes this evening. * * * It went well. Turned out to be a very blustery day but the skies cleared up and it stayed warm until late evening. I was tempted to head for The Hill, but stayed the course to accomplish my assigned tasks for the day. I even got some cleaning and re-arranging done, and photographed a few special wood blocks that I am going to offer for sale on E-Bay. I have boxes and boxes of gorgeous small pieces of exotic and unusual domestic woods that I have bought over the years with the thought of turning them into some small project or using them as decorative bit on a larger piece. But as I’m doing nothing but custom work these days I rarely have time to do anything just for fun. So these boxes of blocks are just in the way. I need the space, so out they go. I’ll post the first batch tonight. Doug-Bob

Wednesday, November 29

Wednesday

It was a nice day today. Rain was predicted, but it was actually nicer today than it was yesterday; warm and partly sunny. The weather-guessers have now decided that it won’t rain until tomorrow night. But I spent the day in the woodshop just the same. I got the large pile of 10 foot long walnut boards I hauled in yesterday cut down to where they will stand-up vertically. Then I finished assembling a garden bench that was ordered long ago by a local church – they wanted two, I delivered the first one and they decided that was enough. But then they decided they wanted them both after all. I’ve put that project off a bit due to this waffling, but now the parts for the second bench are in my way. Time to get it done and get it gone. It’s all assembled now, just needs to be sanded and oiled. I spent some time this morning working up a bid for a wall hung bottle stopper rack for a gal who wanted one. It turned out well enough that I decided to add it to our web site. I’ll post a picture once we build the first one. Tomorrow I’ll spend at least part of the day closing up the Treasures Of Appalachia gallery for the season. Friday I’ll be back in the woodshop. Talk to you then, Doug-Bob

Tuesday, November 28

Tuesday

Today was supposed to be mostly sunny and warm; it’s not. It’s quite cloudy and feels like it could rain at any moment. So I worked quickly to finish up the wall construction. Mostly. I still have three stubby posts to set at the far end, and of course the tops of the posts need to be tied back so I can remove the brace boards. But that will have to wait until after the rains. This morning I finished attaching the top rails to the posts and trimmed the excess from the top of each post. Then I cleaned up the job site and put away all the tools. This afternoon, I’ll be hauling about 200 board feet of lumber into the shop from our lumber piles for the next few projects. Then I’ll be sorting and stacking firewood. This evening I’ll be rubbing liniment on my poor aching shoulders. I’ve been doing a lot of lumber lugging lately! Tomorrow it's back to the sawdust mines, and I'm glad of it!
Later,
Doug-Bob