Tuesday, November 28

Monday

Monday and Tuesday of this week are the only days expected to be free of rain, so I’m reserving them for working on The Wall. Today I bought another fourteen 2x6’s and completed installing the planks. I got a start on drawing down the planks to remove as much gap between the boards (caused by boards crooking) as possible and fastening the top row of boards to the posts with heavy decking screws. I do this by using pipe clamps from the workshop: one across the 6x6 post as an anchor, the other reaching from the top board down to my anchor. This is not totally effective, but it did help. The gaps do not allow anything through the wall because the splines I inserted into the boards edges seal up between them, it’s just a matter of appearance. Filling in the blanks from last week: Wednesday I was on The Wall, Thursday was Thanksgiving, Friday I spent in the woodshop cleaning, moving and preparing to start a couple of new projects. Saturday I was down at Treasures taking my turn at being shopkeeper. See you tomorrow, Doug

Tuesday, November 21

Tuesday

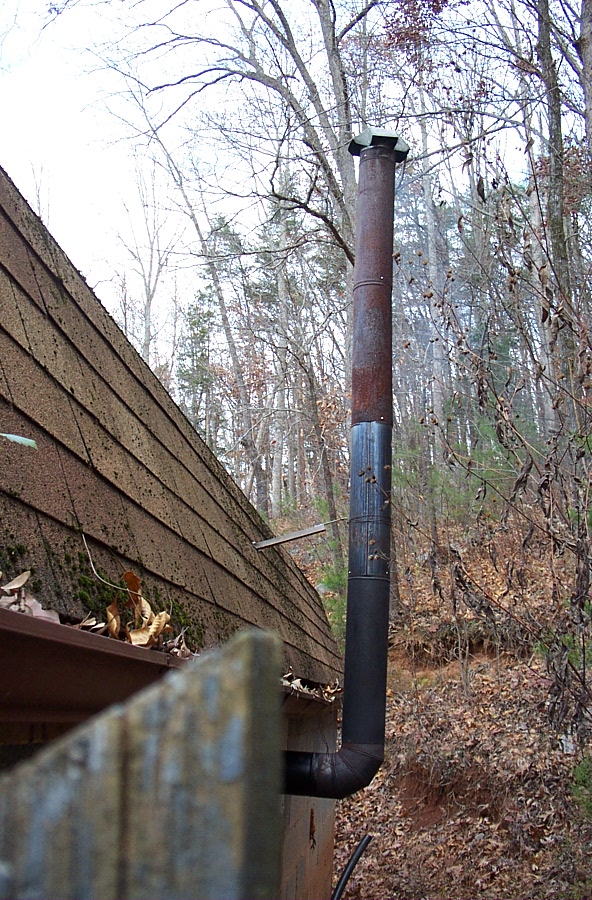
Yesterday while I was working in the shop I heard this soft “whump” sound from the neighborhood of the woodstove. I didn’t see anything amiss, so I figured it was the burning wood settling inside and went back to work. Later, while stoking the stove I happened to notice that I could see smoke through the gap around the stovepipe where it passes through the wall. That shouldn’t be. Going outside, I found that the end of the pipe that goes out through the wall had rusted/burned away and whole smoke stack had fallen to the ground. I drove to Wilton Springs early this morning to get the replacement parts I’d need before Marie had to leave for work then spent all morning fixing the stove pipes. Two things are tricky; one, the straight pipes are not pipes. They come as curled up sheets of metal with a sort of tab & slot joint running along each mating edge. I have to deform the pipe to get the tab into the slot, then try to make the tube round again so the other pipes and elbows will fit onto them. I get the heavy gauge pipes so they will last at least one whole year; the light weight ones burn through too fast. The second thing is that the ends of each pipe have a “crimped” end which is supposed to slip into the uncrimped end of the next piece – but they don’t. So I have to rework the crimped ends to form a taper on the end that the next piece will slip over and I can work it down as I try to round out the new pipe lengths. To do it right takes more hands than I have, but with enough time and persistence I managed it. And a blazing fire is now warming the shop. After lunch I will get to shooting lacquer on the repaired leaf so it can be sent back. I got the leaf lacquered, allowed it to dry well and packed it up to go out on today’s UPS truck. Then finished out the day with some assorted chores that have been getting neglected of late.

Monday

Today it is cold and snowy. Not much snow, not enough to accumulate, just some flakes in the air. But definitely enough to discourage me from going up on The Hill to work on The Great Wall of Edwina today. So instead I actually got some woodworking done. I finished up Pastor Calvin’s shelves for his second book case – they needed adjusting. I should have done that last week, but didn’t; trying to get enough of The Great Wall done to contain the next cave in. But he has holiday guests arriving tomorrow and about 100 books stacked on his guest bed. He *needs* his shelves. So I made them a priority and got them done. Marie will take them with her to Newport tomorrow morning and he will retrieve them from her there. Then I worked some more on repairing the sewing machine cabinet leaf that came in last week. The repairs were done last week, today I sanded the repaired face down and re-stained. That will have to cure at least one day – more if the cool temps and high humidity interfere. I finished out the day by cleaning up a bit. The floor is caked with red mud from my running in here to mill grooves in both edges of the boards for The Wall. Tools and supplies used in the three projects were sitting all around. So I straightened up, scraped off the concrete floor and vacuumed. It is now somewhat better. See you tomorrow. Doug

Wednesday, November 8

Wednesday

It rained again all day today. Part of our dirt wall on The Hill caved in; what a mess! But I can’t do anything about it just now, so I focused on the bookcase instead. I got the casework stained this morning and have spent the afternoon shooting lacquer. Because of the high humidity it’s drying slowly – long periods of inactivity between rounds of spraying – but I got the whole thing done before I quit for the night. Tomorrow morning we have a meeting to attend in Newport. In the afternoon we’ll probably be working on The Hill; it’s supposed to be sunny tomorrow. Doug

Tuesday, November 7

Tuesday

As expected, we’ve had rain on and off all day, so it’s a great day to stay in the workshop and get some woodworking done. This morning I sanded the casework and shelves in preparation for stain. This afternoon, I prepared the shop and began the staining process. BOY I’ll be glad when the new shop is done and I have a dedicated space for finishing work. I got all the shelves stained – both sides – and they are sitting around curing for the night. In the morning they should be dry enough to move out of the way and start on the casework. Doug

Monday

As you know, we’ve been working on the second book case for the Pastor’s Study. Today, however, I spent the majority of the day working out on The Hill, where we are preparing a site for a new building. This morning I laid out the position for the posts that will support a retaining wall to hold back an eight foot high dirt wall at the back of the site. Then I assisted Tommy in cutting down a large oak tree that was just too close to where the building would go. If a branch broke off it would come through our roof so it needed to be removed. Then I spent a good part of the afternoon cutting the tree up into firewood for use later this winter and ‘prettying up’ the rock on the new driveway; straightening the edges, filling in the bare spots with rock from extra deep spots and generally evening things out a bit. It is supposed to rain this afternoon, and through the next few days, so I wanted to get these things done before the rain started. In the late afternoon I did get to do some work on the book case. I plugged the remaining pocket holes then sanded the plugs smooth, and did the first sanding on all the shelves and the cases with 60 grit paper. Since we have a 100% chance of rain tomorrow, I expect I’ll be in the workshop all day working on getting this piece done. See you then. Doug

Friday, October 27

Friday

Today we got close to finishing up the construction of the second book case by building and attaching the toe-kick cabinet and milling the shelf stiffeners. I also had Marie help me lift the upper case on top of the lower case to be sure the joinery fits snuggly in between. It needs a little tweaking, but nothing serious. I'll take care of that next time, finish building the shelves and give everything a good sanding. That will complete the construction phase. See you Monday! Doug

Thursday

Today we went back to making panels – this time for the shelf boards. We took rough sawn 4/4 by 8 foot boards and cut them down into pieces around 3” wide by 37 inches long. These were surface planed, then the edges trimmed square. Then we went back to our router table to cut the glue joints in the planks. This is physical work – keeping the planks mashed flat on the table and firmly against the fence and moving smoothly past the bit. Hard on the shoulders. We glued and clamped the 6 shelves in two set of three – for three shelves this length requires 12 pipe clamps and that’s all I have. Once the glue sets up for a couple of hours on the first set the clamps can come off and the second set can be glued and clamped. In between times, I went out to cut up a fallen tree into firewood. See you tomorrow… Doug

Mon - Wed

Greetings! During the first part of this week we got going on the carcass of the second book case. The side panels are done – I made those when I did the sides for the first book case because they are all the same. The top & bottom plates are slightly smaller than the other case, so I left them to be made separately. That has been done, along with milling the face frame parts and assembling the casework with glue and pocket hole screws. As before, making the panels involves cutting the 8 foot rough-sawn planks to rough length, ripping the 6” wide boards in half, planning them smooth, glue jointing them and gluing the narrower boards back into wide panels. All this is done to produce a panel that is more likely to lay flat and stay that way. Till next time… Doug

Thursday, October 12

Thursday

Over the past couple of days we completed the finish sanding, staining and today we applied the lacquer. The weather was chilly and damp today, so it took much longer than normal for the finish to dry, so this was an all day process although it involved only a few hours of actual work time. I also got the shelf standards installed. So, this book case is ready to deliver to Dr. Calvin. As soon as we get this one out of the shop, we’ll have room to work on another. All the best, Doug

Monday, October 9

Monday

Today we completed the shelves for the right side bookcase. This involved: Trim 6 shelves to length Trim 12 stiffeners to length Lay-out & drill 60 pocket holes Assemble 6 shelves using glue and 60 pocket hole screws Install 60 pocket hole plugs Level pocket hole plugs with coarse sandpaper Sand shelves to 100 grit & inspect. This completes the construction phase of this bookcase. Not the entire project, just this case. But because we don’t have room to build the entire project at once, we are breaking it up into three components. Each is to be finished and delivered as they are built. Tomorrow we begin the finishing stage. See you tomorrow, Doug
Thursday, October 5

Thursday

Today we dressed out and trimmed the shelves we’ve been gluing up and got the shelf stiffeners milled as well. This was a shorter day than normal because there is a Chamber of Commerce function to attend this evening and we have volunteered to help with it. Tomorrow I must spend the day at Treasures Of Appalachia as shopkeeper. See you Monday, Doug

Wednesday, October 4

Wednesday

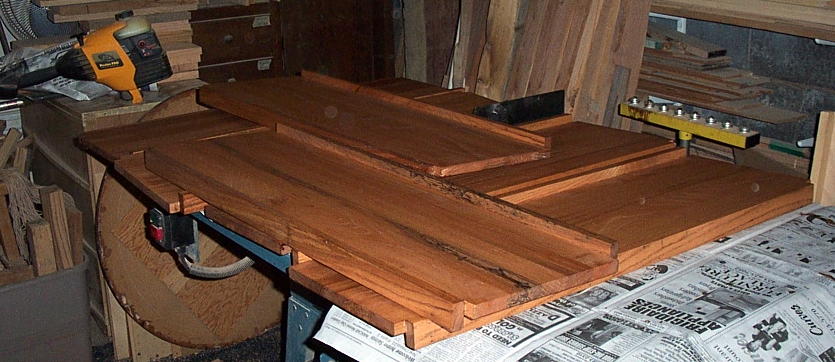
We’re working on making the shelves for Dr. C’s bookcase today. The process is to take the narrow boards we milled yesterday and run them through the router table, which is outfitted with a special bit, to produce the edge-to-edge glue joints. It takes 5 boards to make a shelf, so we apply glue to enough boards at a time to make one shelf, align them and apply clamps. Repeat until we run out of space to put the glued up panels or we run out of clamps. It takes a couple of hours for the glue to set up sufficiently to safely remove the clamps and use them on another set. We have six shelves to make for this book case. See you tomorrow, Doug

Tuesday, October 3

Tuesday

We bought ourselves a new mattress set last night, and this morning was the first time in a long time that I didn’t wake up feeling like I’d been hit by a truck. We hauled the old set off to the local “convenience center” then Marie dropped me back by here and headed out to do her thing. Today I’m working on making the shelves for this book case. That means starting with rough lumber, cross-cutting lengths that are just a wee bit longer than the finished shelves need to be, then ripping those pieces in half lengthwise, surface planing them to 7/8”, glue jointing them, and gluing them back together into wide boards for the shelves. Why cut wide boards into narrow pieces just to glue them back together? To prevent the shelves from curling up. By alternating grain patterns so they will fight against each other should they decide to “move”, we can greatly reduce or eliminate the chance that the shelf will twist or cup. My day’s plan ran into a snag when a neighbor, who is ill, needed some assistance and I took time to help. I did get one shelf glued and clamped. I’ll work on the others tomorrow. See you then, Doug

Monday

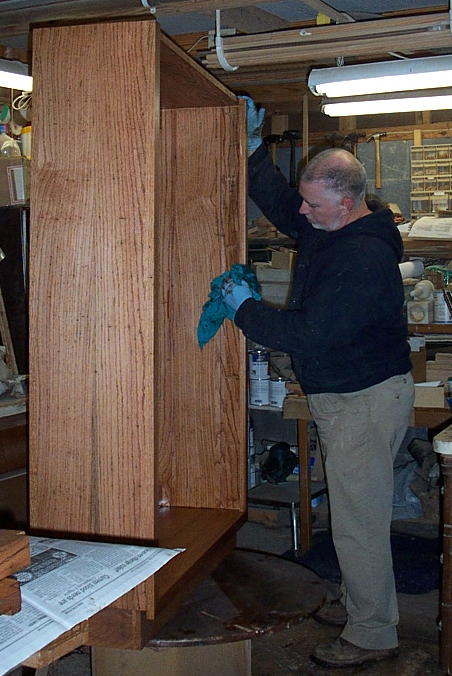
Today I milled the parts for and built the toe-kick cabinet that goes in under the lower part of the book case. I sanded it to 100 grit and attached it to the lower case. Then I made plugs for the pocket hole screws that may be visible and went back around and plugged all those holes and sanded them smooth. Then I sanded the rest of the book case, inside and out, to 100 grit. This is construction sanding. I haven’t gotten into the finishing work yet. I’m just smoothing things out, removing glue stains, and looking for any problems. I scared myself silly this afternoon. I have made allowances for Dr C’s baseboards so they will not have to be removed, but while I was sanding I realized with a start that I had not allowed for crown molding. These cases will go clear to their ceiling, what about the crown molding?!? However, a look at the photos of the room this will go into shows that the room does not have crown molding. We have seen a number of houses recently that do have it and it must have just stuck in my mind and my mind played a cruel trick on me. But, all is well now. And onward we go. This completes the case construction for one book case. I still have to mount the shelf standards, but that will not be done until after the case is stained. So I’m setting the cases aside (as much as I can in my small shop) and going to work on the shelves tomorrow. See you then, Doug

Friday, September 29

Friday

Yesterday and today were spent making and installing the face frames. These are a little trickier than most because the bookshelf is made to split in half vertically so they are easier to transport and work with. At 9 feet tall, they would be a hand full in one piece. There have been many distractions over the past two days. Normally I don’t take the cordless telephone out to the shop with me because of all the silly calls we get – telemarketers mostly – and the time it takes to deal with them without getting rude. But we are in the middle of negotiating a deal that will definitely improve our lives and amount of work I get done in a weeks time. And to do that, I have to be able to accept the calls when they come in. So I’ve gotten only about half a day’s work done each day. But, we’re getting down to the line, so hopefully that will not be a problem much longer. Hope you have a great weekend. See you Monday! Doug

Tuesday, September 26

Tuesday

I got a good full day in with few distractions – for a change. Among the things I got accomplished today were: 1) Trim the case panels to exact length and square 2) Drill the pocket screw holes 3) Route the rabbets on the upper and lower ends of the sides 4) Cut the dados that the shelf standards will fit into 5) Glue and assemble the two cases for the right side bookcase. Just for grins I went ahead and stacked the upper case on top of the lower case, stood back and took it in. For some reason all I could think was, “Golly, that’s a big thing!” Tomorrow Marie and I head for Ashville NC, so no work will get done. But I’ll be back in here Thursday and Friday to make the parts for and install the face frame and stiffeners. Next week we’ll make up the shelves and get ready to do some finishing. See you Thurdsay! Doug

Thursday, September 21

Thursday

I got a late start in the woodshop today. This morning I found an order for 6 of Georgia’s hand painted saw blades on the Treasures computer. It was Georgia who passed away last Sunday. So I had to call the Treasures gallery this morning and have Lynn, the shopkeeper du jour, search out the blades and set them aside. Sounds simple enough, but it’s more like a scavenger hunt run via telephone; I describe the blades using pictures I printed off the TOA web site, and he wanders around the gallery looking for the blades that match my description. It took a while but they are pulled and set aside. Since Marie has our truck today I have no way to get to Cosby to reteive these items for shipping, but as it happens, Lynn will be picking up a prescription at the same store Marie will be doing her weekly grocery shopping this evening, so they will hook up and hand off the blades. I am shopkeeper of the day tomorrow, so I’ll pack them up this evening and ship them on my way to Cosby in the morning. But for today, I’m doing the finish sanding on Chris’s TV Tray Table Set. If I get done in time, I’ll go ahead and clean up the shop and shoot them with lacquer this evening. * * * * * I got the tables lacquered, and it dried in time for me to skim coat the tray tops with tung oil polyurethane to protect them better against spills. The poly needs to set up for at least 8 hours, so I’ll get these packed up this weekend and be ready to ship out on Monday. I’m in Treasures tomorrow and S.M.W. is closed (officially anyway) over the weekend, so I’ll see you on Monday. Have a great weekend! Doug

Wednesday

Today was a bit of an abbreviated day, for a dear friend passed away this past weekend and her funeral is this evening. So I had to close down early and get cleaned up. Most of the day was spent doing the final assembly on Chris’s TV Tray Table set, plugging the screw holes and sanding everything to 100 grit. This completes the construction phase of this project. Normally at this point we’d be asking for another payment on the order but, since Chris chose to pre-pay his order in full, there is no need; we’ll forge ahead without delay. In the afternoon I planed down all the glued-up panels I’ve been making for Dr. C’s bookcases and trimmed them to precise width. I have been taking pictures of both projects but have not had the time to format them and write up the accompanying articles. Maybe I can get caught up with that this weekend. Time has been short the past few weeks because we’re working on a deal that – if we can obtain financing – will allow me to move my workshop into a space that is not only 4 times as large, but insulated, heated and COOLED! I will finally have a dedicated finishing room, a separate office space and a workspace that OSHA wouldn’t flat out turn down as suitable for human inhabitation. That would mean that Marie could hire me an assistant and we could get production going along at a faster pace. That would make everyone happier. If we an make it happen. Wish us luck. See you tomorrow! Doug

Tuesday, September 19

Tuesday

Today I spent the entire day working on Chris's tray tables. All of the sub-assemblies are done now. Tomorrow the sub-assemblies become a set of tray tables. Once these are out of the shop I'll get back to work on Dr C's book cases. The panels I need for one case are done, so I can begin milling and assembling the first case. Till tomorrow, Doug

Friday, September 15

Friday

Fall seems to have arrive a bit early, it got down in the 50’s last night and so it was a bit chilly at the start today. But the concrete walls of my workshop held yesterday’s heat and it was quite pleasant in there, I just kept all the doors closed until mid morning when it warmed up. Today I worked some more on Dr. Calvin’s book cases. I jointed up the last of the side panels and milled the parts for the 4 case top/bottoms needed for the right hand case. The right bookcase is a slightly different size from the left one, so while the side panels can all be milled at once, the tops, bottoms and shelves must be made separately. I got two of the T/B panels jointed, glued and clamped and worked on Chris’s tables when glue was drying. We’re the shopkeepers in Treasures tomorrow, so I’ll see you Monday. See you tomorrow! Doug

Thursday, September 14

Wed & Thurs

I didn’t get a chance to log on yesterday, but today and yesterday have been spent roughing out parts for Chris’s tables and jointing and gluing up side panels for Dr. Calvin’s book cases. There’s not much to watch just yet. See you tomorrow! Doug

Wed & Thurs

I didn’t get a chance to log on yesterday, but today and yesterday have been spent roughing out parts for Chris’s tables and jointing and gluing up side panels for Dr. Calvin’s book cases. There’s not much to watch just yet. See you tomorrow! Doug

Tuesday, September 12

Getting Ready

This morning I pulled 130 board feet of red oak off the pile and moved it inside the shop to acclimate. The hardware has been ordered, so all I need to do before starting construction is to complete the measured design drawing. I’ll work on that this afternoon and get started on Dr. Calvin’s new bookcases and desk tomorrow morning. I’m also getting started on a pair of Classic Tray Tables in white oak for Chris. Dr. C’s book cases will involve lots of gluing up of panels, so while his glue is drying I can work on Chris’s tables and stand. The gal who ordered the 9 Drawer DVD Cabinet will be moving into a new home soon and asked that we delay building the cabinet until she was ready to receive it at the new house. So I flip-flopped her order for Dr Calvin’s, as there are some extenuating circumstances there that require some urgency. While I was working in the lumber yard, I took the opportunity to get the hickory, excess white oak, maple and walnut, left over from recent projects out of the workshop and back on the lumber stacks. That makes quite a difference in the amount of work space I have. During the late afternoon and after supper I made up the two ribbon panels I need for Chris’s tray tables. They’re in clamps for the night. I’m going to update the Classic TV Tray journal with this project: we’ve changed a lot of things since I did that one. Thanks for looking in! Doug

Monday, September 11

Day 9 – Shipping day

I spent a couple of hours this morning doing the final bits on Brenda’s tray tables and getting them packed up, ready to ship out. These final bits include checking the legs to see that they sit level on a flat surface, smoothing the final coat of finish and polishing the set with orange oil prior to packaging. Packaging used up 2 36”x24”x12” shipping cartons (which we have custom made to fit out Classic TV Tray sets), a full 4’x8’ sheet of ¾” Styrofoam, about 4’ of bubble wrap, 6 square feet of crate board and an undetermined amount of stretch wrap, boxing tape, shredded paper, and crumpled newspaper. But, unless someone runs over them with a truck, these tables *will* arrive undamaged. So it’s worth the extra trouble. The shipment has been weighed and processed, labels printed, and Brenda has been notified of the cost. As soon as I get approval to bill her card, the boxes will go out on the dock to wait for Willis, our UPS driver who usually comes through at mid-afternoon. On another front, the crate containing Paula’s sewing cabinet is still sitting in the shop waiting for the 10 day period needed when payment is made by personal check. That will elapse on Wednesday. But, the weather forecast is for increasing chances of rain as the week progresses; 70% by Wednesday. So I think I’ll disobey the rules and take the crate over to White Pine this evening when Marie gets back with the truck. We probably ought to get set up to process checks electronically instead of depositing them and waiting. But we get so few personal checks that the added expense doesn’t seem worth while. So, the rest of the day will be spent cleaning up the mess in the shop and getting ready for our next project. Maybe I’ll do some mowing before the rain starts again. Full details are available in the journal for this project. Thanks for following along! Doug

Thursday, September 7

Day 8 – HD Tray Tables

I got the trays lacquered and reassembled. Have to let the finish set up good and hard, then I’ll scuff sand the tray tops and apply the poly skim coat tomorrow. Full details are available in the journal for this project. Doug

Wednesday, September 6

Day 7b – HD Tray Tables

Some things came up that required my attention last night, so I didn’t get the second round of sanding done then, but I accomplished it this morning, cleaned the shop thoroughly, vacuumed the table parts and applied the stain. It went well. The color is even and matches our Oak Mantel color sample board well. Now we have to let the stain cure overnight. I should be able to get them lacquered tomorrow. Full details are available in the journal for this project. Doug

Tuesday, September 5

Day 7 – HD Tray Tables

I fixed the payment gateway late last night, and Brenda successfully submitted her payment this morning. I spent most of the morning out fetching firewood in the rain with Tommy – who had just cut down several poplar trees for a fellow out by Del Rio and offered to let me have the wood if I’d help him clean it up and haul it off – I need to change out of these muddy clothes so I don’t pollute the surface of Brenda’s pretty tray tables as I sand them, then I’ll get back out to the workshop. I spent the afternoon plugging screw holes and sanding the tables and stand. Got the first round done before Marie said it was time to stop for supper. I’ll go back afterward. I hope to get all the sanding done tonight so I can get the stain on tomorrow… but my shoulders are aching already. We’ll see… Full details are available in the journal for this project. Doug

Day 6 – HD Tray Tables

I’m a bit tardy in posting this update. Yesterday we completed the construction phase of this project by making the parts for the stand and assembling them. The second payment has been requested and Brenda has attempted to comply. But our web site was being a bit balky last night. I managed to track down the problem and get it to run a test transaction, so it should be working again. No one else complained about not being able to make a payment or purchase, so I don’t know for sure how long it has been broken. This was a fairly short day in the workshop, so I used the extra time to update the pricing on the HD Tray Tables on the web site using actual figures from building this set. See, in the past we’ve always estimated the amount of labor we put into things – kind of like an auto mechanic does, figuring what we think it should take based on other jobs. But recently we’ve been time clocking each project to determine exactly how much labor is actually being put into our projects, and where we might be able to streamline things with new equipment. For example, by purchasing a Performax Drum Sander for $1200 we could assemble the ribbon panels needed for this project all at one time and smooth them with the drum sander instead of the planer. This would eliminate chip-out – which is a problem in some species of wood – and reduce labor by at least an hour. Is a $25 savings to the customer worth a $1200 expense to us? It may be if these table sets continue to sell as briskly as they do. Recently we’ve had quite a few inquiries from people wanting to know if the posted price was for one table or the set. We thought that was pretty clear, but since these do generally sell in sets of four, we went ahead and re-did the listing for the HD Tables so they sell as a set of four tables with stand and are priced accordingly. I’ll do the same for the Classic Tables as soon as I have the spare time. The database that drives all the options offered on these things is extensive and it takes hours to make this sort of change to a listing. Full details of todays workshop activities are available in the journal for this project. Since we’re on hold this morning I think I'll go lay in some firewood. They're predicting a very cold winter this year, so I'd best get a head start on it. Doug (PS I've tried repeatedly to add a picture to this post for you, but Blogger is being balky this morning. It says the picture was uploaded and added, but it doesn't show up. It's time to get on to other things now.)

Friday, September 1

Day 5 – HD Tray Tables

This was one of those really gratifying days when tons of visual progress gets made. It’s like that in furniture making; you can spends days and days making parts, then in a single day all those parts come together into something people can actually relate to. Today a pile of odd wooden pieces became a set of tray tables. Full details are available in the journal for this project. See you Monday. Doug

Thursday, August 31

Day 5 - HD Tray Tables

Today dear readers, we completed the spreaders and legs and assembled them into leg sets. They are now ready to attach to the trays to make tables.

Day 4 – HD Tray Tables

We now rejoin our regularly scheduled project, already in progress. Today we roughed out the table parts and built the tray tops. Full details are available in the journal for this project. See you tomorrow. Doug

Monday, August 28

Day 21 - Deluxe Sewing Center

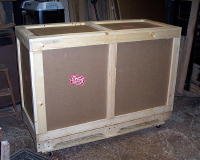
First thing this morning I made a run to International Paper in Morristown, to pick up the crate board Then to the lumber yard for the lumber needed to build the crate for Paula’s Sewing Cabinet. That consumed 2 hours. Then I began wrapping the cabinet with Styrofoam as padding against the rigors of being shipped across country in a freight line truck. Not that Old Dominion is rough – just the opposite – of the companies we’ve used over the years, ODFL is the only one who doesn’t destroy our shipments. So far (knock on wood) they have a perfect record: no losses. But part of this record is the fact that we package the shipments carefully and protect them against the bumps and jolts of being transported in a semi tractor-trailer. I got most of the foam work done before taking my lunch break. After lunch I finished the foam wrapping, cut and applied the crate board then got going on cutting the lumber framing, and finally built the skid that goes under the whole thing. Finished up around 7:00 pm. In the crate it weighs in at 212 pounds. I’m going to grab a bite to eat then get the shop cleaned up and get the crating supplies tucked out of the way so I can get started on the next project. Here is a photo of the finished crate. Exciting huh? OK. That wraps it up for this project. Thanks for following along!! God Bless, Doug Click here to read today's Journal entry.

Thursday, August 24

Day 20 - Sewing Center

Long day today.

Today we were scheduled to spray lacquer -- and we did spray lacquer, but not as early as I had planned. This morning we had a heavy ground fog that didn't burn off for quite a while, and since lacquer is sensitive to moisture, I had to delay the start of the spraying until I could be assured that the lacquer wouldn't blush on me.

Blushing is a white, cloudiness in the finish that occurs when moisture from the air gets trapped as the finish is sprayed on. It can be removed, but it's better not to let it happen in the first place.

So I worked on the new web site for most of the morning, then went down to see how Mom and Pat are getting along and fired up the spray gun after lunch. Didn't get finished up until after 9:30 this evening.

Now it needs to set and get good and hard before I scuff it smooth and polish it.

I won't be able to hook up with my guy at International Paper to get the triple wall crating board I'll need until Monday, but I'll drive over there (Morristown -- about 30 minutes away) early Monday morning so I can get started on the crate as soon as I get the cabinet all put back together.

But now I desperately need a shower, some chocolate, and a good nights sleep.

Tomorrow I'll be in Treasures, and we have a church picnic on Saturday, so this will probably be the end of this weeks work.

For details on todays activities, click the title above to go to today's entry in the journal for this project.

See you next week.

Doug

Wednesday, August 23

Day 19b - Sewing center

I worked on staining the loose parts during the second half of yesterday, and I stained the cabinet this morning, so for the purposes of the journal, I'll call these two half-days Day 19, even though they weren't on the same day.

The staining is complete. It went quickly using the Varathane stain, it's different than any other stain I've used. Most stains have to be applied wet, allowed to sit for 5 to 10 minutes then carefully wiped off. But the Varathane gets wiped off immediately. No "set time" required. And the color goes on very even. It's more like an aniline dye than a pigment stain. I *like* this stuff! I'll have to do some research on it and see what I can find out.

So, the cabinet is completely stained, but I can not do any finishing work on it until it has dried for a minimum of 8 hours. Therefore, the shop is closed for the day. I can do no more work in there until the stain is cured out -- or dry; depending on if it's a pigment stain or a dye.

I guess I'll spend the afternoon mowing the lawn. Oh joy.

Till tomorrow!

Doug

Tuesday, August 22

Day 19 - Sewing Center

This morning I worked on Brenda's TV Trays, but this afternoon Marie gave me the go-ahead to begin staining Paula's sewing center. So that's what I've been doing. First I had to clean the shop again... been making saw dust. Then I had to take the cabinet all apart; remove all the hinges and latches and such. Next I spread protective covers over my work surfaces and began staining parts. I now have all my horizontal surfaces covered with pieces parts, waiting for the stain to dry enough to move them off so I can do another batch.

That Varathain stain does dry pretty quickly, so I expect that after supper I will be able to get the rest of the loose parts done. Then I'll get after the carcass tomorrow.

So, I'm gonna grab a bite to eat and get back at it. See you tomorrow!

Doug

Monday, August 21

Payment Pending

It's Monday and I'm waiting for a payment to clear before I can proceed with staining the sewing cabinet, so I did some more work on Brenda's TV Tray Table set today. I also took care of a little favor a neighbor asked me to do -- a threshold for the house they're remodeling. They said they can't find a wooden threshold anywhere -- just metal.

_____

avast! Antivirus <http://www.avast.com> : Outbound message clean.

Virus Database (VPS): 0634-0, 08/21/2006 Tested on: 8/21/2006 8:15:55 PM avast! - copyright (c) 1988-2006 ALWIL Software.

Friday, August 18

Day 18 - Sewing Center

Today I began split shifting: I'd work on the sewing center for a while, sanding and filling the small chips and dings I found while sanding, then while the filler dried, I'd work on Brenda's Tray Table set. Today I was gluing up the strips that compose the tray panels.

Sand, fill, glue, clamp. Sand, fill, glue clamp. That was my day today.

Tomorrow is my turn to go hang out in the air conditioning at Treasures, so I'll check in again on Monday.

Doug

Wednesday, August 16

Day 17 -- Sewing Center

A red letter day today; we finished the construction of Paula's sewing cabinet.

Today I completed the installation of the top by installing the fancy sewing machine hinges and fastening on the two fold out leaves. That finishes up the construction stage.

Just as I completed this, Brian came over to buy some cherry from my stash. He's making a cradle for his new grandchild. I haven't seen Brian for a while so we had some catching up to do. Then I had to go send Paula a notice that we'd completed this step and ask for a payment.

This evening I cleaned up the shop and put away all the tools except the screwdriver I'll need to remove the hinges and latches so I can stain the cabinet.

Tomorrow morning we have a TV crew coming to Treasures to film a segment for a PBS program. As President of the corporation (Treasures not PBS) my presence has been requested.

Afterward I'll begin the finish sanding. Mostly done by hand, this is tedious work, but any good finish is based on the surface prep of the wood beneath it.

http://www.smokymountainwoodworks.com/InTheShop/Sewing_Center/Day17.php

See you tomorrow,

Doug

Tuesday, August 15

Day 16 - Sewing Center

Today we finished up the two plates for two layers of the top, and machined the lower top to completion.

My new trick worked out pretty well. The large, bulky planks were a tough wrestle, but it all worked out just fine.

http://www.smokymountainwoodworks.com/InTheShop/Sewing_Center/Day16.php

See you tomorrow.

Doug

Teaching an Old Doug New Tricks

Monday's mail brought a new router bit that I had ordered for use on this project. It is a glue joint bit.

http://www.smokymountainwoodworks.com/InTheShop/Sewing_Center/Day16001.jpg

It's something I've been reading about in the magazines, and they say it's the best thing since sliced bread. The way it works is that it routes an interlocking tooth pattern on the edge of the boards to be joined together into a wide panel. Thus they are self-aligning, and the glue surface in the joint is about doubled from a jointed butt joint. It's supposed to be quicker, simpler and stronger than dowel pinning a glued-up panel.

It came with no instructions, but real men don't read instructions anyway. We just intuitively 'know' these things. (OK, OK, when I read about them in the magazines, they explained the concept).

I spent the afternoon teaching myself the ins and outs of using this bit. It's pretty slick but there are some things to be wary of, especially on long boards.

A full explanation of the process will be covered in the Journal for Day 16.

http://www.SmokyMountainWoodworks.com/InTheShop/Sewing_Center/Day16.php

Thanks for dropping by!

Doug

Thursday, August 10

Day 15 - Sewing Center

This was an odd day.

The classic oak knobs for Paula's cabinet finally arrived -- been on back-order for two months -- so I went ahead and installed them and the brass catches that hold the doors closed.

I also got started on the top parts. A special glue joint bit I ordered is still not here. The supplier says it shipped today (yeah, right: you guys LOST the order didn't ya!) and it should be here Monday or Tuesday.

I made the jig that is used to position the sewing machine hinges for the flip out leaves. This thing serves not only to position them accurately, but to guide my router as I cut out the pockets that the hinges recess into. Since the ends of the hinges are semi-circles, this is not something I can do very well with a chisel.

However, since I will be building another of the cabinets in walnut for Dan in a few weeks (and probably one for Marie next year) the building of this jig was done on my own time; this jig will become part of my permanent stash, so I took the time to do it up pretty and five it a finish. I don't bother with this on single use jigs, they just go in the burn box to heat the shop in the winter.

We've got a major electrical storm moving in right now, so I need to shut down and unplug the computers. I won't be able to get the Journal posted tonight, but I'll get on that first thing in the morning.

Tomorrow is my day to be shopkeeper at Treasures, so I will be away all day.

See you Monday!

Doug

Wednesday, August 9

Day 14 - Sewing Center

I got a lot done today, although it may not look like it from the pictures, there was a lot of fitting and fussing going on.

I started by finishing up the feet and installing them, then I prepared the doors for mounting, cut the hinges and installed the works.

This completes the case construction. I'll install the knobs and latches later.

Tomorrow I'll get started on making the top.

http://www.SmokyMountainWoodworks.com/InTheShop/Sewing_Center/Day 14.php

Doug

_____

avast! Antivirus <http://www.avast.com> : Outbound message clean.

Virus Database (VPS): 0632-1, 08/09/2006 Tested on: 8/9/2006 7:36:45 PM avast! - copyright (c) 1988-2006 ALWIL Software.

Tuesday, August 8

Day13 - Sewing Center

It was a muggy day today. Quite uncomfortable, but perfect for checking to see if the drawers will stick in humid weather. Some did, now they don't.

I got all the drawers assembled (with glue this time) and fine tuned, then I built the feet. I'll do the final shaping tomorrow after the glue hardens up.

It's getting late and I'm tired so I'll do the pictorial journal tomorrow.

http://www.SmokyMountainWoodworks.com

http://www.SmokyMountainWoodworks.com/InTheShop/Sewing_Center/

Doug

_____

avast! Antivirus <http://www.avast.com> : Outbound message clean.

Virus Database (VPS): 0632-0, 08/08/2006 Tested on: 8/8/2006 9:06:02 PM avast! - copyright (c) 1988-2006 ALWIL Software.

Monday, August 7

Day 12 - Sewing Center

I have just a few minutes left on my lunch break, so I'll get today's adventure started.

I had to take a few minutes first this morning to pack up two paintings that were sold through Treasures Of Appalachia this weekend. No, neither of us paints, these were Allan Barbour's work, but we're the only member artists with a UPS account and taking them to a shipping store involves hefty mark-ups. So Marie and I do all the shipping for TOA to save TOA customers those added fees.

Then I got started trimming the drawer box lumber to finished size. But before I started trimming, I double checked to be sure all the roughed-out blanks were the right size and in the right quantity. There were several parts that were to be cut from larger pieces, and it's always a good idea to check these things before you go cutting up a nice wide board. I got all the height-wise trimming done before lunch, will get to the length-wise trimming when I start back.

... And it's time to get back out there.

It wasn't so hot today, so I figured TVA could spare a kilowatt or so to let me work through the afternoon. I got all the drawer boxes made, temporarily assembled (using masking tape) and test fitted to their slots. They all fit pretty well. I'll do a small amount of tweaking on them with a sanding block later this evening and they'll be perfect. Then they'll be ready to assemble permanently with glue and screws.

http://www.smokymountainwoodworks.com/InTheShop/Sewing_Center/Day 12.php

See you tomorrow,

Doug

_____

avast! Antivirus <http://www.avast.com> : Outbound message clean.

Virus Database (VPS): 0631-3, 08/04/2006 Tested on: 8/7/2006 5:28:23 PM avast! - copyright (c) 1988-2006 ALWIL Software.

Day 11 - Sewing Center

This was a Friday, often an odd day, sometimes a long day because I don't like to leave things half-done over the weekend. But the power usage constraints that we've been asked to comply with forced me to close up early -- intending to get back to finish up after supper. But Marie had other plans for our evening, so I didn't get the drawer box lumber planed all the way to finished thickness. I'll need that lumber first thing Monday morning, we were away all day on Saturday, so I took a couple of hours Sunday afternoon to finish that step. Normally this is forbidden, but under these circumstances...

So, "today" I installed the large drawer guides and permanently assembled the larger pedestal.

Then I took a little time to put away the tools and clean up the shop before roughing out the poplar lumber for drawer boxes and planning it to 1/2" thickness.

Two of the drawers are almost 10" deep, requiring w-i-d-e boards, so surface planning them was a slow process; take too much off in a pass and the wide shavings choke the planer's dust collection hood. But, I got it done.

Now we're ready for Monday.

We are coming up on a step that is difficult to do by remote... fitting the opening in the cabinet top to the machine to be used in it. In the past, the lift used in these cabinets had two positions: 'up' and 'down'. In the UP position, the shelf the machine rides on comes up to seal the opening in the cabinet top, regardless of it's size. Then we found a professional version that offers a mid-way position -- they call it the "free-arm" position, but I believe that to be a misnomer. This would be the typical working height when using the sewing machine in normal mode. To use the free arm (if your machine has one) you'd want to raise it to the full height.

When Marie was a professional seamstress, they had commercial sewing cabinets that were designed to accommodate most any standard sewing machine. The biggest aggravation she had with them was that the large gap left around the machine (being a generic cabinet) allowed her rulers, scissors, and what have you to fall through. It would have been nice to have the opening more precisely fitted to each machine to reduce the time spent retrieving her tools.

So that's what I've been discussing with Paula. She has measured the case on her machine as 14.5" by 6.125". I would like to keep the opening as snug as possible; maybe 1/4" gap all around, but worry that if the machine should shift at all, it may get clunked by the cabinet top as it rises into working position.

With a narrow gap, there is no room for cleats around the base of the machine, so perhaps I could route out a pocket in the lift shelf -- 1/4" deep or so -- that would serve to hold the machine in position. But then a non-skid pad may be all that is required, and would be less laborious.

Still pondering that one. I have a little time to do so because I must first get the drawers built and the doors mounted. And make and mount the feet. But I like to know where I'm going before I get there.

Thanks for looking in. See you again Monday.

Doug

_____

avast! Antivirus <http://www.avast.com> : Outbound message clean.

Virus Database (VPS): 0631-3, 08/04/2006 Tested on: 8/7/2006 6:21:42 AM avast! - copyright (c) 1988-2006 ALWIL Software.

Thursday, August 3

Day 10 - Sewing Center

I�m happy to report that the bee stings are all healed up, that Benadryl is amazing stuff!

Yesterday I spent the morning getting my monthly invoices out, preparing for the month-end bookwork, and catching up with the back-log of communications. I spent the afternoon milling drawer fronts and installing the lift mechanism.

Today I will complete the drawer fronts and mill out the poplar lumber needed to make drawer boxes, and mill out the drawer slide parts.

Due to the record high demand for electricity and low water levels, the TVA is asking businesses to reduce consumption (or close) between 3:00 pm and 6:00 pm when demand is at its peak or face rotating black-outs. I'll do my part, but I suspect that the real problem is all those folks who insist on keeping their home at 68� even while they're at work. But that's just me.

Doug

_____

avast! Antivirus <http://www.avast.com> : Outbound message clean.

Virus Database (VPS): 0631-2, 08/02/2006 Tested on: 8/3/2006 7:52:20 AM avast! - copyright (c) 1988-2006 ALWIL Software.

Tuesday, August 1

Day 9 -- Sewing Center

It's getting late so this will be brief. Yesterday (Monday) was a disaster. Full details are available in the Doug-Bob blog (www.SmokyMountainWoodworks.blogspot.com) so I won't re print it all here. Let's just say it involves 2 power black-outs, a recalcitrant tractor and a nest of yellow jackets.

Today went much better. I got the four filler panels and surger shelf made, trimmed and temporarily installed: just screws, no glue. Because of the waiting for glue to dry thing, it made for a very long day -- much of it non-billable hours. Bad for me, good for Paula!

I'll post the journal entry on all this in the morning. Right now everyone is waiting for me to turn off the lights so they can go to sleep. That's life in a one room cabin!

Till tomorrow, Doug

_____

avast! Antivirus <http://www.avast.com> : Outbound message clean.

Virus Database (VPS): 0631-0, 07/31/2006 Tested on: 8/1/2006 10:09:11 PM avast! - copyright (c) 1988-2006 ALWIL Software.

Friday, July 28

Day 9 - Sewing Center

Sorry for the delay in getting this update posted. On Tuesday a truck load of lumber came in, and it was hot that afternoon, so we just pulled it off the truck and piled it in the driveway. That evening when it cooled down, I sorted it out and stacked it properly, but by then I was by myself, and I over did it and paid for it dearly on Wednesday. By Thursday I was ambulatory again and was working short shifts in the shop to get the filler panels and the surger shelf made up. I'll trim and install these next week. Friday was my day to spend as shopkeeper in Treasures, so I got to sit at the desk most of the day doing the weekly books and enjoying the air conditioning -- like a mini vacation. I did have a good number of customers in and sold a few things as well as accomplishing the bookkeeping and some web site updates, so it was a good day. By Monday, I ought to be back in shape to work a full day again, so I will be back in the shop and at it full force. See you then!

Doug

_____

avast! Antivirus <http://www.avast.com> : Outbound message clean.

Virus Database (VPS): 0630-3, 07/28/2006 Tested on: 7/28/2006 7:09:02 PM avast! - copyright (c) 1988-2006 ALWIL Software.

Tuesday, July 25

Day 8 - Sewing Center

This will be a short entry for a fairly lengthy day. Most of the day was spent sanding, but not just sanding -- hand sanding. Just about my least favorite thing to do -- but it has to be done, and done right.

After the sanding was done I assembled the sub-assemblies we've been following along on, with glue this time, then assembled the 4 side pieces and the back into the basic carcass of the sewing cabinet. Using just screws, no glue. Still have more to do on them before they can go in permanently.

The full story is here:

http://www.smokymountainwoodworks.com/InTheShop/Sewing_Center/Day 08.php

Today's progress picture is here:

http://www.smokymountainwoodworks.com/InTheShop/Sewing_Center/Day 08006.jpg

See you tomorrow! Doug

_____

avast! Antivirus <http://www.avast.com> : Outbound message clean.

Virus Database (VPS): 0630-1, 07/24/2006 Tested on: 7/25/2006 8:49:50 PM avast! - copyright (c) 1988-2006 ALWIL Software.

Monday, July 24

Day 7 - Sewing Center

Welcome back dear readers,

I hope you have a restful weekend. We spent Saturday in the Treasures Of Appalachia gallery (http://www.TreasuresOfAppalacia.com); it was Marie's turn to be shopkeeper, and I tagged along to do the weekly books. Sunday was church. All in all, a pleasant weekend.

This morning I began by breaking down the mortising machine and setting up to cut the dadoes and rabbets where the various panels and parts will join together.

Most of the morning was spent laying out these cuts and double checking for accuracy and knocking the panels apart again.

I got some of the cuts made before stopping for lunch, finished them up in the afternoon. After this I sealed the ends of all the filler panels to help prevent splitting, and took a break during the heat of the afternoon to let the sealer dry.

In the evening, the sealer was still tacky, so I cleaned up the dadoes and rabbets and checked all the panels for any pits or checks that need to be filled. By tomorrow morning everything ought to be good and dry and I'll be ready to hand sand the filler panels and begin gluing the sub-assemblies together.

See you then! Doug

http://www.smokymountainwoodworks.com/InTheShop/Sewing_Center/Day 07.php

________________________________________________________ Smoky Mountain Woodworks Custom designed, solid hardwood furniture. www.SmokyMountainWoodworks.com

_____

avast! Antivirus <http://www.avast.com> : Outbound message clean.

Virus Database (VPS): 0630-1, 07/24/2006 Tested on: 7/24/2006 8:06:41 PM avast! - copyright (c) 1988-2006 ALWIL Software.

Friday, July 21

Day 6 - Sewing Center

I'm not sure what happened to Day 5's posting -- maybe Internet Gremlins got it again. So, to recap day 5, we cut mortises and fitted tenons into them.

For details see

http://www.smokymountainwoodworks.com/InTheShop/Sewing_Center/Day 05.php

For today we were getting' groovy. Cutting grooves into which the filler panels will fit, then trimming the panels to a precise fit into their frames.

For the whole story, see:

http://www.smokymountainwoodworks.com/InTheShop/Sewing_Center/Day 06.php

I'm not quite sure why it is that some of these links turn into clickable links and some stay a text string that you have to copy into your browser window. I'm taking notes to see if there's something I'm doing differently sometimes.

By the end of the day, we have the entire cabinet casework frame & panel assemblies together and taped in place for a test fit.

http://www.smokymountainwoodworks.com/InTheShop/Sewing_Center/Day 06012.jpg

Looking good so far. Next week we'll begin making the bits and pieces that go inside -- like shelves and drawers and the feet that go under.

See you then!

_____

avast! Antivirus <http://www.avast.com> : Outbound message clean.

Virus Database (VPS): 0629-2, 07/21/2006 Tested on: 7/21/2006 9:06:01 PM avast! - copyright (c) 1988-2006 ALWIL Software.

Tuesday, July 18

Day 4 - Part two

Because of the interruptions yesterday I only got about a half-day's work done, and since I'm chronicling this project I want to keep time frames straight.

What a beautiful morning! We are enjoying 67� at sun-up. The radio says that Saint Louis (where Marie was born and raised) has 98� this morning, so I'm happy with what we have. Because our forecast is for "dangerously high heat indices" this afternoon, I went out to the shop early to get some time in. That way I can bail out for a while in the hottest part of the day and not sacrifice that time. I can do my bookwork and web site stuff that I normally do early at this time in the relative comfort of our house and office (which *does* have insulation!) and use the cooler parts of the day for the woodworking. During the winter I use the early morning for inside work while the wood stove heats up the workshop. I guess it's about time I flipped over to the summer schedule.

So, the early morning was spent scuffing and applying the final coat of polyurethane to Tammy's table. After breakfast it will be tacked up enough to move out of the way so air-borne dust won't settle in the finish while I work on Paula's sewing cabinet.

For those who are just tuning in, the item we're building now is at:

http://www.SmokyMountainWoodworks.com/Cabinet_Sewing.php

The one pictured is made of cherry and cherry veneered plywood. Paula's is being built of quarter sawn white oak using all solid hardwood frame and panel construction. Well, except for the top pieces, which are work surfaces and have to be smooth, flat and solid; these will be made from oak planks joined into wide panels. But we'll get to that later.

For today we're working on the framing needed to create the casework. Specifically, the cutting of tenons on the rails and muntins. In order to get a good fit with one another, mortises and tenons have to be made very carefully. A sloppy fit yields a weak joint.

I spent the majority of the day on this -- until the heat drove me out. I got all the tenons cut and trimmed. In the evening I came back to double check some lay-out dimensions and get ready for tomorrow's task of chopping mortises.

Today's progress picture is available here:

http://www.SmokyMountainWoodworks.com/InTheShop/Sewing_Center/Day 04012.jpg A pile-O-parts.

_____

avast! Antivirus <http://www.avast.com> : Outbound message clean.

Virus Database (VPS): 0629-0, 07/18/2006 Tested on: 7/18/2006 3:58:47 PM avast! - copyright (c) 1988-2006 ALWIL Software.

Monday, July 17

Day 4 - Sewing Cabinet

Hello, I hope you had a great weekend.  Mine was quite interesting as we got away on Saturday for a little field trip.  But you didn't log in to read about that.  But I am rested up and ready to get started again.

Today I spent the early morning session working on Pamela's web site, and the morning smoothing out the panels that were made up last week.  They all turned out very nicely.  I made an extra one in case any went bad on me, but none did, so I'll have a little extra stock to work with.

By lunch time it was getting pretty hot.  This makes me really thirsty but kills the appetite -- which is a good thing as I'm trying to loose a few pounds.  OK, OK... a lot of pounds.  Ever since I tore up my hip and had to stop taking my one-mile walk with the dogs every day at lunch time, I've been gaining weight.  Got to do something about that.  Not getting hungry helps.

After the lunch break I got started laying out and cutting the casework tenons.  After a bit it was getting too hot: 96° outside but with no insulation in the roof of this building, once the afternoon sun starts beating down on it you can bake bread in here in the afternoons.  So I abandoned shop for a few hours and went back to finish up once the sun started going down.  The good thing about these mountains is that it cools down as fast as it heated up.  Fans help blow the hot air out once  they can find some cooler air.

I had to stop a bit early to switch over to finishing a project that I had been working on before this one but had to set aside while waiting for the client to decide how it was to be finished.  Now that she's given me this info, I want to get it done and out of the way so I'll have room to assemble the parts I'm making for Paula's sewing cabinet.

The polyurethane can set up over night and I'll see how it looks in the morning.  Now it's time for a shower and to get after some bookkeeping and web maintenance on my site before bed time.

See you tomorrow!

A photo of a smoothed out panel is at:

http://www.smokymountainwoodworks.com/InTheShop/Sewing_Center/Day04003.jpg


Thursday, July 13

Day 3 - Sewing Center

The early morning session was spent working on Pamela's new web site -- just getting things set up with her hosting service and pulling in a copy of her current files.

The morning session was spent trimming the rails and stiles I made yesterday to finished size. Since my miter fence got destroyed yesterday morning I used my cut-off sled; not quite as convenient since it doesn't have the easily adjustable stop block for obtaining precise cut-off lengths, but it served the purpose.

After the lunch break I mounted a fine tooth blade on the table saw and jointed the half-panel parts, then spent the afternoon gluing and clamping the pairs of panel parts into full panels. I left the first 5 panels in the clamps for a couple of hours, just long enough for the glue to tack up good -- then carefully removed them from the clamps and set them aside to cure while I worked on gluing up the remaining 4 panels.

Once all horizontal surfaces were covered with clamps and panels, there was little I could do in the shop, so I spent some time in the office taking care of some chores there.

Tomorrow is my day to be shopkeeper and do the bookwork at Treasures Of Appalachia, so no work will get done in the woodshop.

See you Monday! Doug

_____

avast! Antivirus <http://www.avast.com> : Outbound message clean.

Virus Database (VPS): 0628-4, 07/13/2006 Tested on: 7/13/2006 9:17:57 PM avast! - copyright (c) 1988-2006 ALWIL Software.

Wednesday, July 12

Day 2 - Sewing Center

This day, dear readers started out with a bang.  Literally.

While trying to cross-cut an 8 foot plank into smaller lengths on the table saw, the blade bound up and kicked the board back at me.  I managed to get out of the way, thus avoided serious injury, but my miter fence was completely destroyed.  Bummer.  I'm going to need that in a day or two when I start finish cutting parts.

The morning session was spent roughing out the rails, stiles and panel blanks. 

After lunch I surface planed all the parts and resawed the panel blanks.

The evening session was spent doing bookwork.

That pretty much killed this day. 

The photo journal for this project can be found at:

http://www.smokymountainwoodworks.com/InTheShop/Sewing_Center/index.php

Until Tomorrow...
Doug

Tuesday, July 11

Sewing Center - Day 1

Today was a long heavy day. We brought in a mess of white oak for this project a while back, but not enough of that was quarter-sawn oak. Quarter Sawing is a special method of cutting a log so that the grain rings run vertically across the end of the board. The advantage is that it warps less, the problem is that quarter sawing a log wastes a considerable amount of it -- thus making this lumber more expensive than flat sawn lumber.

Quarter sawn lumber exhibits a unique "ray flecking" pattern that has become the trade mark of Arts & Crafts style furniture, which is what Paula has in her home. So, she wants this piece done in quarter sawn oak and stained dark to match the rest of her home.

Therefore, I need to go through the white oak pile again and look for the quarter sawn boards.

http://www.smokymountainwoodworks.com/InTheShop/Sewing_Center/Day 01001.jpg

I found enough that I don't think I'll have to special order any, but it meant un-stacking, about 500 board feet of lumber, pulling out the QS boards I came across and then re-stacking the rest with the stacking sticks between each layer ,of course, so air will continue to circulate through the pile.

These boards are all 8 or 9 feet long, and oak is heavy anyway, so this was a good "weight-loss" day. Under our business practices, we don't charge for this prep work, so this was also a day without pay. I get paid only for billable hours.

Time for a shower, some supper, hopefully a good nights rest so I'll be ready to start rough milling parts tomorrow.

The complete photo-journal for this project can be found at:

http://www.smokymountainwoodworks.com/InTheShop/Sewing_Center/Day 01.php

_____

avast! Antivirus <http://www.avast.com> : Outbound message clean.

Virus Database (VPS): 0628-2, 07/11/2006 Tested on: 7/11/2006 1:17:59 PM avast! - copyright (c) 1988-2006 ALWIL Software.

Wednesday, June 28

CD-End Table - Day 15

I should call this "Best Laid Plans" because of the way things worked out. I had planned to go get the crating board I need, crate the cabinet over the weekend and ship it Monday morning. Unfortunately it rained all day Friday, Saturday and Sunday; no opportunity at all to get the supplies I needed -- which would have been ruined by an hour long ride in an open bed pickup, at interstate speeds, in a deluge. So, Lori, I'm terribly sorry for the delay. Once the materials were on hand, here's how we crate up a piece of furniture. We begin by shrink wrapping it to help keep the drawers pulled in and not jiggle up and down so much. http://www.SmokyMountainWoodworks.com/InTheShop/CD-End_15001.jpg Then we take 4' x 8' sheets of Styrofoam and cut it into 3" wide strips. http://www.SmokyMountainWoodworks.com/InTheShop/CD-End_15002.jpg These strips are cut to length and applied to the cabinet. Two or three layers may be needed to build out where we have protrusions like knobs and overhangs. We use duct tape to fasten the strips to one another, but are careful not to let the adhesive touch the cabinet. A top plate of foam is cut to size and fastened in over the entire top of the cabinet. http://www.SmokyMountainWoodworks.com/InTheShop/CD-End_15003.jpg We repeat the process around the base and affix some extra strips on the front, again to help prevent the drawers from moving around during shipment. http://www.SmokyMountainWoodworks.com/InTheShop/CD-End_15004.jpg We do not wrap the entire cabinet in two or three layers of foam because the heavy duty, triple wall corrugated board we use for panels offers enough puncture resistance that the foam would be redundant. And this foam is getting expensive, so to hold your crating fees down we use just what we need. Next we cut and apply the corrugated side panels. At a half inch thick, this stuff is very stable and stiff. We use masking tape to hold the panels together for the moment. http://www.SmokyMountainWoodworks.com/InTheShop/CD-End_15005.jpg Once the panels are all in place we rip 1/6 pine lumber into strips to use in bordering the corrugated panels. These probably aren't necessary in a crate this small as the corrugated panels have so much rigidity and crush resistance (when corrugations are run vertically) that they alone *may* prevent the crate from being crushed if another box is stacked on top of it in the truck trailer. But to get the best rate from our truck line, a crate is defined as being wood reinforced. So we apply the wood: nailed together and glued to the corrugated panels. http://www.SmokyMountainWoodworks.com/InTheShop/CD-End_15006.jpg http://www.SmokyMountainWoodworks.com/InTheShop/CD-End_15007.jpg To finish off, we build a pallet style base that allows the crate to be easily moved and lifted with a fork-lift or pallet jack. Then we run the shipment through Old Dominion's web site, generate the bill of lading and shipping label, and it goes out on the dock to await a ride to White Pine TN where the O.D.F.L. truck dock is.

http://www.SmokyMountainWoodworks.com/InTheShop/CD-End_15009.jpg This process took 5 1/2 man hours to complete, not including the run to Morristown to get the crating board. But, we can rest easy now, knowing that it is well protected for its' trip across country. This one is on its’ way. Now it's time to clean up the shop, put all the tools away, sweep out the debris and get ready to make the next piece of furniture.

Thursday, June 22

CD End Table - Day 14

  This is the day where a lot of gratification is generated: Finishing Day.  Even though the past few days have seen much progress as all the various parts came together into a completed project, until the finish is on, it just doesn't "pop".

The morning session was spent sanding.  All of it.  Some done with a random orbit power sander, but a considerable amount of the finish sanding is done by hand.

After lunch I began spraying lacquer, letting it dry, then scuff sanding it to smooth the surface before applying another coat.  The drawers were removed and finished separately.  The entire piece got two good coats, then the top got a third to add an extra measure of protection.

I finished up the spraying right at 5:00, went in for some dinner then came back to install the brass knobs and clean up the spray equipment and take some pictures.

The heat and humidity are high today and I want to let the piece sit overnight to be sure the lacquer is properly hardened before we start wrapping it in Styrofoam and building a custom crate around it.

Here are some photo links:

http://www.smokymountainwoodworks.com/InTheShop/CD-End_14002.jpg and
http://www.smokymountainwoodworks.com/InTheShop/CD-End_14003.jpg are shots of the piece from two different angles to see both sides.

http://www.smokymountainwoodworks.com/InTheShop/CD-End_14004.jpg is a picture of my favorite feature of this piece; one of the boards we split for use in the back panels shows some gorgeous quilted pattern.  Photography doesn't to it justice. 

This completes this project.  Tomorrow I'll go buy the materials I'll need to build the crate -- we don't have space to store those here.  The crate will be built over the weekend and we'll take it to the truck line early Monday morning and send it on it's way to Lori.  We hope she will be as impressed with it as the visitors to our shop have been today.

Have a great weekend, and we'll start a new project next time.

Wednesday, June 21

CD End Table - Day 13

Very strange day today. It started early: about 1:30 am when the dogs decided to have a bark fest. When we got them settled down I was to much awake to get back to sleep, so I went into the office and got some work done. Wrote a magazine article, wrote a newspaper press release and worked on the Treasures web site for a bit. That was a long early morning session!

The morning session was spent flattening the top plate I'd glued up and sanding with 60 grit paper. Then routed the bevels on the edges of the top plate and sanded the whole thing (including the bevels - done by hand) to 100 grit.

After lunch I made and installed the mounting blocks that will hold he top plate in place and installed them. Then carefully lined to the top plate and fastened that in place with screws from inside the cabinet.

Progress photo: http://www.SmokyMountainWoodworks.com/InTheShop/CD-End_13.jpg

This completes the construction of Lori's CD End Table. Tomorrow we'll begin the finishing stage.

Till then...

Doug

_____

avast! Antivirus <http://www.avast.com> : Outbound message clean.

Virus Database (VPS): 0625-3, 06/20/2006 Tested on: 6/21/2006 6:36:27 PM avast! - copyright (c) 1988-2006 ALWIL Software.

Monday, June 19

CD End Table - Day 12

The early morning and morning sessions today were spent working on the new web site. I've gotten portions of it ready to be opened to the public, but was having some problems getting the old site to communicate properly with the new one.

After lunch, I got started on the top plate for Lori's CD End Table. This involved taking the billets that I'd roughed out at the beginning of this project and flattening them out with a hand plane where corners wanted to lift, then surface planing them to the proper thickness, cutting glue-joints on the mating surfaces and drilling these surfaces for dowel pins. Finally applying the glue and drawing it all together with long clamps.

This panel will have to sit over night to allow the glue to set up solidly before I can work with it further. So, I'm heading back to the office to work on the web site some more.

See you tomorrow,

Doug

_____

avast! Antivirus <http://www.avast.com> : Outbound message clean.

Virus Database (VPS): 0625-1, 06/19/2006 Tested on: 6/19/2006 6:21:31 PM avast! - copyright (c) 1988-2006 ALWIL Software.

CD End Table - Day 11

I see that the notes I sent to be posted last Friday did not post once again. So, I'll try again before posting today's notes. Here goes...

Hello dear readers!

My early morning was spent on bookkeeping chores. Then I surface planed and milled out the parts for the drawer fronts. This is a little trickier than it sounds because they have to be kept in order so the grain flows across the drawers.

Then I had to take a little time to do an emergency job; Terry's lamb feeders. I had planned on doing those after Lori's table was done, but due to a sudden change with his employer, Terry will be leaving after tomorrow and may not get back this way. So I knocked his feeders out quickly and will have Marie deliver them in the morning.

Lunch time. Had a couple of problems to deal with, nothing major.

The afternoon session was spent shaping, sanding, aligning, drilling and installing the drawer fronts onto the drawer boxes. It was a long afternoon -- didn't get done with this until around 7:00. But I wanted to finish this step today because I will be in Treasures tomorrow, so will not get a chance to work on this project again until Monday.

All that's left to do now is to make and install the top plate and do the finishing. Then, Lori, it's on it's way to you!

Progress photo for today is at: http://www.SmokyMountainWoodworks.com/InTheShop/CD-End_11.jpg

See you Monday!

Doug

Thursday, June 15

CD-End Table - Day 10

I wasn't able to post this last night, so I'll try again this morning. These notes are for Wednesday June 14.

Long day, short notes.

The early morning session was spent working on the web site and answering e-mails. It seems that Storage Beds are suddenly quite popular; we've had three inquiries about them in three days. One requested a bid and seems serious, the others are just shopping.

The rest of the day was spent shaping, sanding and installing the drawers into Lori's end table. This took all day.

The evening session was spent processing a new order and 'conversing' via e-mail with my PHP programmer. Great things are afoot.

The progress photo is available at: http://www.SmokyMountainWoodworks.com/InTheShop/CD-End_10.jpg

Till next time...

Doug

_____

avast! Antivirus <http://www.avast.com> : Outbound message clean.

Virus Database (VPS): 0624-0, 06/11/2006 Tested on: 6/15/2006 6:16:25 AM avast! - copyright (c) 1988-2006 ALWIL Software.

Tuesday, June 13

CD End Table - Day 9

Today's early morning session was spent... sleeping!

This is because there was a Dog Party at 2:30 am, and that is too early even for me. There was, apparently, some critter wandering around that had all the dogs on the mountain in an uproar. Including ours. They REALLY wanted to get out and chase whatever it was (probably a bear). But, one of our closer neighbors is not well and tends to get upset when the dogs wake him, so ours stayed in -- and barked anyway. We scolded them for that and they trotted back and forth through the house whining and growling, and mumble-barking. They *really* wanted to bark!

I did, finally manage to get back to sleep -- about the time I normally get up, so I slept in. I got no web work done today.

The morning was used to mill the rabbets and grooves on the drawer box parts and to cut the drawer bottoms of 1/8" BBP.

The late afternoon was consumed by assembling, gluing and squaring the drawer boxes.

The early afternoon was used to mow the lawn. I suspect what got the dogs all stirred up last night was a gazelle, attracted by the Serengeti-like grass field our "yard" has become. It didn't rain at all today, so I took advantage of the chance to mow.

Today's progress photo is: http://www.SmokyMountainWoodworks.com/InTheShop/CD-End_9.jpg

The more observant among you will be wondering why there are 10 drawer boxes when only 9 are needed. I like to make an extra in case something goes amiss during assembling and fussy-fitting. Having an extra means I don't have to go back and set up all the tools again just to run parts for one drawer.

And if nothing goes amiss, these drawer boxes make good storage or tote boxes in the workshop.

Time for me to go take a shower, so you need to go on now...

See you again tomorrow!

Doug

_____

avast! Antivirus <http://www.avast.com> : Outbound message clean.

Virus Database (VPS): 0624-0, 06/11/2006 Tested on: 6/13/2006 6:22:51 PM avast! - copyright (c) 1988-2006 ALWIL Software.

Monday, June 12

CD End Table - Day 8

Happy Monday to you!


The early morning session today was spent working on the new web site; configuring all those attributes takes a long, long time over a slow connection like mine.  I’ll keep working at it as I have time and eventually it will get done.


The morning session was spent removing the clamps from Lori’s casework and checking for any problems.  There were none.  Then I installed the front skirt (that arched piece at the bottom) and sanded the entire case to 150 grit.


Lunch time.  I took care of some phone calls and an issue that was waiting for me on the answering machine.  And I managed to eat a little lunch.


During the afternoon session I re-sawed and planed the poplar billets that were prepped last week, then trimmed the pieces to exact size for the drawer box parts.  That took all afternoon – lots of “stick a piece of wood in this side of the machine, run around to the other site to catch it as it comes out, run back around front and stick another piece in the front.


9 drawers; 4 parts per drawer.  Three passes each through the table saw, as many as 8 passes each through the surface planer.  You do the math; lots of running back and forth.


If you’d like to see a progress picture of what we’ve got so far, copy and paste this address into your browser: http://www.SmokyMountainWoodworks.com/InTheShop/CD-End_8.jpg


This evening I’ll be working on bids.


See you tomorrow.


Thursday, June 8

CD End Table - Day 7

I spent the early morning session working with our web site's LinkMachine. Most of the links that have been submitted recently are inappropriate; real estate sites, a home improvement directory, a circuit board manufacturer, and so on. The obvious ones can just be deleted, but because the names and descriptions used in some submissions are misleading (they sound like they would be a good fit but aren't what they say they are), they have to be checked out. I suppose the people submitting these links think we're using a completely automated system to handle links and they can slip all sorts of garbage into our links directory -- which is exactly why we can't let the LinkMachine run on full automatic. It's a shame some people are so dishonest.

The morning session was spent gluing up the side assemblies of Lori's cabinet, milling the 9 drawer slide rails to completed size and shape and laying out the cuts needed to produce rough billets of poplar for drawer box parts. Once the sides came out of the clamps I assembled and squared the case. After lunch I will begin work on drawer boxes.

In the afternoon I got the poplar boards cut down into billets for drawer boxes but can go no farther until the case assembly is dry enough to remove clamps and move out of the way. Oh, I long for the day when I'll have more work space!

A progress photo is at:

www.smokymountainwoodworks.com/InTheShop/CD-End_7.jpg

So I went into the office and finished one of the bids I've been working on and ordered all the hardware for Paula's sewing cabinet.

Tomorrow I'm doing some volunteer work in Newport to help raise funds for a young woman with ovarian cancer. I will be away most of the day.

So I'll check in with you again on Monday. Have a great weekend!

_____

avast! Antivirus <http://www.avast.com> : Outbound message clean.

Virus Database (VPS): 0623-2, 06/08/2006 Tested on: 6/8/2006 6:38:25 PM avast! - copyright (c) 1988-2006 ALWIL Software.

CD End Table - Day 6

Note: I tried 3 times last night to post this entry and it was refused each time. I'll try again this morning. This was yesterdays post: Wednesday, June 7th.

I started off this day by putting my early morning session (5:30 to 8:00) into working on some bids that have piled up. Didn't get any completed because I need more details from the clients, so I e-mailed them and set the bids aside for completion later.

In the workshop I began by discovering an error in the grid work that forms the front of the cabinet. The center drawer holes are 1/8" wider than the outer drawer holes. So I stopped the time clock and re-made the horizontal grid parts and made note of the error on our working plan. I'll have to adjust that so it won't happen again. I'm not sure how it didn't get caught before.

Once the client's time clock was started again, I resumed the work I had planned to do today. First I cut the small pockets into which the ends of the drawer slide rails will fit: 9 in the front grid, 9 in the pack panel rails, all perfectly aligned so the drawers will be square to the case.

With that done I was able to apply glue to the mortises and tenons of the back panel, assemble that panel and clamp it up. Of course I checked it for 'square': 1/32" off of perfect -- close enough that it's not worth trying to "rack" the panel to correct it. Then I glued and clamped the grid work. Both of these assemblies will need to set up over night before I remove the clamps.

So I took the time to do some cleaning up and putting away tools that will not be needed again. I believe Marie has a project she wants to be working on this evening, so we'll need some work space for that anyway.

Since things are taken apart again, I didn't take a progress picture today, but if you are interested in more pictures and construction details, copy and paste this address into your browser:

www.smokymountainwoodworks.com/InTheShop/CD_End_Table/index.php

This is an article that was written during the construction of a previous 9 drawer CD End Table. It's not as in-depth as some of my more recent articles, but it gives you an idea of what's involved.

Time to grab some dinner, so we can get on with the evening projects.

Till tomorrow...

_____

avast! Antivirus <http://www.avast.com> : Outbound message clean.

Virus Database (VPS): 0623-1, 06/06/2006 Tested on: 6/8/2006 6:26:35 AM avast! - copyright (c) 1988-2006 ALWIL Software.

Tuesday, June 6

CD End Table - Day 5

Today was a good, productive day; we've finally reached the point where visible progress is being made.

The morning was spent cutting mortises in the casework stiles, cutting grooves for the panels to fit into on all stiles and rails, and fitting the tenons on the back rails into the mortises on the back stiles.

Lunch time.

I spent the afternoon sanding the five panels to 150 grit (much easier to do it now than after they're encased in the framework), fitting those panels into the side and back assemblies, cutting the rabbets in the rear of the side panels to house the back panel, and cutting and fitting the half-laps in the grid work parts that will form the front of the table.

A progress photo is available at http://www.SmokyMountainWoodworks.com/InTheShop/CD-End_Day5.jpg

See you again tomorrow...

_____

avast! Antivirus <http://www.avast.com> : Outbound message clean.

Virus Database (VPS): 0623-0, 06/05/2006 Tested on: 6/6/2006 5:36:13 PM avast! - copyright (c) 1988-2006 ALWIL Software.

CD End Table - Tenons

Once again things got busy yesterday evening and I neglected to post the daily notes, so this is for yesterday, Monday the 5th.

The morning session was spent surface planning the 4 half-panels we glued up last week to 3/8" thick, jointing the inner edges and gluing them into full panels for use in the case sides. Then we set up the tools to cut tenons.

The afternoon session was used to cut tenon shoulders on the band saw, then cut the tenon cheeks on the table saw using a tenoning jig.

I had a little time left over so I went ahead and laid out the mortise locations on the back panel stiles and set up the drill press with the mortising attachment so it will be ready to use in the morning.

'Nuff for today, see you tomorrow.

_____

avast! Antivirus <http://www.avast.com> : Outbound message clean.

Virus Database (VPS): 0623-0, 06/05/2006 Tested on: 6/6/2006 9:01:29 AM avast! - copyright (c) 1988-2006 ALWIL Software.

Thursday, June 1

CD-End Table - Trimming Parts

I'm still trying to get the hang of this new Blogger e-mail interface. It allows me to post these messages by sending an e-mail instead of logging into their web site and using the control panel -- which has been VERY slow and often unreliable in that the message I'm trying to post occasionally veers off into never-never land because something somewhere times-out. This method of posting seems more reliable, but it wraps the text lines arbitrarily so I have to find the right line length to set in my e-mail client so it works out properly here.

Yesterday we roughed out all the parts we'll need for the casework of this CD End Table. This morning we re-sawed the billets for the side and back panels and glued up the first half-panel. While the glue was setting up, we surface planed and trimmed all the 7/8" thick pieces (case rails and stiles mostly) to exact size. That killed the morning session.

After lunch we got two more half-panels glued up and trimmed the �� thick parts to finished size. We�ll wait to finish-trim and assemble the pieces for the top plate until just before we�re ready to install it. That way if any of the pieces decide to twist or warp, they�ll do so *before* we use them in the top plate

Tomorrow id my day to spend at Treasures Of Appalachia, being shopkeeper, doing bookwork, including the payroll for the month.

Till Monday�

_____

avast! Antivirus <http://www.avast.com> : Outbound message clean.

Virus Database (VPS): 0622-3, 06/01/2006 Tested on: 6/1/2006 5:30:30 PM avast! - copyright (c) 1988-2006 ALWIL Software.