I am actually almost done with these tables, but have been focusing on getting the woodworking done and not on blogging about it. I’ll get that caught up as soon as I am able. Sorry for the delays, but this order is over-due so I've been putting 12 hour days trying to get it caught up
This step will be to make the ribbon panels. I call them ribbon panels because they’re made up of thin strips (or ribbons) of solid wood that are precision edge glued together to form, a wide panel for the tray top. There are several advantages to doing it this way, including the fact that if the table top should be dinged or scratched, the damage can be sanded out and refinished without destroying the table. Using veneered plywood here would mean that repairing such damage would be very difficult if even possible because the veneers used are so thin (mere thousandths of an inch) and will sand through very easily. The ribbon panels also look much prettier. The down side is that building these panels takes a good deal of time and effort, where simply cutting a piece of plywood and popping it in the slot is much faster. But we at Smoky Mountain Woodworks are not so much about speed or cheap as we are about quality. We want you to have furniture that you will be proud to own – and proud to hand down to the next generation.
 We start with pieces of wood that have been jointed and surface planed so that the faces are absolutely flat and smooth. These faces will become our glue joints, so there cam be no defects or snipe. Bear in mind that we are making a full set of trays and stand, two all walnut tables and a custom stand for Wanda, the other two tables will be our Signature Series made of walnut and oak and will be used for photographic purposes, then will probably head off to our living room where we will conduct extensive product testing .
 As I cut the strips I lay them on the extension table in the same order I cut them from the billet, this preserves the natural flow of the grain pattern and makes it easier to get a good looking panel. I like to use lumber that is as close to flat sawn for these ribbon panels because when I re-saw them the strips end up being quarter sawn and displaying some strikingly beautiful grain, especially in woods like oak.
 When I have all the strips I will need cut (and a few extras, just in case) I begin to lay them out and check the patterns. The ideal method here is to cut all the strips for one panel from one wide board, so that the pattern flows naturally from one edge to the other. But, these days most of the old growth timber has been cut and getting wide boards that are predominantly flat sawn is rare. So I will use two or three boards per panel, and by careful attention to color and form, match them up for a good looking panel.
 I use a couple of strips of wide masking tape pulled tightly across the panel to secure it once I’m happy with the lay-out. If any of the strips have developed a little spring to them un cutting, I’ll use a bar clamp to pull the strips snug while I tape. Fold the assemblage in half and take it into the assembly room for glue-up.
 I built this lop-sided “A” shaped jig to help me apply glue between the strips quickly and efficiently. The tape acts like hinges between strips when placed the panel is placed on the jig up side (tape side) down. I use a small brush to apply Type III polyurethane glue evenly between the first strip, move the panel up, glue the next joint, move it up, and keep going until I get to the last strip.
 When all joints are glued I move the panel over to a set of clamps that were placed at hand, 3 underneath two on top. By alternating the clamps I can insure that I don’t mold a bow into the panel due to the clamping pressure, and I am assured that the panel pieces won’t go “SPROING” and fly all over the place (giggling incessantly) when I apply pressure with the clamps. While clamping I pay attention to the seams, getting them all as flat and even as possible – there are a lot of them to monitor as I snug up the clamps!
I’ll leave this stage sit overnight so the glue will develop a good hold before I take it out and machine it further. It takes 5 days for this poly glue to develop its maximum hold (by then these tables will be on their way to Wanda) but this glue will grab well in a few hours. Giving it overnight to set up makes sure none of the joints will pop open during machining, the surface planer especially will induce a good amount of vibration in the panel as the knives strike the surface repeatedly.
When all joints are glued I move the panel over to a set of clamps that were placed at hand, 3 underneath two on top. By alternating the clamps I can insure that I don’t mold a bow into the panel due to the clamping pressure, and I am assured that the panel pieces won’t go “SPROING” and fly all over the place (giggling incessantly) when I apply pressure with the clamps. While clamping I pay attention to the seams, getting them all as flat and even as possible – there are a lot of them to monitor as I snug up the clamps!
I’ll leave this stage sit overnight so the glue will develop a good hold before I take it out and machine it further. It takes 5 days for this poly glue to develop its maximum hold (by then these tables will be on their way to Wanda) but this glue will grab well in a few hours. Giving it overnight to set up makes sure none of the joints will pop open during machining, the surface planer especially will induce a good amount of vibration in the panel as the knives strike the surface repeatedly.
 The next morning I pull off the clamps, scrape the surface to remove glue squeeze-out, trim the panel to rough width (so it fits through the 15” wide surface planer) and surface plane it to remove most of the roughness. Quarter sawn wood has a tendency to chip out in the surface planer, so I switch to the wide drum sander (photo) as soon as feasible for final smoothing. This tool takes of miniscule amounts of wood with each pass, so reducing the thickness very much will take a long time, but results in a superior surface in the end.
 Wha-La! Two perfect panels!
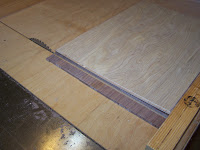
Next I trim these panels to exact width, which is 1/8” narrower than the backer panels, and glue the ribbon panels to the backer panels, leaving a 1/16” overhang of backer on each side. This does two things: first it allows some room for the panels to expand in humid weather and it prevents the ribbon panel from getting glued to the rails during final assembly of the tray. Because these panels are solid, natural wood, they will expand and contract across the grain as the wood fibers swell and contract with the changing humidity. No finish, no matter how good will prevent that –it’s just a fact of life, we furniture makers have to learn to deal with it so parts don’t crack and joints don’t fall apart.
Wha-La! Two perfect panels!
Next I trim these panels to exact width, which is 1/8” narrower than the backer panels, and glue the ribbon panels to the backer panels, leaving a 1/16” overhang of backer on each side. This does two things: first it allows some room for the panels to expand in humid weather and it prevents the ribbon panel from getting glued to the rails during final assembly of the tray. Because these panels are solid, natural wood, they will expand and contract across the grain as the wood fibers swell and contract with the changing humidity. No finish, no matter how good will prevent that –it’s just a fact of life, we furniture makers have to learn to deal with it so parts don’t crack and joints don’t fall apart.
 When the glue is set-up I take the panels to the table saw equipped with a large miter sled and trim the ribbon panels to be even with the ends of the backer panels. Why don’t I leave a gap here like I did on the long sides? Because wood dos not expand and contract along its length, only across it’s width. These edges can be flush, and in fact making them flush will help to strengthen the tray against racking.
 Now I finish sand the panel assemblies, front and back. Finish sanding them well after the edge rails have been added will be far more trouble than doing it now. When I’ve gone through all the grits I wipe the panel down with clean mineral spirits to simulate a finish, this is how it will look when I spray on the lacquer – are there and glue spots, or chips, or crazy grain that need more work? Now would be the time to fix them, not after the first coat of lacquer is on.
 Once the mineral spirits has evaporated I pre-finish the long edges of the ribbon panels. This is so that when the panels contact a narrow ribbon or raw wood does not peek out from under the rail edge. Yes, it is possible that capillary action will pull some finish into the joint between rail and panel, but I don’t want to count on that. Yes it’s possible that even if a sliver of raw wood exposes itself that no one will even notice, but I don’t want to count on that either. I’d rather do it his way and be sure.
This completes construction of the panel assemblies. Next up, tray rails.
Once the mineral spirits has evaporated I pre-finish the long edges of the ribbon panels. This is so that when the panels contact a narrow ribbon or raw wood does not peek out from under the rail edge. Yes, it is possible that capillary action will pull some finish into the joint between rail and panel, but I don’t want to count on that. Yes it’s possible that even if a sliver of raw wood exposes itself that no one will even notice, but I don’t want to count on that either. I’d rather do it his way and be sure.
This completes construction of the panel assemblies. Next up, tray rails.
 We start with pieces of wood that have been jointed and surface planed so that the faces are absolutely flat and smooth. These faces will become our glue joints, so there cam be no defects or snipe. Bear in mind that we are making a full set of trays and stand, two all walnut tables and a custom stand for Wanda, the other two tables will be our Signature Series made of walnut and oak and will be used for photographic purposes, then will probably head off to our living room where we will conduct extensive product testing .
 As I cut the strips I lay them on the extension table in the same order I cut them from the billet, this preserves the natural flow of the grain pattern and makes it easier to get a good looking panel. I like to use lumber that is as close to flat sawn for these ribbon panels because when I re-saw them the strips end up being quarter sawn and displaying some strikingly beautiful grain, especially in woods like oak.
 When I have all the strips I will need cut (and a few extras, just in case) I begin to lay them out and check the patterns. The ideal method here is to cut all the strips for one panel from one wide board, so that the pattern flows naturally from one edge to the other. But, these days most of the old growth timber has been cut and getting wide boards that are predominantly flat sawn is rare. So I will use two or three boards per panel, and by careful attention to color and form, match them up for a good looking panel.
 I use a couple of strips of wide masking tape pulled tightly across the panel to secure it once I’m happy with the lay-out. If any of the strips have developed a little spring to them un cutting, I’ll use a bar clamp to pull the strips snug while I tape. Fold the assemblage in half and take it into the assembly room for glue-up.
 I built this lop-sided “A” shaped jig to help me apply glue between the strips quickly and efficiently. The tape acts like hinges between strips when placed the panel is placed on the jig up side (tape side) down. I use a small brush to apply Type III polyurethane glue evenly between the first strip, move the panel up, glue the next joint, move it up, and keep going until I get to the last strip.
 When all joints are glued I move the panel over to a set of clamps that were placed at hand, 3 underneath two on top. By alternating the clamps I can insure that I don’t mold a bow into the panel due to the clamping pressure, and I am assured that the panel pieces won’t go “SPROING” and fly all over the place (giggling incessantly) when I apply pressure with the clamps. While clamping I pay attention to the seams, getting them all as flat and even as possible – there are a lot of them to monitor as I snug up the clamps!
I’ll leave this stage sit overnight so the glue will develop a good hold before I take it out and machine it further. It takes 5 days for this poly glue to develop its maximum hold (by then these tables will be on their way to Wanda) but this glue will grab well in a few hours. Giving it overnight to set up makes sure none of the joints will pop open during machining, the surface planer especially will induce a good amount of vibration in the panel as the knives strike the surface repeatedly.
When all joints are glued I move the panel over to a set of clamps that were placed at hand, 3 underneath two on top. By alternating the clamps I can insure that I don’t mold a bow into the panel due to the clamping pressure, and I am assured that the panel pieces won’t go “SPROING” and fly all over the place (giggling incessantly) when I apply pressure with the clamps. While clamping I pay attention to the seams, getting them all as flat and even as possible – there are a lot of them to monitor as I snug up the clamps!
I’ll leave this stage sit overnight so the glue will develop a good hold before I take it out and machine it further. It takes 5 days for this poly glue to develop its maximum hold (by then these tables will be on their way to Wanda) but this glue will grab well in a few hours. Giving it overnight to set up makes sure none of the joints will pop open during machining, the surface planer especially will induce a good amount of vibration in the panel as the knives strike the surface repeatedly.
 The next morning I pull off the clamps, scrape the surface to remove glue squeeze-out, trim the panel to rough width (so it fits through the 15” wide surface planer) and surface plane it to remove most of the roughness. Quarter sawn wood has a tendency to chip out in the surface planer, so I switch to the wide drum sander (photo) as soon as feasible for final smoothing. This tool takes of miniscule amounts of wood with each pass, so reducing the thickness very much will take a long time, but results in a superior surface in the end.
 Wha-La! Two perfect panels!
Next I trim these panels to exact width, which is 1/8” narrower than the backer panels, and glue the ribbon panels to the backer panels, leaving a 1/16” overhang of backer on each side. This does two things: first it allows some room for the panels to expand in humid weather and it prevents the ribbon panel from getting glued to the rails during final assembly of the tray. Because these panels are solid, natural wood, they will expand and contract across the grain as the wood fibers swell and contract with the changing humidity. No finish, no matter how good will prevent that –it’s just a fact of life, we furniture makers have to learn to deal with it so parts don’t crack and joints don’t fall apart.
Wha-La! Two perfect panels!
Next I trim these panels to exact width, which is 1/8” narrower than the backer panels, and glue the ribbon panels to the backer panels, leaving a 1/16” overhang of backer on each side. This does two things: first it allows some room for the panels to expand in humid weather and it prevents the ribbon panel from getting glued to the rails during final assembly of the tray. Because these panels are solid, natural wood, they will expand and contract across the grain as the wood fibers swell and contract with the changing humidity. No finish, no matter how good will prevent that –it’s just a fact of life, we furniture makers have to learn to deal with it so parts don’t crack and joints don’t fall apart.
 When the glue is set-up I take the panels to the table saw equipped with a large miter sled and trim the ribbon panels to be even with the ends of the backer panels. Why don’t I leave a gap here like I did on the long sides? Because wood dos not expand and contract along its length, only across it’s width. These edges can be flush, and in fact making them flush will help to strengthen the tray against racking.
 Now I finish sand the panel assemblies, front and back. Finish sanding them well after the edge rails have been added will be far more trouble than doing it now. When I’ve gone through all the grits I wipe the panel down with clean mineral spirits to simulate a finish, this is how it will look when I spray on the lacquer – are there and glue spots, or chips, or crazy grain that need more work? Now would be the time to fix them, not after the first coat of lacquer is on.
 Once the mineral spirits has evaporated I pre-finish the long edges of the ribbon panels. This is so that when the panels contact a narrow ribbon or raw wood does not peek out from under the rail edge. Yes, it is possible that capillary action will pull some finish into the joint between rail and panel, but I don’t want to count on that. Yes it’s possible that even if a sliver of raw wood exposes itself that no one will even notice, but I don’t want to count on that either. I’d rather do it his way and be sure.
This completes construction of the panel assemblies. Next up, tray rails.
Once the mineral spirits has evaporated I pre-finish the long edges of the ribbon panels. This is so that when the panels contact a narrow ribbon or raw wood does not peek out from under the rail edge. Yes, it is possible that capillary action will pull some finish into the joint between rail and panel, but I don’t want to count on that. Yes it’s possible that even if a sliver of raw wood exposes itself that no one will even notice, but I don’t want to count on that either. I’d rather do it his way and be sure.
This completes construction of the panel assemblies. Next up, tray rails.
No comments:
Post a Comment
Appropriate comments are welcome. All comments are reviewed before being posted. Spam messages (anything not a direct discussion of this message) and all profanity will be deleted. Don't waste your time or mine by posting trash here.