Our next project will be the creation of cutting boards made to fit over part (or all) of a kitchen sink opening. These are particularly handy in small kitchens where counter space is at a premium.
The boards are made of solid, natural woods, selected for tight grain and hardness. Boards are ripped into strips, the strips turned up to use edge grain on the board surface and glued back into a large blank.
A lip is routed on the under side of the boards to they sit securely on the rim of the sink.
The boards are sanded satiny smooth and finished with mineral oil. Then packaged in custom made boxes: each board is slightly different, so I make a box for each to be sure it fits properly.
To watch along and get all the details, Click Here.
Daily production notes on projects under construction at Smoky Mountain Woodworks. Slip on a pair of safety glasses and come on in!
Wednesday, November 28
Wednesday, October 17
Turning A Jim Dandy Cane
Jim is in remarkably good shape for being in his 80s, he and his wife
still get out and do a lot of things in the community and they enjoy
taking cruises. But Jim is finding that he needs a little added support
when walking long distances; he needs a cane. And, being a fellow of
great taste and high standards, not just any old cane will do. Since
we’ve built him several pieces of furniture and he knows my work, he
asked if I’d turn him a special cane; something he’d be proud to show
off on his next cruise.
If you want to try this project yourself, order your hardware first. You will need to have it on hand to establish diameters of the connecting tenons.

I start by selecting a thick slab of hickory; one that has some interesting grain to it, but not twisted or sideways; we need the grain to run the length of the cane. Sideways grain would create a snap hazard.
I like hickory because it is very hard (resists dings), very strong (not likely to snap even if you lean heavily on it), and because it’s beautiful stuff. However, the same interlocked grain that makes it so strong makes it very difficult to turn on a lathe and the hardness of the wood makes it a bear to sand. Tradeoffs.
I cut the slab to a generous rough length, joint one face and one edge – just to get them straight. Because I’m going to turn the thing round, getting it square to start with is of no importance at all, but having it straight is helpful. Then I cut the other two sides on the table saw.
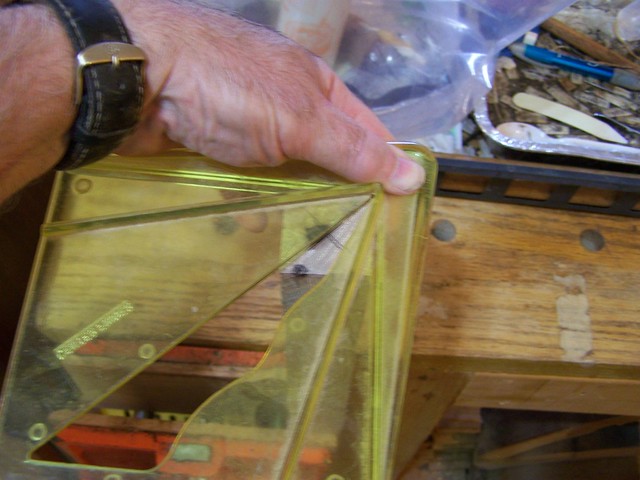
Using a center finder I locate and mark the centers of each end of the blank. If you’re using a pen or pencil, strike your marks from all four corners and use the tiny square in the middle of the four as your center.

Dimple the center with a punch, then drive your lathe’s spur into the end of your blank with a mallet. Drive it in far enough to get tooth gouges for a firm grip. This may be difficult in a wood like hickory, softer woods, not so much.
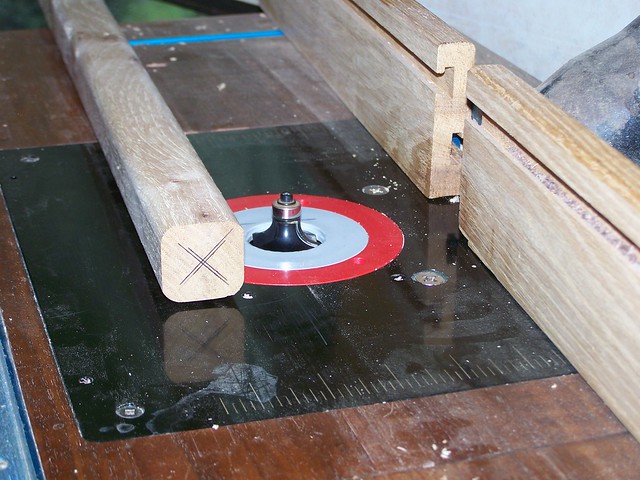
As I mentioned, turning hickory is difficult because the grain is interlocked and pieces tend to tear off rather than shearing off. Those big ol’ square corners especially so. To give me an easier time of it, I use round-over bits in the router table to remove the bulk of the edges, making the blank almost round to start with.
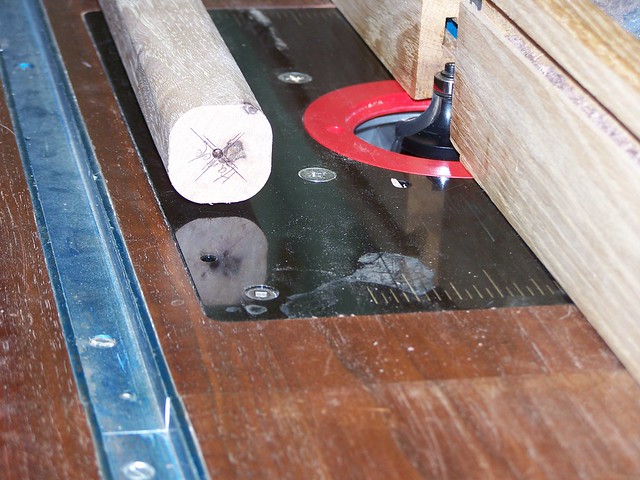
It takes two passes with ¼” radius and ½” radius bits to avoid tearing out the wood with the bits.
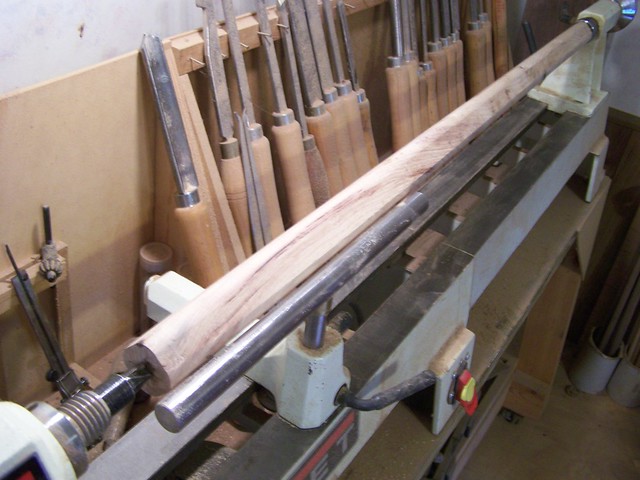
Now mount your blank in your lathe and install a long tool rest. There are two big challenges in turning a cane; one of those is that you need to turn a long smooth taper from one end to the other. This is harder to do freehand than you might think. And doubly so if all you’ve got is the 6” tool rest that came with your lathe. You will want at LEAST a 12” tool rest to work at smoothing your taper.
Read the rest...
If you want to try this project yourself, order your hardware first. You will need to have it on hand to establish diameters of the connecting tenons.

I start by selecting a thick slab of hickory; one that has some interesting grain to it, but not twisted or sideways; we need the grain to run the length of the cane. Sideways grain would create a snap hazard.
I like hickory because it is very hard (resists dings), very strong (not likely to snap even if you lean heavily on it), and because it’s beautiful stuff. However, the same interlocked grain that makes it so strong makes it very difficult to turn on a lathe and the hardness of the wood makes it a bear to sand. Tradeoffs.
I cut the slab to a generous rough length, joint one face and one edge – just to get them straight. Because I’m going to turn the thing round, getting it square to start with is of no importance at all, but having it straight is helpful. Then I cut the other two sides on the table saw.

Using a center finder I locate and mark the centers of each end of the blank. If you’re using a pen or pencil, strike your marks from all four corners and use the tiny square in the middle of the four as your center.

Dimple the center with a punch, then drive your lathe’s spur into the end of your blank with a mallet. Drive it in far enough to get tooth gouges for a firm grip. This may be difficult in a wood like hickory, softer woods, not so much.

As I mentioned, turning hickory is difficult because the grain is interlocked and pieces tend to tear off rather than shearing off. Those big ol’ square corners especially so. To give me an easier time of it, I use round-over bits in the router table to remove the bulk of the edges, making the blank almost round to start with.

It takes two passes with ¼” radius and ½” radius bits to avoid tearing out the wood with the bits.

Now mount your blank in your lathe and install a long tool rest. There are two big challenges in turning a cane; one of those is that you need to turn a long smooth taper from one end to the other. This is harder to do freehand than you might think. And doubly so if all you’ve got is the 6” tool rest that came with your lathe. You will want at LEAST a 12” tool rest to work at smoothing your taper.
Read the rest...
Monday, October 8
A Ladies Undies Rack
This project was a special request from a local; just a small rack or hanger for hanging bras, slips and other delicates on the wall behind her door. It is to consist of a board with three pinkish glass knobs – which she supplied. She wants it painted off-white so it blends well in her closet.
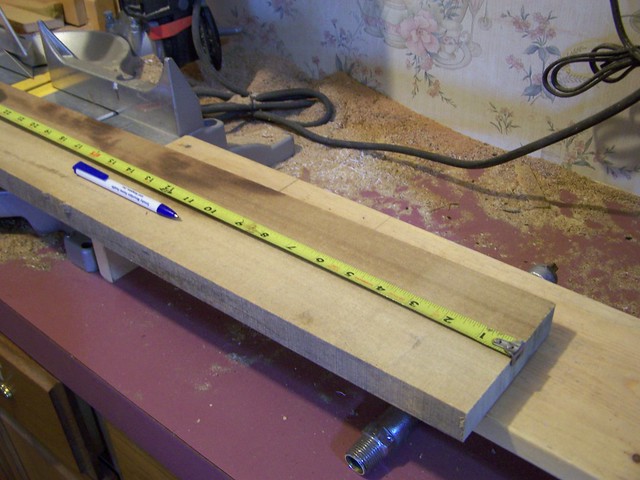
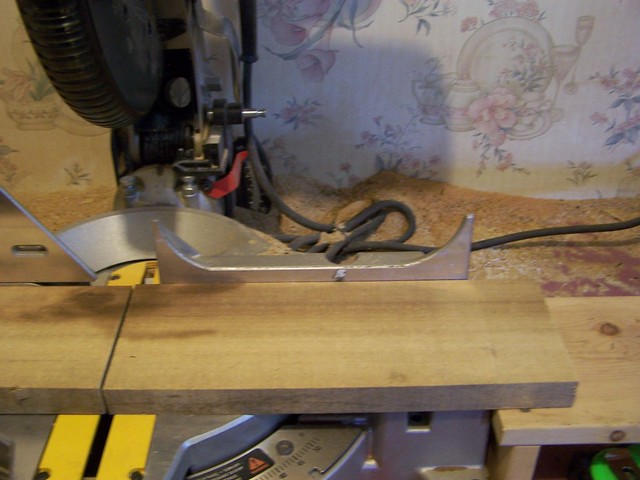
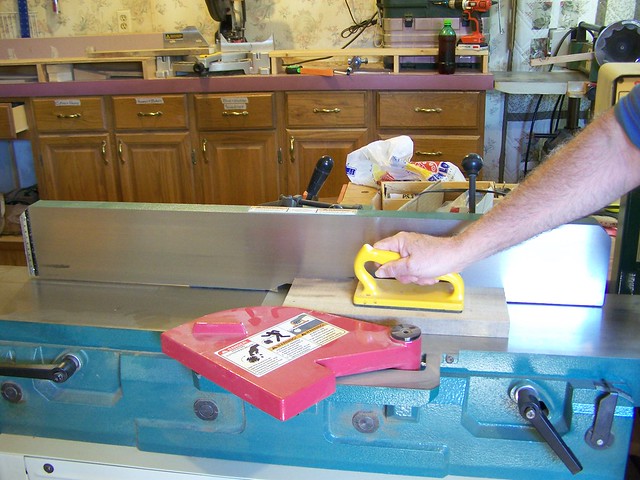
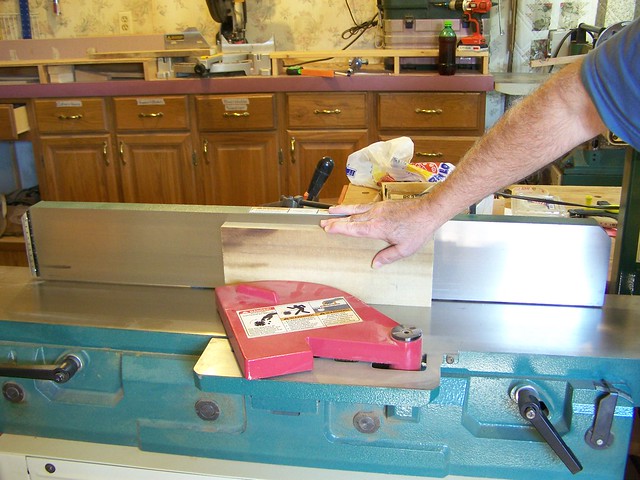
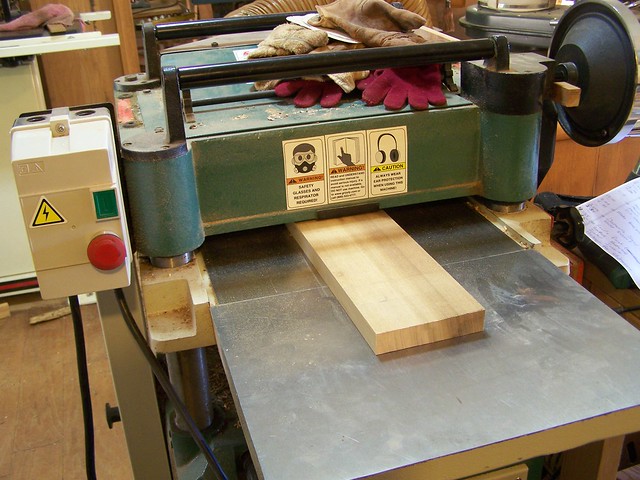
I continue surfacing the blank until I get it to the desired finished thickness. The final pass is done light and slow to reduce the amount of sanding I’ll need to do to remove cutter marks. (NOTE: not all surface planers offer different speeds for roughing and for finishing, mine does.)
Read the rest...
Tuesday, July 17
Cherry Ring Box
Dan has been buying special things from us for a long time, so when he contacted me to ask if we could make him something a little different, I was happy to oblige. Dan is getting engaged. He wants to present the ring in a really classy way: a small, wooden steamer trunk.
He sent this small box; purchased at a craft store, as a general example of what he had in mind for size and shape.
I start by selecting pieces of cherry lumber from my cut-offs bin. The piece for the sides needs to be fairly straight grained so I can get the corners to match up. The piece for the top can have a little more "character". I flatten one wide face of each with a pass over the jointer. Flip that piece up and run the jointed face along the fence to smooth one edge and square the two surfaces to each other.
I use the table saw to cut the part blank to finished width by running the jointed edge along the saw fence. Then I lay out the part arrangement. By cutting them, long, short, long, short, sequentially from the blank I insure that three of the four corners will match up perfectly and allow the grain to flow around the box in an unbroken pattern. To get all four corners perfectly matched requires resawing the blank first, turning the insides to the outside, then cutting one long and one short from each half of the blank. If done properly, the grain pattern perfectly matches up at all four corners. But the added step adds time and labor and I'm on a budget here of an hour and a half total.
I chose this piece of wood specifically because it should match up well even at the fourth corner despite taking a short-cut.
I bevel the edges so all end grain is hidden inside the corners.
When the pieces are cut I arrange them in the proper sequence and carefully stick them to a piece of wide masking tape, making sure the ends are just touching one another and the top and bottom edges are aligned. Then I apply glue to the bevels between pieces.
By rolling this strip of parts up, the strip becomes a box. The masking tape hold the corner joints together and if the 45° bevels were perfectly cut, the joints close up perfectly - as these do. Because I have good wood-to-wood contact throughout the joints, clamps are not needed. I clean up any glue squeeze-out from the inside corners and apply glue to the top edges.
Then I position the top piece - cut just a smidge large - so it hangs over evenly on all sides and clamp it to the body in a vice.
I'll let this assembly sit until the glue hardens up well.
In the mean time my supervisor, Cochise, and I will take a break, get a drink of cool water, go tinkle on a tree or two (that would be him, not me) and stretch our legs. See you back here when the glue dries.
OK, we're back.
The first thing to do now is to sand off the overhang of the box on an oscillating belt sander: the oscillating (cycles up and down as it runs) helps prevent scratches from forming.
Once the top is flush to the sides I use a 1/2" radius router bit in my router table to round over the front and back edges to give it a domed look.
Then I begin sanding; going from 100 grit through 180 grit. If you look close you'll see the way the grain runs around the corner of the box.
After the sanding is done to my satisfaction (this takes a while) it's time to cut the lid from the box. First I mark the box so I can be sure I don't put the lid back on backward. More sanding to clean up the band saw marks and the fuzzy bits the cutting leaves - all the while being careful not to round off the corners of the lid - need to maintain a nice tight closure line between lid and box.
I lay-out the hinge locations and cut the ends of the recesses using a flush-cut saw guided by a small square.
Then I begin the painstaking process of carving out the small recesses for the hinges. This must be done slowly and carefully. Take away too much and it's hard to put it back!
Once I've cut the hinge pockets I position the hinges and make pilot holes for the tiny screws that will mount the hardware. These screws are so small that even my smallest twist drill is too large for pilot holes, so I tap a small scratch awl into the wood to make the pilots, not ideal, but better than nothing.
Positioning the hinges is important. If I don't get them just right - top and bottom - the lid will not line up correctly with the base, and on a box this small, even just a smidge off will be noticeable.
Done, looking good.
Next comes the hasp - not nearly as complicated as the hinges; I just need to get it centered and be sure there is the proper amount of tension when the lever clips over the stud.
Then I lay-out and cut the grooves on the top that simulate ribs and give it a steamer trunk-like look. Again I use the engineers square to guide the flush cut saw to produce a very thin clean line. Any other saw would leave a wide, ragged kerf. A knife will want to follow the grain.
The base plate comes next. I cut a piece of stock to be 1/4" larger in each direction than the box.
I chuck up a 1/8" round-over bit in the router table and dress up the top edge, then sand thoroughly, making sure I keep the part flat. If I sand more off one corner or and edge it will not mate properly to the bottoms of the box sides.
After applying glue to the box sides, positioning the box on the base, and holding by hand a few minutes to let the glue grab so the base does not slide, I put it in a vice to apply even clamping pressure all around while the glue dries.
And that completes construction of the box, so I can clean up a bit and put away the tools. Then Cochise and I will go out for another little stroll.
When we got back I removed the hardware from the box, did the last sanding and started shooting teh finish. It's humid today, so it's taking a while for each round to dry.
While I'm waiting for finish to dry, I use the band saw to cut off a nice chunk of Styrofoam that will fit snugly inside the box bottom.
Dan wanted the fabric liner to be pink, since that is his fiance's favorite color. I had Marie scout around for some pink fabric: velvet preferred, but something similar will do. She came up with a bright pink girls shirt made in a velvety, iridescent fabric of some kind. I think it will work wonderfully to show off that diamond. I tuck the fabric into the slot in the foam and tuck it neatly around the edges. I secure it with masking tape at the bottom.
I slip the pad into the box base just far enough to be sure it fits snugly. I don't want to tear it up getting it out again to do the final coat of finish.
I will not glue this pad into the box. Once the ring is on permanent display on Bonnie's hand, this box may be re-purposed as a small jewelry box. She *may* want to remove the pad to make for room for treasures. Maybe not... but I'll give her the option.
Done. Being fresh milled cherry, it is rather light in color - for cherry. But a week or two of exposure to light will cause it to darken rapidly to the deep reddish hue for which cherry is acclaimed.
All that remains now is to package it up and send it on it's way. I hope Dan and Bonnie will be pleased with it and that their marriage will be long and happy. Bless you both!
He sent this small box; purchased at a craft store, as a general example of what he had in mind for size and shape.
I start by selecting pieces of cherry lumber from my cut-offs bin. The piece for the sides needs to be fairly straight grained so I can get the corners to match up. The piece for the top can have a little more "character". I flatten one wide face of each with a pass over the jointer. Flip that piece up and run the jointed face along the fence to smooth one edge and square the two surfaces to each other.
The the stock gets run through the surface planer, jointed face down. The cutters above the wood smooth the upper face and make it parallel to the jointed face. I keep making passes and lowering the cutter head until the stock is 5/16" thick.
I chose this piece of wood specifically because it should match up well even at the fourth corner despite taking a short-cut.
I bevel the edges so all end grain is hidden inside the corners.
When the pieces are cut I arrange them in the proper sequence and carefully stick them to a piece of wide masking tape, making sure the ends are just touching one another and the top and bottom edges are aligned. Then I apply glue to the bevels between pieces.
By rolling this strip of parts up, the strip becomes a box. The masking tape hold the corner joints together and if the 45° bevels were perfectly cut, the joints close up perfectly - as these do. Because I have good wood-to-wood contact throughout the joints, clamps are not needed. I clean up any glue squeeze-out from the inside corners and apply glue to the top edges.
Then I position the top piece - cut just a smidge large - so it hangs over evenly on all sides and clamp it to the body in a vice.
I'll let this assembly sit until the glue hardens up well.
In the mean time my supervisor, Cochise, and I will take a break, get a drink of cool water, go tinkle on a tree or two (that would be him, not me) and stretch our legs. See you back here when the glue dries.
OK, we're back.
The first thing to do now is to sand off the overhang of the box on an oscillating belt sander: the oscillating (cycles up and down as it runs) helps prevent scratches from forming.
Once the top is flush to the sides I use a 1/2" radius router bit in my router table to round over the front and back edges to give it a domed look.
Then I begin sanding; going from 100 grit through 180 grit. If you look close you'll see the way the grain runs around the corner of the box.
After the sanding is done to my satisfaction (this takes a while) it's time to cut the lid from the box. First I mark the box so I can be sure I don't put the lid back on backward. More sanding to clean up the band saw marks and the fuzzy bits the cutting leaves - all the while being careful not to round off the corners of the lid - need to maintain a nice tight closure line between lid and box.
I lay-out the hinge locations and cut the ends of the recesses using a flush-cut saw guided by a small square.
Then I begin the painstaking process of carving out the small recesses for the hinges. This must be done slowly and carefully. Take away too much and it's hard to put it back!
Once I've cut the hinge pockets I position the hinges and make pilot holes for the tiny screws that will mount the hardware. These screws are so small that even my smallest twist drill is too large for pilot holes, so I tap a small scratch awl into the wood to make the pilots, not ideal, but better than nothing.
Positioning the hinges is important. If I don't get them just right - top and bottom - the lid will not line up correctly with the base, and on a box this small, even just a smidge off will be noticeable.
Done, looking good.
Next comes the hasp - not nearly as complicated as the hinges; I just need to get it centered and be sure there is the proper amount of tension when the lever clips over the stud.
Then I lay-out and cut the grooves on the top that simulate ribs and give it a steamer trunk-like look. Again I use the engineers square to guide the flush cut saw to produce a very thin clean line. Any other saw would leave a wide, ragged kerf. A knife will want to follow the grain.
The base plate comes next. I cut a piece of stock to be 1/4" larger in each direction than the box.
I chuck up a 1/8" round-over bit in the router table and dress up the top edge, then sand thoroughly, making sure I keep the part flat. If I sand more off one corner or and edge it will not mate properly to the bottoms of the box sides.
After applying glue to the box sides, positioning the box on the base, and holding by hand a few minutes to let the glue grab so the base does not slide, I put it in a vice to apply even clamping pressure all around while the glue dries.
And that completes construction of the box, so I can clean up a bit and put away the tools. Then Cochise and I will go out for another little stroll.
When we got back I removed the hardware from the box, did the last sanding and started shooting teh finish. It's humid today, so it's taking a while for each round to dry.
While I'm waiting for finish to dry, I use the band saw to cut off a nice chunk of Styrofoam that will fit snugly inside the box bottom.
Dan wanted the fabric liner to be pink, since that is his fiance's favorite color. I had Marie scout around for some pink fabric: velvet preferred, but something similar will do. She came up with a bright pink girls shirt made in a velvety, iridescent fabric of some kind. I think it will work wonderfully to show off that diamond. I tuck the fabric into the slot in the foam and tuck it neatly around the edges. I secure it with masking tape at the bottom.
I slip the pad into the box base just far enough to be sure it fits snugly. I don't want to tear it up getting it out again to do the final coat of finish.
I will not glue this pad into the box. Once the ring is on permanent display on Bonnie's hand, this box may be re-purposed as a small jewelry box. She *may* want to remove the pad to make for room for treasures. Maybe not... but I'll give her the option.
Done. Being fresh milled cherry, it is rather light in color - for cherry. But a week or two of exposure to light will cause it to darken rapidly to the deep reddish hue for which cherry is acclaimed.
All that remains now is to package it up and send it on it's way. I hope Dan and Bonnie will be pleased with it and that their marriage will be long and happy. Bless you both!
Monday, July 2
Building a Cabin for Cochise
Cochise is an American Bulldog who is staying with us on a foster dog program through the local animal shelter. He has health issues that require one-on-one care and observation. You can read more about that at Rescuing Cochise. We built a quickie sleeping shelter for him the day before he arrived, but it was a temporary arrangement - made more temporary by his habit of leaping atop his wickiup trying to get a better view of things when he hears a noise. It's time to build Cochise a proper house.
As with all projects, we start by pulling lumber. In this case the lumber we're using if from a 100 year old barn we bought and had torn down. We thought there would be a market for this lumber... we were wrong. But it should make an attractive abode for this American classic named after an Apache chief.
While I'm pulling boards out and carrying them inside the shop, Marie is stripping the cover and supportive fencing from the wickiup so we can re-use the door panel an the base for the new cabin. This should have been a fine summer shelter for him but repeated mashings weakened the wire fencing to the point that I could not reform it properly.
Construction begins with breaking the long boards down into rough-length pieces on the chop saw (compound miter saw).
Then I use the jointer to flatten one wide face of each board. With the wide face flattened I flip it up and run the jointed face along the fence and let the cutters straighten an edge and make it square to the flattened face. That's two sides, smooth straight and square.
Then I run the boards through out surface planer, with the flattened face down on the bed. The cutter-head (above the board) skins off the rough wood to smooth that face and make it parallel to the jointed face: three sides smooth straight and square to one another.
On the table saw I remove the last edge to make it straight and square to the two faces and parallel to the jointed edge. Now we're ready to start assembling parts.
First up it's back to the chop saw to trim the dressed boards to finished lengths.
We make panels out of the individual boards my arranging them in pleasing patterns and trimming an edge board to get the exact finished height. The front & back panels are long, three short panels will make the sides and inside baffle. I'll use plywood for the roof. I use some 2x2 stock (sort of) for the corner cleats, clamp the face boards together and just nail them to the corner cleats - using a framing square to square up the end and as a guide to get the nails into the cleat. One nail at each end where I can see the cleat end, then make a line with the square between them to start the rest of the nails.
Yeah, I know: nails - shudder! But this isn't fine furniture and time is short.
I needed to add a batten inside the long pack panel to help keep the boards aligned. I drove nails through and clinched them to hold the batten tightly to the panel. Here's a good way to clinch nails so they never snag anyone:
Bend the end of the nail over with a plyers, then hammer the nail over flat to the board, burying the sharp end of the nail back into the board. The only problem with this method is that these nails are a BEAR to get back out again should you want to dismantle the component.
I use a Kreg jig to drill pocket holes on the lower, inside faces of the corner cleats. These will be used to attach the walls to the floor.
When the front panel is complete I lay-out the door using the framing square and a home-made beam compass. Then cut out the opening with a saber saw.
Cochise looks on as we work, but is unimpressed at this point. I don't blame him, we're just making big boards out of little boards so far.
I cut a plywood baffle to go in beside the doorway. This will help keep the winds out in the winter. I brace it top and bottom as well as screwing it to a center cleat. The braces will (hopefully) keep him from breaking off the baffle if he gets rowdy in his cabin.
Then I can begin assembling the panels into the basic structure.
I decide to use a piano hinge to attach the roof to the cabin so I can lift the roof for cleaning, and to allow for some air circulation in the summer. Spacer blocks atop the back wall will hold the roof up 1" to allow warm air to flow out. These will be removed in winter to keep the cold air out. If the plwood roof decides to warp I'll have to add hook & eyes to the back to draw it down tight in the winter.
We decide to use up some left-over shingles we have laying around to put a proper roofing on the cabin and make sure the roof stays weather tight. TO avoid injury from roofing nails protruding down through the plywood roof panel (and because I don't have any roofing nails) I use heavy duty staples in my staple gun to affix the shingles to the plywood. I lay the shingles in runs and staple the runs where the next run will cover them and prevent rust. Just like laying a real roof.
Done! Now it's time to take the roof off, separate the four walls and move it all out to Cochise's pen. The floor panel is already out there, blocked up and leveled.
The walls are screwed to one another and then attached to the base using face frame screws in the pocket holes I drilled earlier. I also put a screw through the angle brace at the bottom of the baffle.
Finally I attach the piano hinge to the roof panel with lots of small screws. That roof panel got pretty heavy with shingles on it!
I flip up the roof, add some straw and cedar chips, install teh spacer blocks and it's ready for Cochise to do a walk-through inspection. Of course, when we brought him out to his pen, he refused to have anything to do with this new thing that has invaded HIS space. He may be afraid that if he goes in we'll close a door and trap him in there. Once we leave and he has some time to explore on his own terms I'm sure to settle in.
And that's it. I think it's a fine lil cabin for our classic American Bulldog guest. It is by no means a furniture grade project, but it was fun to build, it serves a useful purpose, doesn't look half-bad, and it cost us nothing. At least not now. It was built entirely from materials we had on hand, so there was no out-of-pocket expense in it's construction. Of course, we bought all that stuff earlier, so it's not entirely free, but close enough.
Hope you enjoyed following along. Come back again soon, I'll be starting on Marie's headboard.
Blondie Bear is especially fond of sitting on the porch on a warm summer afternoon. It also makes great shelter if a pop-up rain shower catches them outside.
This cabin has been in service for 7 years now. I have made repairs now and then, but the basic structure (including the roof) is original. I'd say it has held up really well for something we put together in a hurry.
As with all projects, we start by pulling lumber. In this case the lumber we're using if from a 100 year old barn we bought and had torn down. We thought there would be a market for this lumber... we were wrong. But it should make an attractive abode for this American classic named after an Apache chief.
While I'm pulling boards out and carrying them inside the shop, Marie is stripping the cover and supportive fencing from the wickiup so we can re-use the door panel an the base for the new cabin. This should have been a fine summer shelter for him but repeated mashings weakened the wire fencing to the point that I could not reform it properly.
Construction begins with breaking the long boards down into rough-length pieces on the chop saw (compound miter saw).
Then I use the jointer to flatten one wide face of each board. With the wide face flattened I flip it up and run the jointed face along the fence and let the cutters straighten an edge and make it square to the flattened face. That's two sides, smooth straight and square.
Then I run the boards through out surface planer, with the flattened face down on the bed. The cutter-head (above the board) skins off the rough wood to smooth that face and make it parallel to the jointed face: three sides smooth straight and square to one another.
On the table saw I remove the last edge to make it straight and square to the two faces and parallel to the jointed edge. Now we're ready to start assembling parts.
First up it's back to the chop saw to trim the dressed boards to finished lengths.
We make panels out of the individual boards my arranging them in pleasing patterns and trimming an edge board to get the exact finished height. The front & back panels are long, three short panels will make the sides and inside baffle. I'll use plywood for the roof. I use some 2x2 stock (sort of) for the corner cleats, clamp the face boards together and just nail them to the corner cleats - using a framing square to square up the end and as a guide to get the nails into the cleat. One nail at each end where I can see the cleat end, then make a line with the square between them to start the rest of the nails.
Yeah, I know: nails - shudder! But this isn't fine furniture and time is short.
I needed to add a batten inside the long pack panel to help keep the boards aligned. I drove nails through and clinched them to hold the batten tightly to the panel. Here's a good way to clinch nails so they never snag anyone:
Bend the end of the nail over with a plyers, then hammer the nail over flat to the board, burying the sharp end of the nail back into the board. The only problem with this method is that these nails are a BEAR to get back out again should you want to dismantle the component.
I use a Kreg jig to drill pocket holes on the lower, inside faces of the corner cleats. These will be used to attach the walls to the floor.
When the front panel is complete I lay-out the door using the framing square and a home-made beam compass. Then cut out the opening with a saber saw.
Cochise looks on as we work, but is unimpressed at this point. I don't blame him, we're just making big boards out of little boards so far.
I cut a plywood baffle to go in beside the doorway. This will help keep the winds out in the winter. I brace it top and bottom as well as screwing it to a center cleat. The braces will (hopefully) keep him from breaking off the baffle if he gets rowdy in his cabin.
Then I can begin assembling the panels into the basic structure.
I decide to use a piano hinge to attach the roof to the cabin so I can lift the roof for cleaning, and to allow for some air circulation in the summer. Spacer blocks atop the back wall will hold the roof up 1" to allow warm air to flow out. These will be removed in winter to keep the cold air out. If the plwood roof decides to warp I'll have to add hook & eyes to the back to draw it down tight in the winter.
We decide to use up some left-over shingles we have laying around to put a proper roofing on the cabin and make sure the roof stays weather tight. TO avoid injury from roofing nails protruding down through the plywood roof panel (and because I don't have any roofing nails) I use heavy duty staples in my staple gun to affix the shingles to the plywood. I lay the shingles in runs and staple the runs where the next run will cover them and prevent rust. Just like laying a real roof.
Done! Now it's time to take the roof off, separate the four walls and move it all out to Cochise's pen. The floor panel is already out there, blocked up and leveled.
The walls are screwed to one another and then attached to the base using face frame screws in the pocket holes I drilled earlier. I also put a screw through the angle brace at the bottom of the baffle.
Finally I attach the piano hinge to the roof panel with lots of small screws. That roof panel got pretty heavy with shingles on it!
I flip up the roof, add some straw and cedar chips, install teh spacer blocks and it's ready for Cochise to do a walk-through inspection. Of course, when we brought him out to his pen, he refused to have anything to do with this new thing that has invaded HIS space. He may be afraid that if he goes in we'll close a door and trap him in there. Once we leave and he has some time to explore on his own terms I'm sure to settle in.
And that's it. I think it's a fine lil cabin for our classic American Bulldog guest. It is by no means a furniture grade project, but it was fun to build, it serves a useful purpose, doesn't look half-bad, and it cost us nothing. At least not now. It was built entirely from materials we had on hand, so there was no out-of-pocket expense in it's construction. Of course, we bought all that stuff earlier, so it's not entirely free, but close enough.
Hope you enjoyed following along. Come back again soon, I'll be starting on Marie's headboard.
UPDATE:
As time passed, Cochise became a house dog and had no need of his cabin. Several other foster dogs used it until I decided to move it out into our big new play yard to be used as a play house by all the dogs. I also spiffed it up a little by adding a covered porch. We ARE in the ountain, after all and all proper mountain cabins have a proper porch.Blondie Bear is especially fond of sitting on the porch on a warm summer afternoon. It also makes great shelter if a pop-up rain shower catches them outside.
This cabin has been in service for 7 years now. I have made repairs now and then, but the basic structure (including the roof) is original. I'd say it has held up really well for something we put together in a hurry.
Subscribe to:
Comments (Atom)


