 The first step (after working up the design sketches and pulling lumber) is to make templates for the oddly shaped pieces. The side and front of each cabinet lean in at the top, and the lower rails on the front and sides are arched on the lower edge. This makes for an attractive piece of furniture, but is tricky to build. Templates help get the trickiest bits consistently shaped.
 Making Top Plates
Cutting rough lumber to length using the chop saw station.


After matching them up, I take the first pair into the assembly room and glue them together. I use clamps above and below to keep from bowing the assembly.


While glue sets up in the paired up boards I work on making parts blanks for the lower rails and legs - the oddly shaped bits. I use the templates to help me lay out the parts so I make maximum use of the lumber, working around the ugly bits and nesting the parts to reduce waste. Then I cut them out on the band saw.


Now that all four pairs of boards have been glued up I arrange the four pairs and look for the best matches to pair these up and make the 20" wide cabinet tops. When I find the best matches I mark them and joint those edges.

Back again to the assembly room, glue and clamps.


Here's a better look at it. Looks quite natural.


Making the Legs
 Then I install and tune a taper jig to cut the long straight taper on the inside edge of each leg. Tuning it in for a perfect cut the entire length takes many practice passes.
Making the Arched Lower Rails
I use the template for the side rails (short rails) to set up a stop block on the chop saw so I can cut the short rails to proper length. This length includes material needed to form a tenon on each end.


 Competed parts blanks stacked and awaiting the next step of their evolution.
 There is one last step to do in creating the legs; that is a slight bevel on teh inside edges inder the arched rails. Just a decorative touch, but a nice one. I lay out one leg, use an angle finder to measure the angle formed from the base.
 Then I use this gauge to set the angle on the chop saw (compound miter saw). I also install a disposable back board by clamping a smooth piece of scrap stock to the saw's fence.
 I make a plunge cut through the disposable fence to determine the path of the blade.
 I can use this cut to line up the cut line on the part with the path of the blade...
 ...when that is lined up I can install a stop block that will make positioning all the other legs automatic. Then I these angles, set the legs aside, and take all this stuff off of the saw.
 Next I want to start the tenons on the lower long rails. I begin by installing my mega-miter fence. This is long enough to support the entire length of the rails despite having arches cut in one edge. I adjust the stop to make the cut on the waste side of the lay-out line, and make my first cut. Then I roll the rail 90° and make the next cut, roll it again, make the third cut, roll it one more time and this cut completes an uninterrupted cut that runs all the way around the board and mates up perfectly at each corner. Flip the rail and repeat the process for the other end. Then repeat the whole process for each of the other three rails.
 Now I set up the band saw to remove the waste at the ends of the tenons. I am careful to stop pushing just as I approach the shoulder cut so the blade does not jump across the shoulder cut and slice into the end of the rail stock. On a straight rail I'd just flip it over and cut the other edge the same way, but the arch on that edge prevents this.
 So I adjust the fence backward, run the straight edge along the fence and trim off the excess on the arched edge. I'll wait to cut the tenon cheeks (the wide faces) until after I've chopped the mortises that the tenons will fit into.
I finish out the day's task by milling stock for the top long rails (no arches) and repeat this whole tenoning process on them, except that the tenons up there are 3/4 inch long, not 2 inches like these guys.
Cutting Mortises
 Because the legs for these cabinets are tapered, I need to support them at an angle so the mortises get cut square to the edge. I could built a cradle to hold the narrow end up enough to level the leg out, but I decided not to bother with all that for just 8 pieces. Instead I just tilted the bed of the drill press. I clamped a leg to the table, strapped a bubble level to the leg with masking tape and used the level as a reference to getting the leg perpendicular (square / 90°) to the mortising bit; which I have not installed yet in this photo.
 Then I change the machine from being a drill press to being a mortising machine by installing a mortising head and chisel/bit. This rig allows me to drill a series of square holes, one next to the other, so the end result is a nice, rectangular mortise. There are other ways of doing this, including a jig for a plunge router, using a router table, drilling and chiseling, and hand cutting them. But this is my favorite.
 When I'm done I have mortises cut for the upper and lower front and back rails. I'll finish up by clearing all the chips from the mortises, then check the bottoms of them and clean up any nubbins that may have been left in the corners.
 Completing the Tenons
 Then I cut the waste from the cheeks of the tenons. I do one - actually just part of one; about 1/3 of a long tenon as a test run in case I get the saw set up to cut too small. It was actually a little thick, so I'm good.
 Using a block plane and chisel I shave the tenons down to a perfect fit. Perfect here is one where the joint slides together with a nice "snick" sound. No slop and wiggle, but no need to pound on it to get it to go together.
 I shave a little, and test. Shave a little and test. Repeating until it's perfect. Perfection takes time.
 When I'm done, I have four frames, two fronts, two backs all fitted up. Now I'll move on to the sides.
Preparing for the Side Panels
The ends, or sides, of these cabinets will consist of framed panels. The panels will lodge in grooves cut on the inner edges of the rails and the legs (which serve as stiles). So I need to cut these grooves now.

I set up the table saw and mill a centered groove end-to-end on the inner edges of the upper and lower rails.

Then I cut the mortises for the side rails in the legs

And connect the two mortises with a groove for the panel. Because I do not want the groove to run the full length of the leg: the lower portion will be visible under the cabinet, I use the mortise as a terminus for the groove and drop the leg onto the dado head on the saw – or lift it off; depending on the orientation of the leg – so the groove does not extend beyond the dado.

The grooves in the rails and in the legs must match up perfectly or the panel will bind and assembly will be seriously complicated.

But the groove must not extend to this part of the leg where it would be visible.
Completing the Case Frame


 The final step in casework is to cut grooves on the insides of the upper rails that will provide a secure hold for the steel Z clips that will be used to attach the top plates to the casework. I can’t just screw the top to the casework because the top plate will want to expand and contract across the grain with changes in humidity, if it were solidly attached to the case, this expansion force would tend to pop the cases joints. Allowing for seasonal movement means using an attachment method with some “give” in it. These table top fasteners will do that. The only danger in this is that when the shelves are installed and one filled with books, the other with AV equipment these cabinets will be heavy. If one lifts the cabinet by grabbing the overhang of the top, there is a danger of ripping the screw out or bending the faster clips. Therefore I always enclose a “floating top” warning that directs the new owner to lift the cabinet from the bottom if they must move it around.
Bottom Plates
The floors of these cabinets, like the shelves are solid wood plates. These are made up just as I made the top plates above. The process starts with rough cutting boards into properly sized chunks and jointing one face and one edge smooth and flat.

Once in a while delays are introduced into the process through mechanical failure. This happens when machines are involved. In this case I was jointing boards when the cutter head started slowing down, sounding like the electricity was dropping out. After a few passes something in the base cabinet went Whunk-clunk-bang and the cutter head stopped all together. Nope, not the electricity. I pulled the side panels and found what the trouble was. This piece of key-stock was laying on the floor inside the jointer cabinet,

The belt had come off the drive pulley and the pulley had slid out almost off the end of the drive shaft. The drive shaft has a slot milled into it, the drive pulley has a matching slot milled inside its hub. The key stock or ‘key” is precisely sized to fit into these slots when lined up together, locking the hub to the shaft. A set screw in the hub is sometimes used to lock the key in place. In this case, the set screw had vibrated loose, allowed the key to slide out and the pulley to spin on the shaft as well as walk out to the end of the shaft. Naturally all this abnormal movement did damage to the involved parts, including mushrooming the end of the drive shaft where the key came out of the slot and was twisted sideways by the torque of the drive shaft against the drag of the drive pulley trying to power the cutter head as I passed wood over it.

Fortunately the key itself was not bent and I was able to clean up the drive shaft with a mill file to remove the burrs and mushrooming. Otherwise this mishap would have shut this machine down for a week or more as I waited for replacement parts to be ordered and shipped in. As it was I accomplished the repairs and had the machine back in service in about an hour and a half.

Jointing one wide face of each board to make it flat and smooth. Jointing removes any minor bowing, cupping or twist in a board. Severely misshapen boards are either cut into small parts that can be flattened, or sent to the firewood pile. With one wide face flattened, I flit the board up on edge and run the just-jointed face along the fence to straighten one edge that is now also perfectly square to the jointed face. I’ll mark these faces and corner with a “carpenter’s bowtie” two triangles with their points meeting at the squared corner to identify the finished edges.

The boards then go to the surface planer and I run them through with the jointed face down against the bed. The cutter head above the board trims off a bit of wood with each pass until this face too is smooth, flat, and parallel to the jointed face – and the board is at the proper thickness.

Again I lay the boards out and begin matching them up for the most pleasing color and grain combinations. Ideally this will hide the joints between boards so the panel looks like one wide board. I mark the completed sets with a big V to help me get them back together in the same order and faces up and take them into the assembly room for gluing and clamping.
Making the Side Panels

While the glue is setting up on the two bottom plates, I repeat the process with the pieces I’ll need to make the four end panels. Matching up this many pieces requires using all the available “table” surfaces available to me in the machine room so I can see all the pieces at once. I group them by hue. As I match up the pieces, I trim away the final rough edge on the table saw to make it parallel to the jointed edge and joint the freshly sawn edge to make it straight and square for a superior glue joint.

When the glue sets up I am ready scrape the glue pips off, drum sand the panels smooth and to final thickness, then trim them to finished size. The long grain edges are done first using the rip fence. This makes these two edges parallel. Then I install the bit cut-off sled and trim the back edge of the panel to straighten it and square it to the two long-grain edges.

The angled front edge is the tricky one. For this I take very careful measurements from *inside* the panel grooves in the front and back legs (serving as stiles), allow just a skosh of air space for expansion, and mark these measurements on the panel. Because the grain runs side to side not up and down on these panels, most of the expansion space is left at the top, but, the angled front edge requires some attention because as the panel expands that sloping front edge will bind in the groove and could cause problems. I connect the dots on the panel with a straight edge to create the cut line I need, then set up the sled to cut just to that line. To properly support the work at this angle requires a wedge installed under the left hand corner – including a little under the waste piece to prevent it from being grabbed by the blade and thrown when it comes loose.

After a few trips through the drum sander I set up the table saw with a dado head and a sacrificial fence (so I can bury part of the cutter head in the fence for a clean, all-the-way-to-the-edge cut) and mill the rabbets along the edges of the side panels. This creates a lip around the panel that will slide into the grooves I cut in the side rails and legs. I want a snug fit so the panel does not rattle, but not so snug that the panel has to be forced into place. Forcing things usually means breaking something along the way.

I put all the side rails back in place and check for a proper fit. Later I'll pull it all apart again to sand everything, but for now I'm done with these.

Back to the Bottom Plates
I mill a wooden strip to serve as a cleat upon which the back will rest and glue and screw it to the inside of the back arch.

Next I snag my pocket hole jig and drill pockets for face frame screws that will hold the bottom tightly against the front edge of the cabinet. The back edge will be allowed to float as the panel expands and contracts.

With side panels and floors installed, it’s time to complete the interiors. First up I need shelf support rails. When we discussed these cabinets, Phil wanted all the shelves to be adjustable, and removable. But because we’re using European hinges, which are hidden from the outside but large and bulky on the inside, and because the cabinet front slopes inward as it rises, making the depth of the cabinet constantly changing, fully adjustable shelves are not possible.

I cut wedge shaped pieces that will be glued in as shelf support rails. These will compensate for the changing width of the cabinet by allowing the shelf standards (metal tracks) to be mounted plumb and vertical.

These get glued inside the cabinet face frames. The top most shelf will sit on top of these rails. On the cabinet with doors, this is mandatory because this shelf must remain at the top of the doors. On the book case cabinet it *could* be made adjustable, the side-to-side variance is compensated for, but the front to back dimension still varies by almost an inch and a half. A shelf that fits snuggly near the top will become loser and looser as it moves down. If the front edge is kept flush with the cabinet front, the back edge will fall off the supports. The middle shelves will be adjustable on both cabinets, but adjustment will be limited to about 6”. It will be removable on the book case. Hinges and doors on the A/V cabinet will prevent removal.
 Finish sanding of the side panels is done with a random orbit sander equipped with a dust extraction hose leading to a big shop vac. This keeps most of the fine sanding dust out of the air - and thus out of my lungs. I used teh drum sander to flatten the panels with 100 grit paper. Finish sanding is done using 120, 150, 180 and 220 grit papers.
 Finish sanding of the side panels is done with a random orbit sander equipped with a dust extraction hose leading to a big shop vac. This keeps most of the fine sanding dust out of the air - and thus out of my lungs. I used teh drum sander to flatten the panels with 100 grit paper. Finish sanding is done using 120, 150, 180 and 220 grit papers.
 I take advantage of the chance to sand the parts of the cabinet case while they are taken apart again. I sand with 120 and 150 grit papers and will sand with the final two grits after the case is reassembled for the final time.
 To make the stiffeners for the shelves, I made the shelf blanks extra wide so I could rip off the edge and flip it down to acheive the best grain and color match possible. Here I'm laying out alignment marks prior to sanding both pieces.
 The alignment marks help me keep track of which edges were together and which face was on top.
 Then I can apply glue, line up the marks, and clamp the stiffener to the shelf edge.
 Next I cut and install the shelf standards. These slotted tracks use clips that snap into the slots to support the movable shelf. The slots are numbered to make getting the clips in the right spot easier when adjusting the shelf, so I make sure I get the number-one slot on the bottom of each track; installing one upside down would just cause confusion.
 The final step is to glue the mortise & tenon joints, and draw them snugly together with clamps while the glue sets up. This is the point of no return, this case will not be taken apart - other than removing the adjustable shelf - again.
 Next up is to route a bevel on the upper edges of the top plates. This is just a decorative touch that adds elegance to the piece without getting ornate. When completed I sand the faces with the random orbit sander and the edges by hand with sanding blocks.
The dimensions I planned for the doors need to be given a visual check before making the door parts, so I do a scale drawing in paper to see how they look. The original 3" frames will look awfully clunky on such small doors to I reduce the width. In addition, I use a visual design trick of making the top rails a little thinner that the lower rails and the two middle stiles - which will sit together when the doors are closed, looking like one element in the design - thinner than the outside stiles. These adjustments go a long ways toward making the doors much more appealing.


 |
| Catastrophic Stain Failure - 1st time in 30 years this has happened. |
 An agreement has been reached and the project goes on. I need to build a new cabinet to replace the one that was ruined, so I start by pulling another 60+ Board Feet of lumber from the stacks outside...
 ...and bring it inside where I can get at it easily as I need it. Normally I stack lumber vertically in eth assembly room; handy to the chop saw since that is normally the first stop but since I have two cabinets sitting in teh assembly room now, swinging lumber around in there could damage them, especially if it's hot and I'm tired and not paying real close attention to what I'm doing. Yes, it does happen. I do not need to acclimate this lumber becuase during the summer the environment inside the shop is (unfortunately) the same as the environment outside teh shop because the windows are all open and fans are sucking air in from outside. In teh winter I'd have to let this lumber adjust to being inside before I could use it.
I've been absent here for a while again, I'm sorry.
Since my last update I have:
- Pulled another 75 board feet of lumber from the piles and brought it inside.
- Ordered the new stain and more table top clips
- Made the new top plate for the A/V cabinet.
- Made the new shelf for the AV cabinet.
- Milled limber for legs and rails on the new book case
- Cut the legs to final shape for the new bookcase
- Cut the rails for the new bookcase to final size
- Laid out tenons on the book case rails
- Received the new stain and table top clips.
Today, (Monday) I have to do my weekly radio program so I can burn it to disk and mail it off to the radio station tomorrow morning or it will not get there in time for our regular air time. I'll spend some time in the afternoon sanding the A/V cabinet in preparation for staining.
I'm not going to post pictures of the new construction because the process is exactly the same as pictured above, and when I'm back where I ought to be I'll delete these do-over notes.
OK, I will not post very many pictures...

OK, I will not post very many pictures...

Today (Tuesday) I am staining the loose parts of the A/V cabinet: top, movable shelf, and doors using the new stain. This looks MUCH better. As you can see, the color is far more consistent, the only variations are the natural variations in the wood. This should work fine. If this is not dark enough, I can apply a second coat after the first coat has dried and before I shoot the lacquer. If you want it darker, let me know ASAHP.
Thursday: Staining the A/V cabinet carcass. Since a second coat (to make it darker) is requested, I'll wait for this coat to cure off and do it again, possibly tomorrow. It's humid today, that will affect the cure time.
 |
| MUCH better!! |
At day's end the cabinet is all stained and it looks MUCH better than the last attempt. because you need to be working with wet edges, the staining process once started had to continue non-stop until completed. That process alone took about 2 hours. But it was worth it. I did not have any of the troubles I did with the Environmentally Friendly stain. Give me a good old oil based stain any day!
This will need to cure overnight and hopefully will be ready for the second coat tomorrow. I'll try to get the case and the loose parts all recoated tomorrow so they can sit for the weekend and be ready for lacquering and reassembly next week.
Friday Second coat of stain on the A/V cabinet case. Mill, route, & miter glass retainer strips. Build pilot hole drilling jig. Drill pilot holes in grass retainer strips and sand. Stain glass retainer strips. restain all loose parts (including glass retainer strips. Re-staining the project (to make it a darker color) yielded some strange results. Nothing insurmountable, just unexpected. I'm sure it has to do with the dark color. I'll let it all stand for the weekend and it should be ready for lacquering next week.


Monday: Mondays are particularly busy days. I start with my daily visit to the garden. These visits have been greatly abbreviated for a while now as I try to squeeze more hours out of each day, and as a result the garden has suffered. Aside from the reduction of foodstuffs going onto our table and into the freezer for this winter, it inhibits my ability to fulfill my obligation to write about gardening from a novices viewpoint for Grit Magazine online. Also on Monday I produce a half-hour radio program that is aired on WGSN 90.7 FM each week. I have to do this on Monday because the completed program is burned onto a CD and mailed to the radio station. If it does not go out in Tuesday's mail, it does not get there on time for our weekly air time. It generally takes anywhere from 2½ to 4 hours to produce, package and mail this program, depending on how much editing has to be done. The late part of this afternoon was spent shooting lacquer on the A/V cabinet parts, waiting for it to dry and shooting more lacquer.
 A respirator equipped with organic mist filter cartridges is a must when spraying lacquer for laqcuer thinner is deadly stuff. Once the thinner has evaporated out of the finish, lacquer is perfectly safe, but the solvents used to make the thinner cause cancer and kill brain cells if breathed. Because of my beard, the respirator does not seal up to my face as tightly as it should and a day of shooting lacquer will leave me really loopy by day's end. I try to shoot in short sessions, and get out for fresh air breaks between sessions, while the latest coat dries. I also use a fan in a window to pull air through the room and exhaust some of the stink outdoors. This would be illegal in California, but then so would be using the lawn mower I just bought.
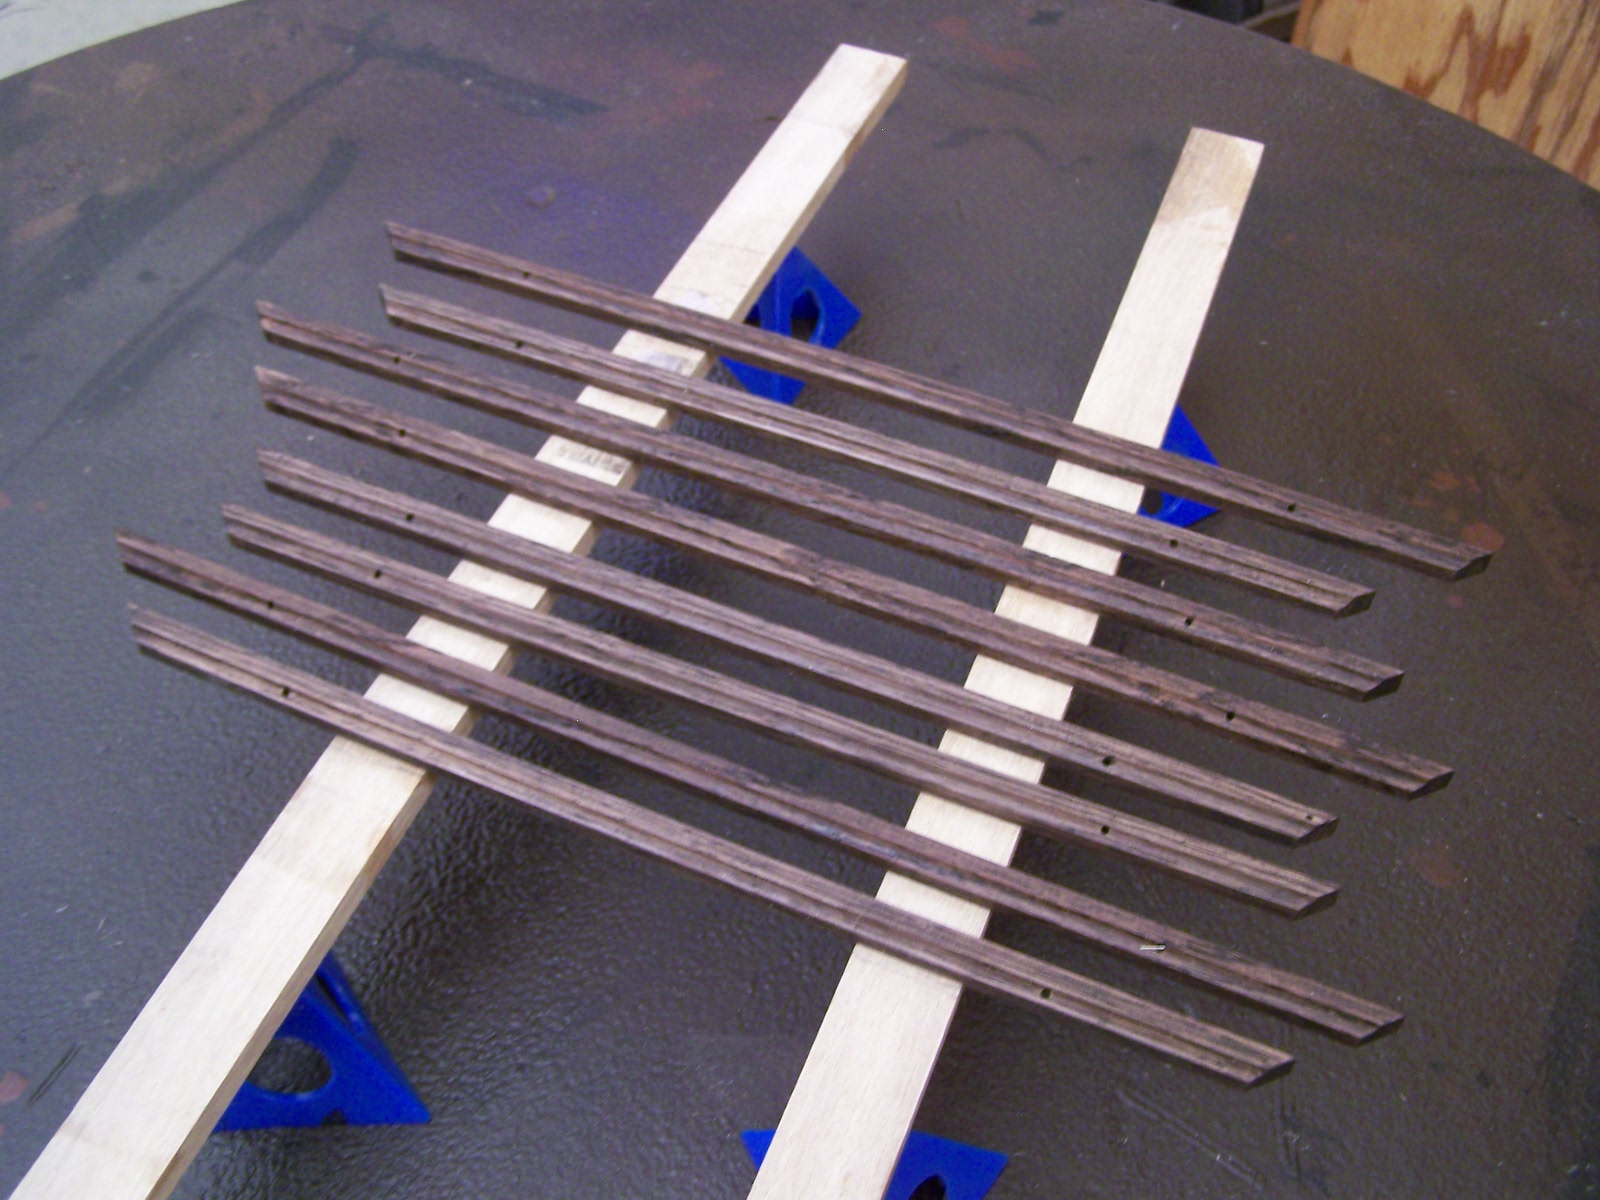 The little strips I made as glass retainers are so light weight that they would just blow around in the air stream of even my HVLP stray gun - which uses low pressure air as opposed to a compressor driven spray gun which uses high pressure air to blow the finish on. To get around this I used double-stick tape and affixed the glass retainers to a pair of runners. These make it easy to move the enire collection on and off of my spray table ans well as keeping them from blowing around. Only the decorative sides need to be stained and finished, so being stuck to the runners poses no problems in finishing the strips.
 I use a spinning finishing table to do the smaller, loose parts, but when it's time to spray the case, I break that down, fold it up and set it to the side so I can roll the cabinet - on a small whelled table - into center stage. Using the wheeled table I can spin the cabinet instead of having to walk around the cabinet dragging my spray gun hose with me. I can also work the light to optimal advantage this way. And when it's done, I just roll it back out of the way and set up the spinning table again to do the next coat on the smaller pieces.
Tuesday: Today will also be spent shooting lacquer. After everything has two full coats I'll scuff sand to smooth it and shoot two more full coats. Then it may be necessary to scuff again and shoot a final coat. Whether a 5th coat is needed or not depends largely on the weather.


